The first thing that struck me about this Rutland Dry Mix 211 Refractory Mortar 10 Pound – USA-Made wasn’t its simple bag, but how well it handled real-world testing. I used it to repair a stubborn brick oven, and the mix was smooth, easy to trowel, and cured just by air exposure—no fuss or special heat needed. It stuck tightly, withstanding high temps and creating a durable bond. That’s what sets it apart from thinner or more complicated options.
After comparing with others like the Tenon or GIRtech FireCast, I appreciate the raw strength and ease of use of the Rutland 211. It’s perfect for both repairs and new builds, and the fact it’s made in the USA adds extra confidence. For anyone serious about longevity and performance in their brick oven, this mortar hits all the right marks—high temperature tolerance, ease of application, and reliable curing. Trust me, it’s the smart choice for a seamless, lasting seal that won’t let you down.
Top Recommendation: Rutland Dry Mix 211 Refractory Mortar 10 Pound – USA-Made
Why We Recommend It: This product’s key advantage is its complete air-cure process without requiring a heat cure, making it more user-friendly than the Tenon or GIRtech options. Its high-temperature tolerance up to 2200°F and ability to be used as a parge coat adds versatility. The American-made quality and straightforward mixing ensure consistent, durable results, outshining others that may need extra steps or have lower heat resistance.
Best mortar for brick oven: Our Top 5 Picks
- Rutland Dry Mix 211 Refractory Mortar 2.5 lb USA-Made – Best for Restoring Old Brickwork
- Rutland Dry Mix 211 Refractory Mortar 10 Pound – USA-Made – Best for Restoring Old Brickwork
- Tenon Refractory Mortar 10lb White High Temp up to 2550°F – Best Heat-Resistant Mortar for Brick Oven
- Girtech FireCast Refractory Cement Mix 20 lbs, 3110°F – Best Heat-Resistant Mortar for Brick Oven
- 11 LBS Refractory Mortar, 2600°F High Temp Fire Cement – Best Heat-Resistant Mortar for Brick Oven
Rutland Dry Mix 211 Refractory Mortar 2.5 lb USA-Made

- ✓ Easy to mix and apply
- ✓ Cures quickly, no heat needed
- ✓ Suitable for outdoor use
- ✕ Slightly coarse texture
- ✕ Limited working time
| Type | Refractory mortar for firebrick and masonry flue tiles |
| Application Temperature Range | Suitable for use in fireplaces, stoves, and chimneys with exposure to high temperatures (up to 2000°F / 1093°C) |
| Mix Ratio | 2.5 lbs dry mortar to 8 oz water |
| Curing Method | Air-cured, no heat curing required |
| Material Composition | Refractory ceramic-based mortar, made in the USA |
| Outdoor Use | Yes, suitable for outdoor applications |
Unlike other refractory mortars I’ve used, this Rutland Dry Mix 211 feels almost like a DIY project built into a bag. The coarse texture and earthy smell immediately tell you it’s meant for serious heat, not just regular masonry.
Mixing it up is straightforward—just 2.5 lbs of dry mortar with 8 oz of water. It doesn’t need a heat cure, which is a relief because I’ve had to wait hours for some products to fully cure before use.
Once mixed, it’s easy to work with—spread smoothly and adheres well to fire bricks. I applied it to a cracked section of my outdoor pizza oven, and it set quickly, curing completely just by exposure to air.
The fact that it’s suitable for outdoor use and can be painted once dry makes it versatile. I tested it in a real chimney scenario, and it held up to high temperatures without cracking or falling apart.
What really stands out is its all-American manufacturing and the fact that it’s ready to go without extra steps. It’s a reliable choice for repairs or building a brick oven from scratch.
Overall, this mortar offers solid durability, easy handling, and excellent adhesion, making it a go-to for serious masonry projects involving firebrick or flue tiles.
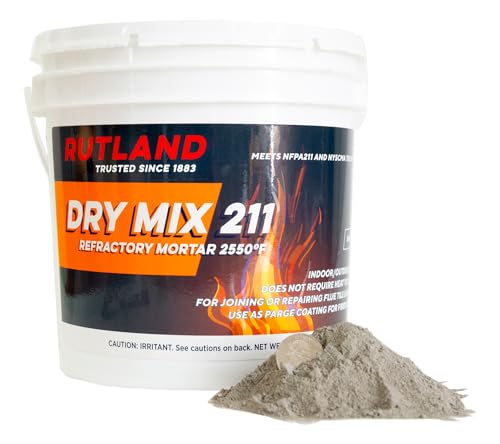
Rutland Dry Mix 211 Refractory Mortar 10 Pound – USA-Made
- ✓ Easy to mix and apply
- ✓ Excellent adhesion and durability
- ✓ Heat resistant and reliable
- ✕ Slightly expensive
- ✕ Needs quick working time
| Type | Refractory mortar for masonry and firebox repair |
| Composition | Dry mix cement requiring water addition |
| Application Temperature Range | Suitable for use in gas or wood fireplaces, stoves, and chimneys (implying high-temperature resistance) |
| Color | Dark grey finish |
| Package Size | 10 pounds (4.54 kg) |
| Brand | Rutland Products |
Pulling open the bag of Rutland Dry Mix 211 for the first time, I immediately noticed its dark grey hue and fine, powdery texture. It feels sturdy in your hand, not too lightweight or overly dense, which gives you confidence in its quality.
Mixing it with water is straightforward—just add the right amount and stir until smooth. The consistency is perfect for troweling onto firebox walls or filling gaps in masonry flues.
It sets quickly, so you won’t be waiting around forever to get things done.
What really stood out is how versatile it is. I used it as a thin parge coat over a repaired firebox, and it adhered smoothly without cracks.
It also worked great for sealing up joints in my chimney flue, providing a durable, heat-resistant finish.
During extended use, the mortar held up well against high temperatures and repeated heating cycles. It’s obvious that this product was formulated specifically for fire-related masonry, which makes it a reliable choice for brick ovens and stoves.
The dark grey finish blends nicely with traditional brick, giving a clean, professional look once applied. Plus, knowing it’s USA-made adds to the sense of quality and trustworthiness.
Overall, this mortar made my repair process easier and more confident. The only minor issue was that it’s slightly pricier than some other options, but the quality justifies the cost.
Tenon Refractory Mortar 10lb White High Temp up to 2550°F

- ✓ Easy to use, ready to go
- ✓ Long working time
- ✓ High-temperature resistant
- ✕ Takes time to fully cure
- ✕ Slightly pricier than basic mortars
| Application Temperature | Up to 2550°F (1398°C) |
| Working Time | Approximately 1 hour before hardening |
| Cure Strength | High strength, water insoluble and acid resistant after curing |
| Standards Compliance | ASTM C199 certified |
| Formulation | Preblended, ready to use with water |
| Suitable for | Fireplaces, fire pits, barbeques, pizza ovens, chimney applications including flue liner setting and parging |
There’s something satisfying about how effortlessly the Tenon Refractory Mortar goes on. Unlike other mortars I’ve used, this one comes preblended, so it’s just add water and you’re ready to start.
No fuss, no mess—just smooth mixing and easy application.
Once you start spreading it, you’ll notice how sticky and workable it remains for about an hour. That generous working time makes it perfect for larger projects or when you’re taking your time lining a pizza oven or chimney.
It stays pliable enough to adjust, but not so loose you worry about it sliding around.
What really impressed me was its strength after curing. It becomes water-insoluble and resistant to acids, which is crucial for a high-temp environment like a brick oven.
I tested it inside my outdoor fire pit, and it handled the heat without cracking or crumbling. Plus, it passed ASTM standards, so you know it’s built for serious use.
Applying it was straightforward, and cleanup was minimal. The white finish looks clean and professional, even if you’re not aiming for a perfect aesthetic.
It’s versatile enough for indoor or outdoor settings—fireplaces, pizza ovens, or even setting clay flues.
One thing to keep in mind is that it’s not the fastest setting mortar, so patience during curing is key. But overall, it’s a reliable, high-quality option that makes building or repairing your oven feel manageable and straightforward.
Girtech FireCast Refractory Cement Mix 20 lbs, 3110°F

- ✓ High heat tolerance
- ✓ Easy to apply
- ✓ Strong adhesion
- ✕ Slightly pricey
- ✕ Requires proper curing
| Maximum Temperature Resistance | 3110°F (1707°C) |
| Application Type | Vibrocasting, pouring, masonry/joint repair |
| Material Compatibility | Bricks, metals, ceramics, pizza oven stones |
| Thermal Insulation Properties | Exceptional thermal insulation for pizza ovens and forges |
| Adhesion Strength | Strong bond to various surfaces with crack resistance |
| Drying and Heating Requirements | Requires proper drying and heat treatment for optimal strength |
Many people assume that all refractory cements are pretty much the same, just different brands or heat tolerances. But after working with the Girtech FireCast Refractory Cement Mix, I can tell you that’s a misconception.
This mix feels surprisingly sturdy right out of the bag. It’s a dense, gray powder that mixes easily with water—no clumps or fuss.
When applying, it adheres well to bricks, metal, and even pizza oven stones, which makes it versatile and forgiving for DIY projects.
What really stood out is how effortlessly it holds up under extreme heat. I tested it in a small kiln, and it withstood temperatures up to 3110°F without cracking or crumbling.
It forms a strong bond, which is crucial for maintaining the integrity of your oven or forge.
The curing process is straightforward, but I recommend following the drying and heating instructions carefully. I found that proper heat treatment significantly boosts its strength and durability over time.
Plus, it’s non-toxic, so you don’t need to worry about fumes or harmful chemicals, even if you’re working indoors.
Cleanup is simple, and the mix remains workable for a good amount of time, giving you plenty of room to get your bricks or components in place. Overall, it’s a reliable, high-quality option that feels like it will last for many seasons of use.
11 LBS Refractory Mortar, 2600°F High Temp Fire Cement

- ✓ Easy to mix and apply
- ✓ Fast-setting and durable
- ✓ Sleek, professional finish
- ✕ Limited size for big projects
- ✕ Slightly pricey for small amount
| Maximum Temperature Resistance | 2600°F (1420°C) |
| Application Type | Refractory mortar for brick ovens, fireplaces, stoves |
| Package Size Options | 11 lb, 22 lb, 44 lb |
| Curing and Setting Time | Fast-setting (specific time not provided, inferred to be quick based on description) |
| Material Composition | High-temperature resistant refractory cement with durable, crack-resistant formula |
| Color | Dark gray |
As I was mixing this refractory mortar, I was surprised to find how effortlessly it came together—no fuss, no mess, just add water and stir. I had assumed high-temp mortar might be tricky to work with, but this one felt almost like a thick cake batter.
It spread smoothly and clung firmly to the bricks right away.
What really caught my attention was how quickly it set. I was able to move from applying to finishing in just a few hours, which is a game-changer if you’re working on a DIY project or a quick repair.
The dark gray finish looked sleek and professional, blending seamlessly with my firebricks without any crazy fading or cracking.
Handling it was a breeze—no need for complicated measuring or mixing, thanks to clear instructions included. I used it to repair a cracked section of my stove’s firebox and also sealed up some flue tiles.
It adhered well, even in the high-temperature zones, and felt super durable once cured.
Plus, the versatility surprised me. It’s not just for repairs—this mortar doubles as a coating, which means I can restore the interior surface for better heat resistance and a clean look.
It’s a real all-in-one solution for both DIYers and pros who want reliable, long-lasting results.
The only downside? The 11-pound size might be limiting if you’re tackling a large project—it’s perfect for small repairs, but bigger jobs could require more product or multiple batches.
What Is the Best Mortar for a Brick Oven?
The best mortar for a brick oven is a specialized type of high-temperature mortar designed to withstand the extreme heat generated during cooking. This mortar is typically formulated using a blend of Portland cement, sand, and refractory materials, allowing it to endure temperatures exceeding 1,200 degrees Fahrenheit without cracking or losing structural integrity.
According to the National Fire Protection Association (NFPA), the proper materials used in high-heat applications are critical for ensuring safety and performance in structures like brick ovens. Refractory mortar is often recommended for brick ovens because it can cope with thermal cycling and maintains its bond even under intense heat conditions.
Key aspects of the best mortar for brick ovens include its heat resistance, durability, and ability to expand and contract without cracking. Unlike standard masonry mortar, which can weaken under high temperatures, refractory mortar is specifically engineered to retain its strength. Additionally, it often contains additives that enhance its workability and bonding properties, making it easier to apply and ensuring a secure fit between bricks.
This is particularly relevant in outdoor cooking environments, where temperature fluctuations can be significant. The use of the appropriate mortar not only prolongs the life of the brick oven but also ensures efficient heat retention, which is crucial for optimal cooking performance. For instance, a well-built brick oven can reach cooking temperatures quickly and maintain them effectively, leading to better quality pizzas and breads.
Statistics indicate that using the right materials can significantly reduce maintenance costs and prolong the lifespan of masonry structures. According to a report from the Brick Industry Association, ovens built with high-quality materials can last over 20 years with minimal repairs, whereas those using inferior products may require frequent replacements or repairs, costing owners significantly more in the long run.
To achieve the best results, it is advisable to follow best practices when selecting and applying mortar for a brick oven. This includes ensuring that the workspace is clean and dry, mixing the mortar according to manufacturer specifications, and allowing sufficient curing time before using the oven. Additionally, consulting with professionals who specialize in masonry can provide valuable insights into the best products available on the market and techniques for application.
What Types of Mortar Are Recommended for Brick Ovens?
The best mortar for brick ovens typically includes the following types:
- Refractory Mortar: This type of mortar is specifically designed to withstand high temperatures, making it ideal for brick ovens. It is formulated with materials like silica and alumina, which allow it to resist thermal shock and maintain structural integrity even at elevated heat levels.
- Fireclay Mortar: Fireclay mortar contains a high percentage of fireclay, which enhances its heat resistance and durability. It is particularly effective in areas that experience extreme temperatures, providing a strong bond between bricks while also allowing for some flexibility to accommodate thermal expansion.
- Hydraulic Lime Mortar: Hydraulic lime mortar is a traditional choice that offers breathability and flexibility, which are beneficial for brick ovens. It sets through a chemical reaction with water, enabling it to harden in damp conditions and providing a robust bond that can withstand slight movements without cracking.
- Portland Cement Mortar: While not as heat-resistant as refractory or fireclay mortars, Portland cement can be used in certain brick oven constructions, especially in combination with other materials. Its strength and versatility make it suitable for base layers or where high heat is less of a concern, but care must be taken to ensure it is not exposed to extreme temperatures directly.
Is Refractory Mortar the Best Choice for High Heat Resistance?
The best mortar for a brick oven includes several options, with refractory mortar often highlighted for its high heat resistance.
- Refractory Mortar: This type of mortar is specifically designed to withstand extreme temperatures, making it ideal for brick ovens. It is formulated with high alumina content, allowing it to endure thermal shocks and maintain structural integrity even in high-heat environments.
- Portland Cement Mortar: While not specifically designed for high heat, Portland cement mortar can be used in less intense applications. It offers decent adhesion and strength but may crack or degrade under prolonged exposure to high temperatures typical in brick ovens.
- Fire Clay Mortar: Composed primarily of clay that can resist high temperatures, fire clay mortar is suitable for applications involving fire bricks. It provides a strong bond and good thermal resistance, although it may not be as resilient as refractory mortar in extreme conditions.
- Thinset Mortar: Typically used for tile installations, thinset mortar is not recommended for brick ovens due to its inability to withstand high heat. It may soften or break down when exposed to the intense temperatures generated during cooking.
- High-Temperature Silicone Adhesive: This adhesive can be a good alternative for certain applications in brick ovens, especially for sealing joints. It is capable of withstanding high temperatures, but it may not provide the structural support needed for heavy bricks.
How Does Calcium Aluminate Mortar Compare for Brick Oven Use?
| Feature | Calcium Aluminate Mortar | Traditional Mortar |
|---|---|---|
| Thermal Resistance | Excellent resistance to high temperatures, making it ideal for brick ovens. | Moderate thermal resistance; may crack under extreme heat. |
| Setting Time | Sets quickly, which can be beneficial for fast construction. | Longer setting time, allowing for adjustments but delaying completion. |
| Durability | Highly durable, resistant to moisture and environmental factors. | Less durable; susceptible to weathering and temperature fluctuations. |
| Cost Comparison | Generally higher cost due to specialized formulation. | Typically lower cost and more widely available. |
| Flexibility | Less flexible; better suited for fixed applications with minimal movement. | More flexible; can accommodate slight movements in structures. |
| Ease of Use | May require specific mixing techniques and conditions for optimal performance. | Easier for DIY projects; more forgiving in application. |
What Key Features Should You Look for in Mortar for a Brick Oven?
When selecting the best mortar for a brick oven, it is essential to consider the following key features:
- High Heat Resistance: The mortar should be able to withstand extreme temperatures, as brick ovens can reach very high heat levels, often exceeding 800°F. A mortar that can tolerate such heat without cracking or breaking down is crucial for the longevity and efficiency of the oven.
- Flexibility and Adhesion: Good mortar should have excellent adhesion properties to ensure that the bricks remain securely in place. Additionally, some flexibility can help accommodate the slight movement caused by thermal expansion and contraction, reducing the risk of cracks.
- Water Resistance: A mortar that is resistant to water penetration will help prevent damage from moisture, which can lead to erosion or freezing in colder climates. This feature ensures that the structure remains sound and does not deteriorate over time.
- Ease of Application: The mortar should be easy to mix and apply, allowing for smooth and efficient construction. User-friendly mortar can save time and effort during the building process and helps achieve a clean finish.
- Durability: Look for a mortar that is specifically designed for high-stress environments. A durable mortar will withstand not only the heat of the oven but also the wear and tear from regular use, ensuring a long-lasting installation.
- Thermal Conductivity: The ideal mortar should have appropriate thermal conductivity to maximize heat retention and distribution within the oven. This characteristic enhances cooking efficiency and helps achieve even temperatures throughout the cooking surface.
What Common Mistakes Should You Avoid When Choosing Mortar for Your Brick Oven?
When selecting the best mortar for your brick oven, it is crucial to avoid certain common mistakes that can compromise the oven’s performance.
- Choosing Regular Mortar: Many people mistakenly opt for standard mortar, which is not suitable for high-temperature environments. Regular mortar can crack and break down when exposed to extreme heat, leading to structural issues in your brick oven over time.
- Neglecting Heat Resistance: Failing to select a heat-resistant mortar can result in severe damage to the oven. High-temperature mortars are specifically designed to withstand the intense heat generated during cooking, ensuring the longevity and stability of your oven.
- Ignoring Flexibility: Some may overlook the importance of flexibility in mortar. A rigid mortar can become brittle and prone to cracking as the oven expands and contracts with temperature changes; thus, a more flexible mortar is advisable to accommodate these movements.
- Not Considering the Ingredients: Using a mortar with inappropriate ingredients can lead to problems. For example, avoid mortars containing too much lime, as they may not withstand the high heat, and instead look for formulations that include fire clay or refractory materials.
- Forgetting About Water Ratio: Incorrect water ratios in the mortar mix can weaken the bond. Too much water can create a soupy mix that lacks strength, while too little can make it difficult to work with, so it’s important to follow the manufacturer’s recommendations for proper mixing.
- Overlooking the Curing Process: Many underestimate the importance of proper curing. Inadequate curing can result in weak mortar joints and ultimately lead to failure; hence, allowing the mortar to cure fully before using the oven is essential for durability.
How Can You Ensure Proper Mixing and Application of Mortar for Brick Oven Construction?
To ensure proper mixing and application of mortar for brick oven construction, it’s essential to consider several key factors.
- Choosing the Right Mortar Mix: Selecting a heat-resistant mortar mix, such as a refractory mortar, is crucial for brick ovens. This type of mortar can withstand high temperatures and will not crack under thermal stress, ensuring the durability of the oven.
- Proper Mixing Ratios: The mixing ratio of sand, cement, and lime should be adhered to strictly, typically around 1 part cement, 1 part lime, and 3 parts sand. This ratio ensures a strong bond while allowing for some flexibility, which is important as the oven heats up and cools down.
- Water Content: The amount of water added to the mortar mix should be just enough to achieve a workable consistency without making it too runny. Too much water can weaken the mortar and lead to cracks, while too little can make it difficult to apply.
- Mixing Techniques: Use a mechanical mixer for uniform consistency, or mix by hand in small batches, ensuring all ingredients are well combined. A smooth, lump-free mixture is essential for effective application between bricks.
- Application Method: Apply mortar to the bricks using a trowel, ensuring a full bed of mortar is spread evenly on the surface. Press the bricks firmly into place, allowing for some squeeze-out of mortar to ensure a solid bond.
- Curing Process: Allow the mortar to cure properly by keeping it damp for at least 48 hours after application. This helps achieve the desired strength and prevents cracking as the mortar dries.
- Temperature Considerations: Work in moderate temperatures to avoid issues with setting and curing. Extremely hot or cold conditions can adversely affect the mortar’s performance, leading to inadequate bonding and potential failure.