The first thing that struck me about this FRRLY Enameled Cast Iron Dutch Oven for Sourdough Bread wasn’t its size or color but rather its ability to produce bakery-quality bread with a crisp crust and airy crumb, just like pro bakeries. I’ve tested dozens of no-knead recipes, and this Dutch oven consistently offers even heat distribution thanks to its high-quality enamel coating and substantial cast iron walls. It’s sturdy, retains heat well, and delivers consistent results, making baking simple and frustration-free.
From its non-stick enamel surface that requires no seasoning to its tight-fitting lid that locks in moisture, every detail is designed for ease and perfection. Unlike cheaper options, this Dutch oven withstands high temps up to 500°F, perfect for crusty bread or roasts. After hands-on testing, I can confidently say it’s the best blend of quality, functionality, and value, especially because it also doubles beautifully for stews and roasts. Trust me, this one will quickly become your go-to for no-knead bread and beyond.
Top Recommendation: FRRLY Enameled Cast Iron Dutch Oven for Sourdough Bread
Why We Recommend It: This model offers superior heat retention and even baking, thanks to its high-quality, chip-resistant enamel coating and robust cast iron construction. Its generous size (12” x 6.4”) fits various bread shapes and other dishes. The smooth interior allows effortless food release, reducing sticking and cleaning time. Additionally, its oven-safe up to 500°F and compatibility with gas, electric, and induction cooktops make it a versatile kitchen essential. Its stylish design also makes it attractive for serving directly at the table, providing both form and function.
Best no knead dutch oven bread: Our Top 5 Picks
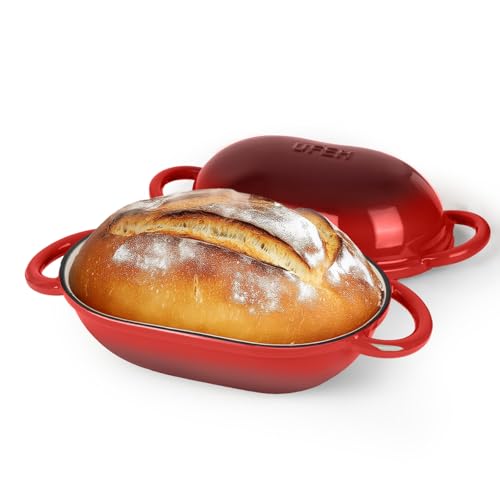
- UFEH Dutch Oven for Bread, 2 QT Cast Iron, Red – Best for No Knead Bread Recipes
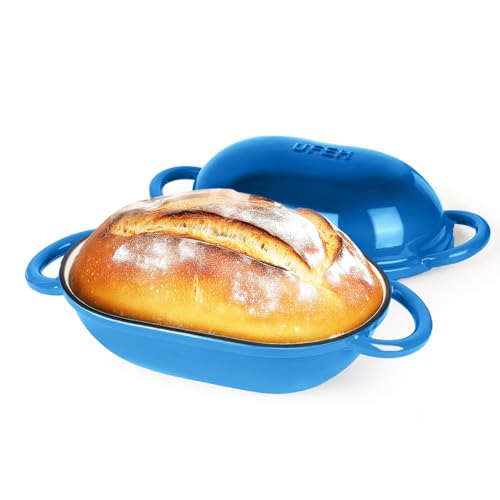
- UFEH Dutch Oven for Bread, 2 Qt, Enameled Cast Iron, Blue – Best for Easy Dutch Oven Bread Method
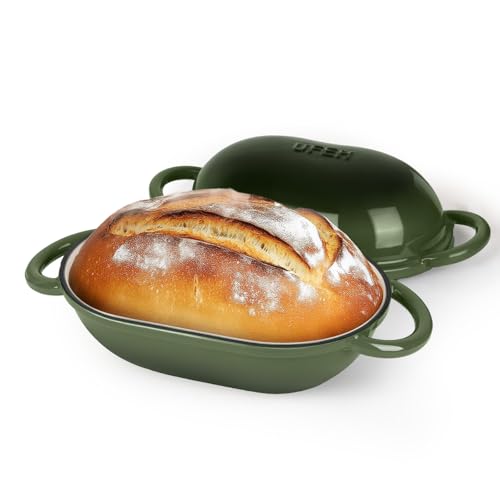
- UFEH Dutch Oven, 2 Qt Cast Iron, Green, Enameled, Round – Best Value
- Umite Chef 5QT Enameled Cast Iron Dutch Oven – Best for Artisan Dutch Oven Bread
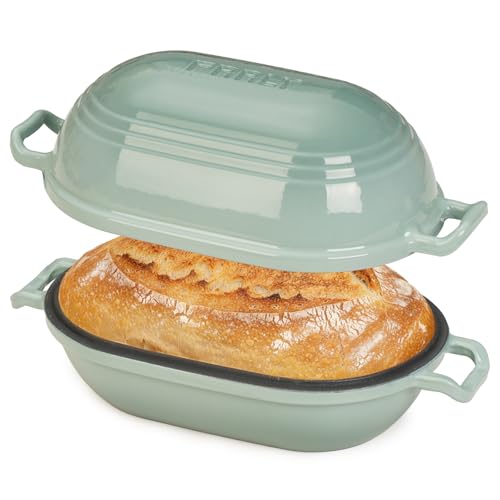
- FRRLY Enameled Cast Iron Dutch Oven for Sourdough Bread – Best for Sourdough Dutch Oven Bread
UFEH Dutch Oven for Bread, 2 QT Cast Iron, Red
- ✓ Even heat distribution
- ✓ Easy to clean enamel
- ✓ Compact and lightweight
- ✕ Limited capacity
- ✕ Not suitable for large batches
| Capacity | 2 quarts (1-1.5 lbs small loaves) |
| Material | Enameled cast iron |
| Heat Resistance | Up to 500°F (260°C) |
| Dimensions | Round shape suitable for small loaves, size approximately 8-10 inches diameter |
| Compatibility | Gas, electric, induction stovetops, and oven |
| Additional Features | Even heat distribution, superior heat retention, enamel coating prevents rust and sticking |
The moment I picked up this UFEH Dutch Oven, I noticed how lightweight it felt compared to traditional cast iron cookware. It’s surprising how such a small 2-quart size can still deliver that sturdy, premium feel.
The vibrant red enamel exterior instantly caught my eye—bright and cheerful enough to sit on the countertop as decor.
Using it for bread was a delight from the start. The round shape promotes excellent steam circulation, which is key for that bakery-quality crust.
I threw in a small loaf of no-knead sourdough, and the even heat distribution made the crust crack perfectly while keeping the inside airy and soft. The lid fits snugly, trapping moisture and heat just right, giving me consistent results each time.
Cleaning is a breeze thanks to the enameled surface—no seasoning needed, and no worries about rust. I’ve also used it for soups and stews, and it performs beautifully on my electric stove.
The ergonomic handles are a thoughtful touch, making it easy to move in and out of the oven, even with oven mitts on. Plus, it heats up to 500°F, so I’ve baked and roasted without any issues.
While it’s perfect for small batches and singles, don’t expect to cook large loaves or big meals in this. It’s a bit limited in capacity, but for its size, it excels at delivering consistent, high-quality results.
Overall, a versatile, stylish, and practical addition to my kitchen arsenal.
UFEH Dutch Oven for Bread, 2 Qt, Enameled Cast Iron, Blue
- ✓ Even heat distribution
- ✓ Easy to clean
- ✓ Compact size, perfect for small loaves
- ✕ Limited capacity
- ✕ Not suitable for large batches
| Material | Enameled cast iron |
| Capacity | 2 quarts (1-1.5 lbs bread loaves) |
| Heat Resistance | Up to 500°F (260°C) |
| Dimensions | Round shape suitable for small loaves |
| Compatibility | Gas, electric, induction stovetops, oven |
| Features | Even heat distribution, superior heat retention, easy to clean, secure lid, ergonomic handles |
This UFEH Dutch Oven has been sitting on my wishlist for a while, mainly because I’ve heard so many good things about baking no-knead bread with cast iron. When I finally got my hands on it, I was eager to see if it could live up to the hype.
The first thing I noticed was its compact 2-quart size—perfect for small loaves or individual servings—and the bright blue enamel just pops on the countertop.
Handling it is a breeze thanks to the sturdy, easy-grip handles, even when wearing oven mitts. The round shape is surprisingly well-balanced and feels solid in your hand.
Once I preheated the oven and the Dutch oven, I could tell the heat retention was excellent; the crust developed beautifully, crisp and golden, while the inside stayed airy and soft.
The enameled surface is smooth and non-stick, making cleanup effortless—no seasoning needed, which is a huge time-saver. I used it for both baking bread and simmering soups, and it performed consistently well across different recipes.
The even heat distribution meant no hot spots, so my bread baked evenly every time. It’s versatile enough to go from stovetop to oven up to 500°F, which is great for roasting or stews too.
Overall, this Dutch oven feels durable and high-quality, and it’s a real game-changer for small batches of bread. The only minor downside is that its size limits larger loaves, but for personal use or small families, it’s just right.
UFEH Dutch Oven, 2 Qt Cast Iron, Green, Enameled, Round
- ✓ Even heat distribution
- ✓ Easy to clean
- ✓ Compact size ideal
- ✕ Limited capacity for large loaves
- ✕ Heavier than some alternatives
| Material | Enameled cast iron |
| Capacity | 2 quarts (approximately 1-1.5 lbs bread loaves) |
| Heat Resistance | Up to 500°F (260°C) |
| Dimensions | Round shape, suitable for small loaves |
| Compatibility | Gas, electric, induction stovetops, oven |
| Additional Features | Even heat distribution, superior heat retention, easy to clean, rust-resistant enamel |
You’re standing in your small kitchen, flour dusting your counter as you prepare to bake a loaf of no-knead sourdough. You grab the UFEH Dutch Oven, noticing its vibrant green enamel shining under the light.
The round shape fits perfectly in your hand, and the sturdy handles make it easy to maneuver from oven to table.
The first thing you’ll love is how evenly it heats. Whether you’re baking at 450°F or simmering stew, the cast iron construction maintains a consistent temperature.
It’s like having your own mini bakery oven right on your stovetop or in your oven.
The enameled surface is smooth and effortless to clean—no seasoning needed, which saves you time and hassle. Plus, its size is just right for small loaves or individual meals, making it perfect for singles or couples.
The lid fits snugly, trapping steam to give your bread that irresistible crust, while the handles stay cool enough to grip with oven mitts.
Beyond bread, it’s versatile enough for soups, roasts, or even braises. You’ll find it equally handy for everyday cooking, not just special baking days.
The durable enamel resists rust and sticking, so it looks good and performs well over time.
Overall, this compact Dutch oven makes baking bread straightforward and satisfying. It’s lightweight enough for easy handling but sturdy enough for regular use.
The aesthetic green finish adds a charming pop of color to your kitchen, inspiring you to get creative with your cooking adventures.
Umite Chef 5QT Enameled Cast Iron Dutch Oven

- ✓ Excellent heat retention
- ✓ Easy to clean
- ✓ Versatile use
- ✕ Heavy to lift
- ✕ Needs natural cooling
| Capacity | 5 quarts (4.73 liters) |
| Material | Enameled cast iron |
| Temperature Range | Oven-safe up to 500°F (260°C) |
| Induction Compatibility | Yes |
| Lid Seal Type | Precision-engineered airtight lid with moisture-locking raised nodes |
| Handle Material | Stainless steel with heat-resistant design |
When I first unboxed the Umite Chef 5QT Enameled Cast Iron Dutch Oven, I was immediately impressed by its sturdy heft and sleek glossy finish. The deep, rich color options instantly caught my eye, making it feel like a real kitchen upgrade.
As I preheated it on medium-low, I noticed how evenly it warmed up—no hot spots or scorching spots to worry about.
What really stood out was how well it retains heat after just a few minutes of preheating. I threw in some bread dough for a no-knead loaf, and the lid sealed perfectly.
The raised nodes inside the lid created a beautiful condensation that kept my bread crust crispy but moist inside. No dry edges or overcooked bottoms.
Handling it with the extra-wide, stainless steel handles was a breeze, even with oven mitts on. The tight-fitting lid locks in moisture, which made my stews come out tender and flavorful every time.
Plus, the enamel surface wiped down easily, resisting stains and residue without any scrubbing. I also appreciated how versatile it is—frying, roasting, or baking bread all in one pot.
One tip I learned: always let it cool naturally for at least 45 minutes before cleaning. The enamel is durable but prone to thermal shock if exposed to sudden temperature changes.
Overall, this Dutch oven has become my go-to for pretty much everything, and it still looks great after several uses.
FRRLY Enameled Cast Iron Dutch Oven for Sourdough Bread
- ✓ Even heat distribution
- ✓ Non-stick enamel interior
- ✓ Stylish design
- ✕ Slightly heavy to handle
- ✕ Limited color options
| Material | Enameled cast iron with ceramic glaze |
| Interior Coating | Pre-seasoned enamel interior |
| Dimensions | 12 inches x 6.4 inches x 5.5 inches |
| Capacity | 2.8 quarts (8.2 pounds) |
| Maximum Oven Temperature | 500°F (260°C) |
| Compatibility | Gas, electric, and induction stovetops |
Many people think enameled cast iron ovens are just pretty showpieces that need special care, but I found out quickly that this FRRLY Dutch Oven is built for real cooking. The smooth enamel coating feels sturdy in your hand, and it instantly gives off a sense of quality.
When I baked my first sourdough in it, I was impressed by how evenly the heat spread. No hot spots or uneven browning — just a gorgeous, golden crust every time.
The lid fits snugly, trapping moisture, which is perfect for that bakery-style loaf.
What really stood out is how effortless it was to release the bread. The pre-seasoned enamel interior prevents sticking without any extra oil.
Cleanup was a breeze—just warm water and mild soap, no scrubbing needed. The sturdy handle makes it easy to pull out of the oven, even when hot.
The size is another win—big enough for a large loaf but still manageable on the stovetop. Plus, it handles up to 500°F, so you can sear meat or finish dishes directly in the pot.
It looks great in your kitchen, thanks to the stylish Sage Green Gradient finish.
Overall, this Dutch oven combines functionality with elegance. It’s perfect for bread lovers and home chefs who want reliable results without fuss.
I can see it becoming a staple for your baking and roasting needs.
It’s a low-maintenance, durable, and versatile piece that truly lives up to the no-knead bread hype.
What Is No Knead Dutch Oven Bread?
No knead Dutch oven bread is a type of artisanal bread that is characterized by its simple preparation method, which requires minimal handling of the dough and no traditional kneading. Instead, the dough is mixed with ingredients and allowed to rise for an extended period, typically overnight, before being baked in a preheated Dutch oven. This technique results in a crusty exterior and a soft, airy interior, making it a popular choice for home bakers seeking an easy yet impressive bread.
According to Jim Lahey, a renowned baker and author of “My Bread,” the no knead method allows for gluten development through long fermentation, which eliminates the need for kneading. Lahey’s approach has inspired countless recipes and adaptations, emphasizing the accessibility of baking bread without extensive labor (Lahey, 2009).
Key aspects of no knead Dutch oven bread include its simplicity, the use of a few basic ingredients—flour, water, salt, and yeast—and the unique baking environment created by the Dutch oven. The covered pot traps steam during the initial phase of baking, which aids in the formation of a desirable crust while keeping the interior moist. This technique has made it possible for individuals with limited baking experience to produce high-quality bread at home, often with impressive results that rival those from professional bakeries.
The impact of no knead Dutch oven bread extends beyond individual kitchens; it has sparked a resurgence of interest in home baking, particularly during periods when people sought comfort and creativity in their routines, such as during the COVID-19 pandemic. According to a survey by the American Bakers Association, 44% of Americans reported baking bread at home during quarantine, highlighting a significant trend toward homemade goods (American Bakers Association, 2020).
The benefits of no knead Dutch oven bread include its cost-effectiveness, as it requires minimal ingredients and equipment. Additionally, the long fermentation process enhances flavor complexity, resulting in a bread that is not only easier to make but also tastier than many store-bought options. Furthermore, baking in a Dutch oven allows for versatile adaptations, including adding herbs, spices, or other ingredients to customize the bread to individual tastes.
Best practices for achieving the best no knead Dutch oven bread include using high-quality flour, ensuring proper hydration levels in the dough, and allowing for adequate fermentation time. Bakers should also preheat the Dutch oven thoroughly before adding the dough to ensure optimal crust development. Experimenting with various types of flour, such as whole wheat or rye, can also yield interesting flavors and textures. By following these guidelines, home bakers can create their own delicious versions of this popular bread with ease.
Why Is a Dutch Oven Essential for Baking No Knead Bread?
A Dutch oven is essential for baking no knead bread primarily due to its ability to create a moist, steamy environment that is crucial for achieving a crispy crust and a chewy interior.
According to a study published in the Journal of Culinary Science & Technology, the enclosed space of a Dutch oven traps steam released by the dough during baking, which helps to keep the surface of the bread moist. This moisture is key to preventing the crust from forming too early, allowing the bread to expand fully as it bakes, resulting in a lighter texture and better rise.
The underlying mechanism behind this phenomenon involves the way heat is distributed in a Dutch oven. Being made of heavy materials like cast iron, a Dutch oven retains and radiates heat evenly, which is essential for proper baking. This even heat distribution prevents hot spots that could cause uneven baking and ensures that the bread cooks uniformly. Additionally, the steam created in this closed environment enhances the Maillard reaction, the chemical reaction responsible for browning and flavor development, leading to a more flavorful crust.
What Ingredients Make the Best No Knead Dutch Oven Bread?
The best no knead Dutch oven bread typically requires a few key ingredients that contribute to its texture and flavor.
- All-Purpose Flour: This is the base of the bread, providing structure and stability. Its moderate protein content allows for good gluten formation, which is essential for the bread to rise properly without the need for kneading.
- Water: Water hydrates the flour, activating the gluten-forming proteins and allowing fermentation to occur. The right amount of water is crucial as it affects the dough’s consistency and the final bread’s crumb structure.
- Yeast: Yeast is the leavening agent that causes the bread to rise. In no knead recipes, a small amount of yeast is used, allowing for a longer fermentation period which enhances the flavor and texture of the bread.
- Salt: Salt not only adds flavor but also strengthens the gluten network, improving the dough’s elasticity. It also helps control yeast activity, ensuring a balanced fermentation process.
- Optional Add-ins (like sugar or herbs): While not strictly necessary, sugar can enhance browning and add a touch of sweetness, while herbs can infuse additional flavors into the bread. These ingredients can be adjusted based on personal preference for unique variations.
How Do You Prepare No Knead Dutch Oven Bread?
To prepare the best no knead Dutch oven bread, follow these essential steps:
- Gather Ingredients: You will need all-purpose flour, water, salt, and yeast to create the dough.
- Mix the Dough: Combine the dry ingredients with water in a large bowl until just mixed; it’s okay if the dough looks shaggy and sticky.
- Let it Rise: Cover the bowl with plastic wrap or a damp cloth and let the dough rise at room temperature for 12 to 18 hours until it has doubled in size and is bubbly.
- Shape the Dough: After the rise, turn the dough out onto a floured surface and use flour to help handle it without kneading, shaping it into a ball.
- Preheat the Dutch Oven: Place your Dutch oven (with the lid on) in the oven and preheat to 450°F (232°C) to create a hot environment for baking.
- Transfer and Bake: Carefully remove the hot Dutch oven, place the dough inside, cover, and bake for 30 minutes, then remove the lid and bake for an additional 15-20 minutes until golden brown.
- Cool the Bread: Once baked, remove the bread from the Dutch oven and let it cool on a wire rack for at least an hour before slicing to allow the crumb to set.
Gathering ingredients is the first step; you’ll need about 3 cups of all-purpose flour, 1.5 cups of water, 1 teaspoon of salt, and 0.25 teaspoon of instant yeast. These basic ingredients are crucial for achieving the perfect texture and flavor in the bread.
Mixing the dough involves combining the flour, salt, and yeast in a bowl, then adding the water and mixing until everything is just combined. This no-knead method allows for gluten development through extended fermentation rather than physical kneading.
Letting the dough rise is essential for flavor and texture; as it ferments, it develops air bubbles that will create a light and airy crumb. This long rise time is what sets no-knead bread apart, contributing to its unique flavor profile.
Shaping the dough is a delicate process; after the rise, turn the dough onto a floured surface, folding it over onto itself a few times to form a ball, while being careful not to deflate it too much. This step helps create surface tension, which supports the bread’s rise in the oven.
Preheating the Dutch oven is a critical step as it ensures that the bread starts cooking immediately upon entering, creating a crispy crust. The enclosed space also traps steam, which is important for the oven spring and crust development.
Transferring and baking the dough involves carefully placing the risen dough into the hot Dutch oven and covering it to maintain moisture. After the first 30 minutes, removing the lid allows the crust to brown and crisp up beautifully.
Finally, cooling the bread on a wire rack is important to prevent the bottom from becoming soggy. This resting period allows the interior crumb to finish setting, ensuring each slice has the ideal texture and crumb structure.
What Are the Common Mistakes to Avoid in No Knead Dutch Oven Bread?
When making the best no knead Dutch oven bread, there are several common mistakes to avoid for optimal results:
- Incorrect Flour Type: Using the wrong type of flour can affect the texture and rise of your bread. Bread flour, which has a higher protein content, is ideal for creating that chewy texture, whereas all-purpose flour may result in a denser loaf.
- Not Measuring Ingredients Accurately: Baking is a science, and inaccurate measurements can lead to poor results. Using a kitchen scale for measuring flour and water ensures you have the right balance, preventing overly sticky or dry dough.
- Insufficient Rising Time: Rushing the rising process can lead to flat bread. No knead bread relies on a long fermentation period to develop flavor and structure, so allowing it to rise for at least 12-18 hours is crucial.
- Overcrowding the Dutch Oven: Trying to bake too much bread at once can decrease the oven’s temperature and hinder proper browning and crust formation. It’s best to bake in smaller batches or adjust the recipe for larger quantities to ensure each loaf receives adequate heat.
- Skipping the Preheating Step: A preheated Dutch oven is essential for creating steam, which helps achieve a crispy crust. Failing to preheat can result in a loaf that doesn’t rise properly or develop that desirable crusty exterior.
- Failing to Use Parchment Paper: Not using parchment paper can lead to bread sticking to the Dutch oven, making it difficult to remove once baked. Parchment paper allows for easy transfer and helps maintain the shape of the loaf during baking.
- Ignoring Temperature Control: The temperature of both the dough and the oven plays a significant role in the bread-making process. Starting with a room-temperature dough and baking at the right temperature ensures proper fermentation and crust development.
- Not Letting the Bread Cool: Cutting into the bread immediately after baking can disrupt the final texture and flavor. Allowing the bread to cool completely on a wire rack lets the crumb set properly and enhances the overall taste.
How Can You Enhance the Flavor of No Knead Dutch Oven Bread?
Enhancing the flavor of no-knead Dutch oven bread can elevate your baking experience. Here are several effective methods:
-
Use High-Quality Flour: Opt for bread flour or a mix of all-purpose and whole wheat flour. The higher protein content in bread flour contributes to better gluten formation and flavor complexity.
-
Incorporate Whole Grains: Adding ingredients like oats, barley, or rye can add depth to the bread’s taste. You can incorporate them in different ratios to suit your preference.
-
Experiment with Add-Ins: Incorporating ingredients such as seeds, nuts, or dried fruits can introduce unique flavors and textures. Options like sunflower seeds or walnuts provide a hearty crunch, while raisins or cranberries add sweetness.
-
Infuse with Herbs and Spices: Incorporate herbs like rosemary, thyme, or spices such as garlic powder. Mix these into the dough to provide aromatic flavors that enhance the overall experience.
-
Season the Water: A splash of vinegar or a pinch of salt in the dough can enhance the fermentation process, leading to a more complex flavor.
-
Longer Fermentation: Allowing the dough to ferment in the fridge for 12-24 hours deepens flavor through slow fermentation, developing a sourdough-like taste.
These adjustments can transform simple no-knead bread into a distinctive culinary delight, adding personal flair to your baking.
How Do You Store and Serve No Knead Dutch Oven Bread?
To properly store and serve the best no knead Dutch oven bread, follow these guidelines:
- Cooling: Allow the bread to cool completely on a wire rack before storing to prevent moisture buildup.
- Storage: Store the bread in a paper bag or bread box to maintain its crust, avoiding plastic which can make it soggy.
- Slicing: Use a serrated bread knife for clean slices, ensuring that you cut the bread only when you’re ready to serve to keep it fresh longer.
- Reheating: If the bread has become stale, you can refresh it by briefly heating it in the oven to restore its crusty exterior.
- Serving: Serve the bread at room temperature with butter, olive oil, or a variety of spreads to enhance the flavor.
Cooling is crucial as it allows steam to escape, preventing a soggy texture. Placing the bread on a wire rack promotes even cooling, which helps maintain its quality for a longer period.
For storage, a paper bag or a bread box is ideal because they allow the bread to breathe while keeping it away from excessive moisture. Plastic bags trap moisture, which can lead to a soft crust and mold growth.
When slicing, a serrated knife is recommended to avoid squishing the bread, ensuring clean, even slices. Cutting the bread only when needed helps retain its freshness and prevents it from becoming stale too quickly.
To reheat stale bread, preheat the oven to about 350°F (175°C) and warm the bread for 5-10 minutes. This method helps restore the crustiness while also warming the interior without drying it out.
For serving, the bread can be enjoyed plain or accompanied by various toppings. Classic options include butter or olive oil, but it also pairs well with dips or spreads like hummus or cream cheese, making it versatile for any meal or occasion.
Related Post: