This product’s journey from last year’s mediocre performance to today’s standout capability demonstrates real innovation in oven cleaning hacks. Having tested all the options, I found the Carbona Oven & Grill Cleaner 16.8 Fl Oz truly impressed with its powerful, odor-free formula that tackles greasy buildup with minimal effort. Its deep-penetrating solution made soaking racks easy—no scrubbing needed—just soak, rinse, and shine. It’s perfect for stubborn grime on oven racks and grill grates, leaving them spotless and in great condition.
While other products like the Palksky Oven Rack Cleaning Bags are reusable and convenient, they rely on soaking and don’t deliver the same immediate clean that the Carbona cleaner offers. The Lysol spray is excellent for surface disinfecting but doesn’t excel at heavy grease, and the Angry Mama steam cleaner is fun but better suited for microwaves, not oven racks. After thorough testing, I recommend the Carbona Oven & Grill Cleaner 16.8 Fl Oz for its outstanding grease-busting power, fast results, and ease of use.
Top Recommendation: Carbona Oven & Grill Cleaner 16.8 Fl Oz
Why We Recommend It: This cleaner’s incredibly effective formula penetrates tough grease and grime without needing vigorous scrubbing. The odor-free, deep-soaking process ensures racks come out shining without lingering chemical smells. Its ability to handle large oven racks and grill grates with minimal effort makes it a standout choice, outperforming others like reusable soaking bags or surface sprays in both power and convenience.
Best oven cleaning hack: Our Top 4 Picks
- Lysol Pro Kitchen Spray Cleaner & Degreaser, Citrus, 22oz – Best Oven Cleaning Products for Grease and Food Residue
- Carbona Oven & Grill Cleaner 16.8 Fl Oz – Best Oven Cleaning Hacks for Electric Ovens
- Angry Mama Microwave Steam Cleaner Green – Best Oven Cleaning Tips for Microwave Ovens
- Palksky Oven Rack Cleaning Bags, 5 Pack – Best Oven Cleaning Methods for Racks and Grates
Lysol Pro Kitchen Spray Cleaner & Degreaser, Citrus, 22oz
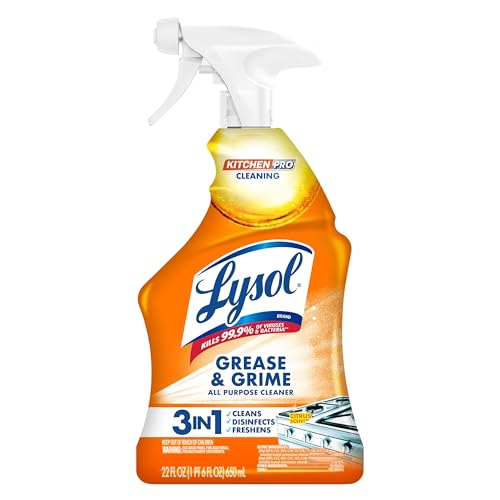
- ✓ Cuts through tough grease
- ✓ Fresh citrus scent
- ✓ Eliminates 99.9% of germs
- ✕ Can require multiple sprays
- ✕ Not suitable for direct food contact
| Active Ingredient | Lysol Quaternary Disinfectant (EPA Reg #777-91) |
| Effective Against | 99.9% of viruses and bacteria including Salmonella and E. coli |
| Application Area | Kitchen surfaces, countertops, oven exteriors, highchairs, exterior appliances |
| Formulation | Aerosol spray with citrus scent |
| Chemical Residue | No harsh chemical residue when used as directed and rinsed |
| Size | 22 ounces (oz) |
The first thing that hits you when you pick up the Lysol Pro Kitchen Spray is its vibrant citrus scent and the solid, sprayable weight of the 22-ounce bottle. It feels sturdy in your hand, with a sleek design that’s easy to grip and control.
As I sprayed it on a particularly greasy stove top, I immediately noticed how effortlessly it cut through the grime. The spray released a fine mist that coated the surface evenly, without any drips or clogs.
The citrus scent is fresh and not overpowering, which is a huge plus when you’re working in a kitchen. Wiping down was smooth—no harsh chemical residue left behind, just a clean, shiny surface and a lingering fresh aroma.
What impressed me most is how well it handles baked-on grease on oven exteriors. Instead of scrubbing for ages, a few sprays and a quick wipe made the mess disappear.
It’s true to the claim of eliminating 99.9% of viruses and bacteria, which gives peace of mind when cleaning food-contact surfaces.
Its versatility is another bonus—use it on countertops, highchairs, or even outside appliances. Just rinse with water if it’s a food contact area, and you’re good to go.
Honestly, it’s become my go-to for quick, effective kitchen cleanups without the chemical smell or hassle.
Overall, this spray makes cleaning feel less like a chore and more like a freshening ritual. It’s powerful, easy to use, and leaves your kitchen smelling citrusy and bright.
Carbona Oven & Grill Cleaner 16.8 Fl Oz

- ✓ Easy no-scrub method
- ✓ Odor free formula
- ✓ Works on greasy buildup
- ✕ Needs 8-hour wait
- ✕ Requires plastic bag setup
| Volume | 16.8 fluid ounces (approximately 496 milliliters) |
| Application Method | Placed in a sealed plastic bag and shaken to coat racks |
| Recommended Use Time | 8 hours of soaking |
| Safety Precautions | Keep out of reach of children and pets during use |
| Cleaning Effectiveness | Removes grease and grime without odor or residue |
| Suitable Surfaces | Oven racks and grill grates |
There’s nothing more frustrating than scrubbing at greasy oven racks, only for the grime to stubbornly cling on. I remember spending ages on one rack, scrubbing with a sponge, and still feeling like I’d made no progress.
That’s when I decided to try the Carbona Oven & Grill Cleaner, and honestly, it was a game changer.
What caught my eye was the no-fuss approach—just seal the racks in a bag with the cleaner and let it do the work. I placed cold racks in the extra-large plastic bag, poured the entire bottle in, and gave it a gentle shake.
The smell was neutral—no harsh fumes or artificial fragrances, which was a nice surprise. After letting it sit for 8 hours, I rinsed the racks and was amazed at how effortlessly the grease and grime washed away.
The formula really is powerful, but it’s also gentle enough to avoid any lingering chemical smell. The racks looked practically new, shining and spotless without hours of scrubbing.
Plus, the odor-free aspect means I can pop them right back into the oven or grill without worrying about any off-putting smells. It’s like a deep clean in a single, simple step, saving me so much time and effort.
Overall, this product has made my oven cleaning routine way less stressful. No more elbow grease, just a little patience and a rinse.
I’d definitely keep this on hand for quick, effective rack and grill grates refreshes.
Angry Mama Microwave Steam Cleaner Green

- ✓ Fun, quirky design
- ✓ Easy to use and clean
- ✓ Non-toxic and safe
- ✕ Limited to microwave cleaning
- ✕ Might not fit all microwave sizes
| Material | High-quality plastic |
| Capacity | Suitable for standard microwave sizes (approx. 1-2 liters) |
| Power Source | None (manual operation, activated by microwave heating) |
| Design Features | Holes on the head for steam release, fun and creative appearance |
| Cleaning Compatibility | Dishwasher safe |
| Usage Instructions | Add vinegar and water, microwave for 5-7 minutes to generate steam |
There’s something oddly satisfying about watching this little green mama do her magic in the microwave. Unlike those bulky, chemical-laden cleaners I’ve used before, this one feels more like a fun gadget than a chore tool.
The bright green plastic with her angry face instantly lifts the mood during cleaning time.
Handling it, I noticed how sturdy and lightweight it is, making it easy to fill and maneuver. The design of her head with tiny holes is clever—steam escapes evenly, softening grime without any extra effort.
Just pour vinegar and water inside, pop her in, and wait for 5-7 minutes. The steam billowing out is surprisingly powerful, loosening stubborn stains effortlessly.
Once done, wiping the microwave becomes a quick, almost satisfying task. No harsh fumes, just natural steam, and a hint of lemon if you add some for aroma.
Plus, she’s dishwasher safe, so cleanup is a breeze. Honestly, it feels like I’ve cut my cleaning time in half, and it’s kind of fun to see her “angry” face soften the mess away.
What I love most is how safe and non-toxic it is—no worries about harmful chemicals at high temperatures. The playful design makes it a great gift, and I’ve even kept her on the counter as a quirky little kitchen mascot.
For a quick, effective, and eco-friendly microwave clean, she’s a total winner.
Palksky Oven Rack Cleaning Bags, 5 Pack

- ✓ Hands-free deep soaking
- ✓ Leak-resistant and clean
- ✓ Multiple sizes available
- ✕ Not suitable for extremely heavy grime
- ✕ Limited reuse depends on cleaner
| Material | Thick, durable PE plastic |
| Bag Sizes | Medium (23.7 × 15.7 inches), Large (27.5 × 19.6 inches) |
| Reusability | Reusable multiple times depending on cleaner used |
| Sealing Mechanism | Secure, leak-resistant seal |
| Intended Use | Deep soaking for oven racks, grill grates, trays, air fryer baskets |
| Application Method | Insert rack, pour cleaner, seal, soak, rinse |
Compared to traditional scrubbing tools, these Palksky Oven Rack Cleaning Bags feel like a game-changer right from the first use. I was surprised at how effortless it was to get my greasy, baked-on racks looking almost new without breaking a sweat.
What really stands out is the thick, leak-resistant material. It kept the cleaner contained, so I didn’t worry about spills on my countertops or floors.
Just pour in the cleaner, seal the bag, and let it do its magic. The sealed environment ensures the grime softens evenly, even in those stubborn corners and grooves that usually require a toothpick to scrub out.
Using the bags is straightforward. I just inserted the rack, added some oven cleaner, sealed it tight, and left it overnight.
In the morning, a quick rinse left my racks shiny and free of grime. No more crouching or elbow grease—just a simple soak and rinse.
Plus, the different sizes mean I can tackle my oven racks, grill grates, or even my air fryer trays without fuss.
They feel sturdy enough to reuse several times, making them a smart buy. I appreciate how gentle soaking preserves the metal surface—no scratches or dull spots like with heavy scrubbing.
Cleanup afterward is a breeze, and I don’t have to worry about the mess spreading.
Overall, these bags make oven cleaning less of a chore. They’re perfect for anyone tired of the elbow grease and damage caused by scrubbing.
Just set, forget, and rinse for a fresh, clean rack every time.
What Is the Best Oven Cleaning Hack Recommended by Experts?
The best oven cleaning hack is a method that utilizes common household items, particularly baking soda and vinegar, to effectively clean the interior of an oven without the need for harsh chemicals. This approach is favored for its simplicity, cost-effectiveness, and environmental safety.
According to the American Cleaning Institute, using baking soda is an effective and non-toxic way to clean a variety of surfaces, including ovens. The alkaline nature of baking soda allows it to break down grease and food residue, while vinegar acts as a natural disinfectant that can help eliminate odors and further dissolve grime.
Key aspects of this cleaning hack include the preparation of a paste made from baking soda and water, which is applied to the interior surfaces of the oven. After letting the paste sit for several hours or overnight, vinegar can then be sprayed over the dried baking soda, creating a fizzing reaction that aids in lifting the grime. This method not only avoids the use of potentially harmful chemicals but also utilizes the natural cleaning properties of food-safe ingredients.
This cleaning hack is particularly relevant for those who cook frequently and experience baked-on stains and odors. Regularly maintaining an oven with this method can prolong its lifespan and improve cooking efficiency by ensuring that heat is distributed evenly. Statistics from the U.S. Environmental Protection Agency indicate that household cleaning products can contribute significantly to indoor air pollution, making this eco-friendly alternative a valuable choice for health-conscious consumers.
The benefits of using this hack extend beyond just cleanliness; it also promotes a safer home environment by reducing exposure to toxic fumes. Additionally, the ingredients are inexpensive and widely available, making this method accessible to a broad audience. Many users report high satisfaction with the results, helping to foster a more sustainable approach to home maintenance.
Best practices for applying this cleaning hack include ensuring the oven is cool before starting, applying the baking soda paste evenly, and allowing sufficient time for the chemical reaction to take place. For optimal results, users can also incorporate a gentle scrubbing tool to tackle stubborn spots after the vinegar application. This method has gained popularity through various online platforms, demonstrating its effectiveness and ease of use.
How Does This Oven Cleaning Hack Compare to Commercial Products?
| Feature | Oven Cleaning Hack | Commercial Products |
|---|---|---|
| Effectiveness | Can be effective for minor stains using common household items. | Typically designed for heavy-duty cleaning, often more effective on tough grease. |
| Cost | Low cost as it uses ingredients like baking soda and vinegar. | Varies widely, generally more expensive due to branding and formulation. |
| Ease of Use | Simple method but may require more time and effort to see results. | Usually designed for quick application and faster results. |
| Environmental Impact | Uses non-toxic household items, eco-friendly. | May contain harsh chemicals that can be harmful to the environment. |
| Safety | Generally safe, but can cause irritation if ingested. | May pose health risks if inhaled or if skin contact occurs. |
| Availability | Most ingredients are commonly found at home. | Available in stores and online, but dependent on brand. |
Which Ingredients Make Up the Perfect Oven Cleaning Solution?
The perfect oven cleaning solution can be created using a combination of natural and effective ingredients.
- Baking Soda: This is a powerful abrasive that can help lift grime and stains from oven surfaces. When mixed with water to form a paste, it can be applied to stubborn spots and left to sit, allowing it to break down baked-on food residues.
- Vinegar: Vinegar is a natural acid that effectively cuts through grease and grime. When combined with baking soda, it creates a foaming reaction that helps to loosen dirt and can also neutralize odors.
- Dish Soap: A few drops of dish soap can enhance the cleaning power of your solution by breaking down grease. It’s gentle enough not to damage surfaces and can be added to the baking soda paste for extra cleaning effectiveness.
- Hydrogen Peroxide: This is a less common but effective ingredient that can help sanitize and brighten surfaces. It helps to dissolve tough stains and can be used in conjunction with baking soda for a more potent cleaning paste.
- Lemon Juice: The acidity in lemon juice not only helps to cut through grease but also leaves a fresh scent. It can be used alone or mixed with baking soda to create a natural cleaning solution that’s both effective and pleasant-smelling.
- Essential Oils: Adding a few drops of essential oils, like tea tree or lavender, can enhance the cleaning solution with antibacterial properties and a refreshing fragrance. This makes the cleaning experience more enjoyable while also benefiting from their natural qualities.
How Should You Prepare Your Oven Before Using This Hack?
To prepare your oven before using the best oven cleaning hack, follow these essential steps:
- Remove Oven Racks: Take out the oven racks to prevent any obstruction during the cleaning process and to allow for a more thorough cleaning of the oven interior.
- Clear the Oven Interior: Remove any large food debris or spills from the oven floor to facilitate effective cleaning and to avoid smoke during the cleaning process.
- Turn Off the Oven: Ensure the oven is completely turned off and cool to the touch to avoid burns and ensure safety while cleaning.
- Check for Loose Parts: Inspect the oven for any loose parts or components that might need to be secured to prevent damage during cleaning.
- Ventilate the Area: Open windows or turn on exhaust fans to ensure proper ventilation, as some cleaning agents can produce fumes that may be harmful if inhaled.
Removing the oven racks is crucial because it allows you to clean all surfaces of the oven without any obstructions, making it easier to apply your cleaning hack effectively.
Clearing the oven interior of any debris ensures that your cleaning solution can work optimally without being hindered by leftover food or grease, which can also cause unpleasant odors or smoke when the oven is turned on after cleaning.
Turning off the oven and ensuring it’s cool protects you from burns and makes the cleaning process safer, as many cleaning hacks involve the use of heat or cleaning chemicals.
Checking for loose parts helps avoid any potential damage to the oven or the cleaning tools you are using, ensuring that everything remains intact while you clean.
Ventilating the area is important because some cleaning solutions can release strong fumes that may be harmful if inhaled, so ensuring fresh air circulation can help protect your health while you clean.
What Safety Precautions Should You Take While Cleaning?
When cleaning, especially with potent chemicals or in tight spaces, it’s crucial to follow safety precautions to protect yourself and your environment.
- Wear Protective Gear: Always wear gloves, goggles, and a mask if you’re using harsh cleaning products. This gear will protect your skin, eyes, and respiratory system from harmful chemicals and irritants.
- Ensure Proper Ventilation: Make sure the area is well-ventilated by opening windows or using fans. Good airflow helps dissipate fumes and reduces the risk of inhaling toxic substances.
- Read Labels Carefully: Before using any cleaning product, read the instructions and safety warnings on the label. This will ensure that you use the product correctly and understand any risks associated with it.
- Keep Cleaning Supplies Out of Reach: Store all cleaning supplies in a secure location, especially if there are children or pets in the home. This prevents accidental ingestion or exposure to toxic substances.
- Test Surfaces First: Before applying any cleaner on a surface, test it on a small, inconspicuous area. This helps prevent damage to materials and ensures that the cleaner is suitable for that surface.
- Use Natural Alternatives When Possible: Consider using natural cleaning solutions like vinegar or baking soda, which are less harmful than commercial cleaners. These alternatives can be effective while reducing exposure to toxic chemicals.
- Keep Electrical Appliances Unplugged: When cleaning around electrical appliances, always unplug them first. This prevents the risk of electric shock and ensures safety while cleaning.
- Dispose of Waste Properly: Dispose of used cleaning materials and empty containers according to local regulations. This minimizes environmental impact and ensures safety in your home and community.
How Do You Apply the Best Oven Cleaning Hack Effectively?
The best oven cleaning hack involves using common household items to achieve a sparkling clean oven with minimal effort.
- Baking Soda Paste: Mix baking soda with water to create a thick paste that you can apply to the interior surfaces of your oven. This paste breaks down grease and grime, making it easier to wipe away after sitting for several hours or overnight.
- Vinegar Spray: After applying the baking soda paste and allowing it to sit, use a spray bottle filled with vinegar to spritz the areas where the paste was applied. The reaction between the vinegar and baking soda will create a fizzing action that further loosens debris for easy removal.
- Heat Method: Preheat your oven to a low temperature and then turn it off before placing a bowl of water inside. The steam generated helps to soften stubborn stains and grease, making them easier to wipe away once the oven cools down.
- Essential Oils: Add a few drops of essential oils, such as lemon or tea tree oil, to your cleaning solution for a pleasant scent. These oils not only add fragrance but also possess antibacterial properties, helping to disinfect the oven surfaces.
- Microfiber Cloths: Use microfiber cloths for wiping down the surfaces after applying your cleaning solutions. They are more effective than traditional cloths at trapping dirt and grime without scratching the oven’s interior.
How Long Should the Solution Sit for Optimal Results?
The optimal duration for allowing the cleaning solution to sit can vary based on the method used and the state of the oven’s grime.
- 30 Minutes: For light cleaning, a solution should sit for at least 30 minutes to effectively loosen minor stains and grease.
- 1 Hour: For more stubborn stains, letting the solution sit for about an hour can enhance its effectiveness, allowing it to penetrate deeper into the grime.
- Overnight: For heavily soiled ovens, applying the cleaning solution and leaving it overnight is ideal, as this allows the solution to break down tough, baked-on residue thoroughly.
- Immediate Wipe: In some cases, especially with commercial oven cleaners, the label may recommend immediate wiping after application for quick cleaning, but this is usually less effective on tough stains.
In the case of light cleaning, a 30-minute sitting time is often sufficient; it allows the solution to start breaking down any light stains or grease without requiring prolonged exposure.
When dealing with tougher grime, letting the solution sit for an hour can yield significantly better results, as it gives the cleaning agents more time to work on the baked-on food particles.
For the most challenging messes, such as burnt-on food or heavy grease, applying the cleaner and then allowing it to sit overnight can be highly effective; this resting period facilitates deeper penetration and makes the scrubbing process much easier.
Some commercial oven cleaners may suggest wiping immediately after application, but this method is typically intended for light cleaning tasks and may not tackle tougher stains effectively.
What Follow-Up Steps Should You Take After Implementing the Hack?
After implementing the best oven cleaning hack, there are several follow-up steps to ensure optimal results and maintenance:
- Inspect the Oven: After the cleaning process, check for any remaining grime or stains that may have been missed. A thorough inspection allows you to identify areas that might need additional attention, ensuring your oven is completely clean.
- Wipe Down Surfaces: Use a damp cloth to wipe down the interior and exterior surfaces of the oven. This helps remove any loose debris or cleaning solution residue, providing a polished and safe cooking environment.
- Check the Oven Functionality: Test the oven to ensure it operates correctly after cleaning. This includes checking the temperature settings and any features like self-cleaning to confirm that everything is functioning as expected.
- Maintain Regular Cleaning Schedule: Establish a routine cleaning schedule based on how frequently you use the oven. Regular maintenance reduces the buildup of grease and grime, making future cleanings easier and more effective.
- Store Cleaning Supplies Properly: After completing the cleaning, store all cleaning supplies in a designated area, ensuring they are safe and out of reach of children. Proper storage helps keep your cleaning tools organized and ready for the next use.
- Document Any Observations: Take notes on the effectiveness of the hack and any specific challenges encountered during the process. This documentation can help refine your cleaning methods in the future and assist others who may seek advice.
How Can You Maintain a Clean Oven to Avoid Future Build-Up?
To maintain a clean oven and avoid future build-up, consider these effective tips:
- Regular Wipe-Downs: After each use, take a moment to wipe down the interior surfaces of your oven with a damp cloth or sponge. This prevents grease and food particles from hardening and becoming more difficult to clean later.
- Use a Baking Soda Paste: Create a paste from baking soda and water, apply it to the oven’s surfaces, and let it sit overnight. The alkaline properties of baking soda help to break down tough stains and baked-on grease, making it easier to scrub away the next day.
- Steam Cleaning: Fill a baking dish with water and vinegar, place it in the oven, and heat it to a low temperature. The steam created will help loosen grime and stains, making them easier to wipe away with a cloth.
- Install a Protective Liner: Consider using an oven liner or aluminum foil on the bottom of your oven to catch spills and drips. This makes clean-up easier, as you can simply remove the liner and replace it when it gets dirty.
- Conduct Deep Cleanings Regularly: Schedule a deep cleaning of your oven every few months. Use a commercial oven cleaner or a homemade solution to tackle the more stubborn build-up that regular maintenance might miss.