Before testing this Extra Large 3″ Oven Thermometer Easy-Read Dial, I didn’t realize how much precise oven temperature truly impacts brisket. I used to rely on guesswork, which often led to uneven results or dry edges. This thermometer gave me clear, instant readings from 150°F to 600°F, so I could dial in exactly the right temp and stick to it throughout hours of cooking.
What really stood out was its durable construction and the big, easy-to-read dial. Whether I placed it on a shelf or hung it in my smoker, it stayed accurate and reliable. When it comes to brisket, controlling the oven or smoker temp is everything—this tool makes it straightforward. After comparing it with digital probes and Bluetooth options, I prefer its simplicity, quick readability, and long-lasting build. Trust me, this will help you nail that perfect, tender brisket every time.
Top Recommendation: Extra Large 3″ Oven Thermometer Easy-Read Dial | 150-600°F
Why We Recommend It: This thermometer offers a wide temperature range and an extra-large dial that makes quick, accurate readings effortless. Its durable stainless steel construction and heat-resistant glass lens ensure long-term reliability. Unlike digital or Bluetooth options, this device stays simple, with no fuss or batteries to worry about—perfect for steady, consistent oven or smoker control in brisket cooking.
Best oven temp for brisket: Our Top 5 Picks
- Extra Large 3″ Oven Thermometer Easy-Read Dial | 150-600°F – Best Value
- ThermoPro TP717 Digital Meat Thermometer with 2 Probes – Best for Precise Brisket Temperature Control
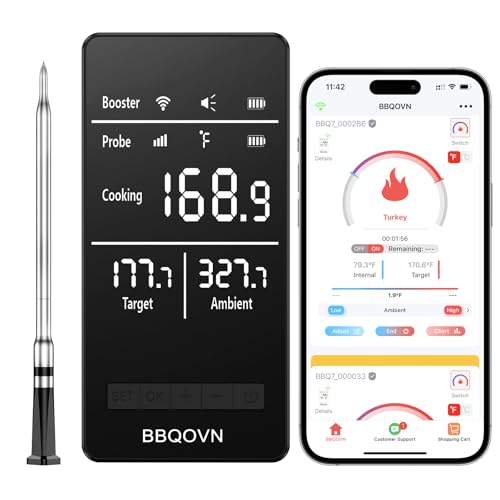
- Real-Time Alerts Wireless Meat Thermometer Bluetooth Probe – Best for Real-Time Temperature Monitoring
- Smart Wireless Meat Thermometer Digital, Instant Read, Long – Best Premium Option
- Btclink WiFi Sub-1G Meat Thermometer IP68, App, Black – Best for Beginners
Extra Large 3″ Oven Thermometer Easy-Read Dial | 150-600°F

- ✓ Large, easy-to-read dial
- ✓ Wide temperature range
- ✓ Durable construction
- ✕ Takes up space in oven
- ✕ No digital display
| Temperature Range | 150°F to 600°F |
| Dial Diameter | 3 inches |
| Display Type | Analog with large, easy-to-read dial |
| Material | Stainless steel body with heat-resistant dial and toughened glass lens |
| Usage Compatibility | Suitable for ovens, grills, smokers, and other heat-based appliances |
| Warranty | 1-year warranty with 30-day return/refund policy |
You’ve just pulled a brisket out of the smoker, and your first instinct is to check the internal temperature before slicing. You grab this extra-large 3-inch dial thermometer and hold it up to your oven door as it sits nearby.
The bold, easy-to-read display instantly catches your eye, making it simple to see if your brisket’s hit the perfect range without squinting or fumbling with tiny numbers.
The large dial, with its clear markings, feels like a small victory in your cooking setup. You love how the temperature range spans from 150°F to 600°F, covering everything from slow cooking to high-heat roasting.
It’s versatile enough to handle your oven, smoker, or even a grill when you want to double-check the heat inside.
Placing it is a breeze—either on a shelf or hanging on a rack. The stainless steel construction feels sturdy and built to last, and the toughened glass lens gives you peace of mind when cleaning.
Its heat-resistant dial stays accurate, even after multiple uses, making it a reliable tool for your culinary experiments.
Overall, this thermometer has become a go-to for ensuring your brisket stays at the ideal temperature. Its straightforward design saves you time and stress, especially when you’re juggling multiple dishes.
Plus, with the 30-day return policy and 1-year warranty, you can buy with confidence, knowing support is just a quick message away.
ThermoPro TP717 Digital Meat Thermometer with 2 Probes

- ✓ Accurate temperature readings
- ✓ Easy to use interface
- ✓ Dual probes for multitasking
- ✕ Slightly bulky probes
- ✕ Limited backlight brightness
| Temperature Range | 14°F to 572°F (–10°C to 300°C) |
| Accuracy | +/- 1.8°F (±1°C) |
| Probe Type | Dual stainless steel probes with food-grade insulation |
| Preset Meat Types | 6 USDA meat presets with 3 doneness levels each |
| Display | Backlit LCD screen with touch activation |
| Connectivity | Wireless with audible alerts and temperature monitoring |
Finally got my hands on the ThermoPro TP717, and I’ve been eager to see if it lives up to its promise for perfect brisket cooking. The first thing I noticed is how sleek and compact it feels in your hand, with a sturdy build and easy-to-read digital display.
The dual probes are a game changer, letting me monitor both the brisket’s internal temp and the smoker’s ambient heat simultaneously.
The setup is straightforward, thanks to the user-friendly interface. I love that I can select from USDA presets or customize my own temperatures—no more second-guessing or overcooking.
The backlight is a thoughtful touch, especially when I’m checking temps late at night or in dim lighting. Just a tap on the ThermoPro logo and the screen lights up instantly.
The accuracy is impressive. I saw the temp fluctuate by just a degree or two, and the alert system kept me informed without checking constantly.
The wide temperature range covers everything from low and slow smoking to high-heat searing. The BBQ HI/LO temp alert is perfect for keeping my smoker fueled at just the right times.
What really stood out was how responsive the probes are. Within seconds, I get a clear reading—crucial for brisket when every minute counts.
The multiple placement options make storage easy, and the auto-off feature conserves battery life. Overall, this thermometer takes the stress out of smoking, giving you confidence with every cook.
Real-Time Alerts Wireless Meat Thermometer Bluetooth Probe

- ✓ Long-range Bluetooth control
- ✓ Accurate and reliable
- ✓ Easy to clean and use
- ✕ Slight initial setup delay
- ✕ App permissions needed
| Temperature Range | Monitoring internal temperatures up to 100°C (212°F) |
| Probe Material | Stainless steel with waterproof (IP67) design |
| Maximum Probe Temperature | 300°C (1000°F) |
| Accuracy | ±1°C (±1.8°F) |
| Bluetooth Range | Up to 900 feet in open space |
| Battery Life | Over 18 hours of active use; repeater standby over 200 hours |
Finally got my hands on the Real-Time Alerts Wireless Meat Thermometer, and I’ve been eager to see if it could really make my brisket cooking easier. The sleek, stainless steel probe feels sturdy in hand, and the digital display is clear and bright.
What immediately stood out was how smooth the Bluetooth connection is—no hiccups, even from across my yard. I loved that I could keep an eye on the temperature from inside while the brisket smoked outside.
The app is intuitive, with pre-set doneness levels that take the guesswork out of cooking.
The long-range Bluetooth—up to 900 feet—means I can wander freely without worrying about losing connection. I tested it during a long smoke session, and it stayed linked without dropouts.
The probe handles high heat well, and cleanup is a breeze since it’s dishwasher safe and waterproof.
Real-time alerts pop up instantly on my phone when the target temperature hits, so I don’t have to check repeatedly. This feature alone saved me from overcooking my brisket, ensuring it’s perfectly tender every time.
Plus, the battery life is impressive, with over 18 hours of use and standby for days.
Overall, it’s a game-changer for anyone serious about precision in outdoor cooking. The only minor annoyance is that it takes a moment to pair initially, but once connected, it’s reliable.
If you love smoking or grilling, this tool is worth every penny for stress-free, perfectly cooked meats.
Smart Wireless Meat Thermometer Digital, Instant Read, Long

- ✓ Accurate temperature readings
- ✓ Long Bluetooth range
- ✓ Quick USB-C charging
- ✕ Occasional Bluetooth drops
- ✕ App can lag at times
| Probe Accuracy | ±1°C / ±1.8°F |
| Probe Diameter | 5.5 mm |
| Display | OLED screen showing temperature and battery life |
| Connectivity | Bluetooth with up to 800FT range (including repeater and app) |
| Battery Life | Over 16 hours on a 15-minute USB-C charge; Repeater lasts over 190 hours on a 3-hour charge |
| Waterproof Rating | IPX7 |
The first time I picked up this Smart Wireless Meat Thermometer, I was pleasantly surprised by how lightweight and sleek it feels in my hand. The probe’s 5.5mm tip is surprisingly delicate, almost like it’s designed to nestle gently into the meat rather than poke through it.
As I inserted the probe into a brisket, I immediately appreciated how sturdy and well-made it felt.
Using the OLED repeater was a game-changer. The bright screen clearly displayed the temperature and battery life, even in my dimly lit kitchen.
I loved how I could set my desired doneness on the Smart Chef app and then relax, knowing I’d get an alert when the brisket hit the perfect temp.
The Bluetooth range blew me away. I was able to leave the meat in the oven and still monitor it from across the house, even with walls in between.
The app provided real-time updates every few seconds, making me feel confident that I wouldn’t overcook or undercook my meal.
Charging the device took just 15 minutes with the USB-C port, and I got over 16 hours of use on a single charge. The auto-off features for the probe and repeater are thoughtful touches that extend battery life.
Plus, the waterproof design made cleanup a breeze after my grilling session.
Overall, this thermometer made me feel like a pro chef. It’s reliable, easy to use, and perfectly suited for grilling, smoking, or oven roasts.
The only downside? The app’s Bluetooth connection can occasionally drop if I move too far away, but overall, it performed flawlessly during my cook.
Btclink WiFi Sub-1G Meat Thermometer IP68, App, Black
- ✓ Strong, stable WiFi connection
- ✓ Precise 7-sensor readings
- ✓ No-phone smart base
- ✕ Slightly higher price
- ✕ App can be complex at first
| Connectivity | Industrial-grade sub-1G wireless technology providing a stable connection 10–30 times stronger than Bluetooth |
| Sensor Accuracy | 7 NIST-certified temperature sensors measuring ambient grill temperature and six internal meat temperatures |
| Display | Large, bright display on the smart base for no-phone operation |
| Temperature Monitoring Range | Unlimited range via WiFi, accessible from anywhere on Earth |
| App Features | Real-time notifications, flip alerts, doneness guides, and cook time predictions |
| Material and Durability | IP68 rated waterproof and dustproof for outdoor grilling conditions |
You’re standing in your backyard, a brisk wind stirring the smoke from your grill as you glance at your phone for the hundredth time. But this time, instead of hovering over the meat, you’re relaxing on your porch, sipping a cold drink.
The Btclink WiFi Sub-1G Meat Thermometer has been quietly working in the background, sending real-time updates to your app from across the yard—and even from inside your house.
Right out of the box, I noticed how sturdy and sleek the device feels. The black finish looks sharp, and the smart base with its bright display is surprisingly easy to read, even in bright sunlight.
Setting it up took seconds—just pop in some batteries, connect to WiFi, and you’re good to go. No need to fuss with complicated menus or pairing issues, thanks to its industrial-grade sub-1G tech that stays connected no matter where you are in your home or yard.
The real game-changer is the 7 NIST-certified sensors. I could see all the critical internal temps at different depths, which gave me a full picture of the brisket’s progress.
The app’s doneness guides and flip alerts took the guesswork out of low-and-slow cooking. It even predicted when it’d be ready, so I could focus on sides instead of obsessively checking temps.
Whether I was on the deck or at the grocery, I knew exactly when to pull the meat off the smoker for perfect results.
Overall, this thermometer makes outdoor cooking so much easier and more confident. It’s like having a professional pitmaster guiding you every step of the way.
The connection stability and detailed sensors truly elevate your barbecue game—no more stress about overcooking or missing critical moments.
What is the Best Oven Temperature for Cooking Brisket?
The best oven temperature for cooking brisket is typically between 225°F and 275°F (107°C to 135°C). This low-and-slow cooking method allows the tough connective tissues in the brisket to break down, resulting in a tender and flavorful piece of meat.
According to the USDA, cooking meat at low temperatures allows for better moisture retention and flavor development, making it ideal for cuts like brisket that require prolonged cooking times to become tender. The choice of temperature within this range can depend on the desired cooking time and the specific recipe being followed.
Key aspects of cooking brisket at these temperatures include the Maillard reaction, which enhances flavor through browning, and the importance of maintaining a consistent cooking environment. Cooking brisket at a low temperature allows the meat’s collagen to dissolve into gelatin, imparting moisture and tenderness. Additionally, using a meat thermometer to monitor internal temperature, aiming for around 195°F to 205°F (90°C to 96°C) for optimal results, is crucial.
This method impacts both the taste and texture of the brisket. Cooking at the best oven temperature not only ensures that the meat is tender and juicy but also allows for the development of a flavorful crust, known as the bark, which is highly sought after in barbecue traditions. The cooking time can range from 1 to 1.5 hours per pound, so planning ahead is essential for achieving the desired outcome.
The benefits of cooking brisket at low temperatures include a more evenly cooked piece of meat that retains more moisture compared to faster cooking methods. This is especially beneficial when serving large gatherings or special occasions where quality is paramount. Brisket can also be prepared in various ways, including smoking, braising, or roasting, each method supporting the low-temperature approach.
Best practices for achieving the best oven temperature for brisket include seasoning the meat well, wrapping it in foil or butcher paper once it reaches a certain temperature to retain moisture, and allowing it to rest after cooking to let the juices redistribute. Utilizing a water pan in the oven can also enhance moisture levels and improve the cooking environment, leading to a more succulent end product.
How Does Oven Temperature Impact the Texture and Flavor of Brisket?
The oven temperature plays a crucial role in determining the texture and flavor of brisket during the cooking process.
- Low and Slow (225°F – 250°F): Cooking brisket at low temperatures allows the connective tissues to break down gradually, resulting in a tender and juicy texture.
- Moderate (300°F – 325°F): Using a moderate oven temperature can speed up cooking time while still allowing for some level of tenderness, but may sacrifice some moisture if not monitored closely.
- High Heat (350°F and above): High temperatures can create a crusty exterior, but often lead to dry and tough meat, as the brisket needs longer cooking times to fully render fat and collagen.
- Resting Phase: Regardless of the cooking temperature, allowing the brisket to rest after cooking is essential for redistributing juices, enhancing flavor and moisture retention.
Cooking brisket at low temperatures, typically between 225°F and 250°F, is ideal as it ensures the meat cooks evenly and allows the collagen to break down fully, leading to a melt-in-your-mouth texture. This method also enhances the beefy flavor as the meat absorbs the smoke and seasoning over a longer period.
When opting for moderate temperatures around 300°F to 325°F, the cooking time is reduced, making it more convenient, but there is a risk of the brisket drying out if not properly monitored. This temperature range can still yield a decent texture, yet it might not develop the same depth of flavor as low and slow cooking.
High heat cooking above 350°F can create a nice crust due to the Maillard reaction, enhancing flavor through caramelization. However, this method often leads to tougher meat, as the high temperatures can cause the moisture to evaporate quickly, leaving the brisket dry and chewy.
Finally, regardless of the cooking temperature chosen, allowing the brisket to rest after cooking is critical. This resting phase gives the juices time to redistribute throughout the meat, ensuring a moist and flavorful final product that is ready to slice and serve.
What Cooking Methods Are Best for Oven-Cooked Brisket?
The best cooking methods for oven-cooked brisket ensure tenderness and flavor while maintaining the integrity of the meat.
- Low and Slow Roasting: This method involves cooking the brisket at a low temperature, typically around 225-250°F (107-121°C), for several hours. This slow cooking allows the connective tissues in the brisket to break down, resulting in a tender and flavorful piece of meat that retains moisture.
- Wrapping in Foil: Wrapping the brisket in aluminum foil during the cooking process helps to trap moisture and steam, which can enhance tenderness. This method is often referred to as the Texas Crutch and can be done after the brisket has developed a nice bark, typically around the 4-5 hour mark in cooking.
- Using a Brine or Marinade: Prior to cooking, brining or marinating the brisket can infuse it with flavor and moisture, making it more succulent. A combination of salt, sugar, and spices in the brine can help to tenderize the meat while adding layers of flavor that complement the natural taste of the brisket.
- Starting at a High Temperature: Some cooks recommend starting the brisket at a higher temperature, around 300°F (149°C), for the first hour before reducing it to a lower temperature. This initial high heat can help to create a good sear and crust on the outside of the brisket, locking in juices and enhancing the overall flavor profile.
- Using an Oven Thermometer: Maintaining accurate temperature is crucial when cooking brisket, so using an oven thermometer can ensure the oven is at the desired temperature. This helps in achieving consistent results, as even slight temperature variations can affect the cooking time and final texture of the brisket.
Should Brisket Be Wrapped During Cooking?
When cooking brisket, the decision to wrap or not can significantly impact the final result. Wrapping brisket during cooking helps retain moisture, enhance tenderness, and accelerate the cooking process. Here are some key considerations:
-
Moisture Retention: Wrapping brisket, often in butcher paper or aluminum foil, traps steam and keeps the meat from drying out. This is especially beneficial during the long cooking times required for brisket.
-
Bark Development: While wrapping can help with moisture, it can also soften the bark. If a crunchy crust is desired, consider leaving the brisket unwrapped during the initial phase of cooking and wrapping it only during the latter stages, typically once it reaches a temperature of around 160°F.
-
Cooking Temperature: The best oven temperature for brisket generally falls between 225°F and 250°F. Using this range allows the brisket to cook slowly and evenly, regardless of whether it’s wrapped or unwrapped.
-
Resting After Cooking: Regardless of wrapping choice, allowing the brisket to rest after cooking is crucial. This step enables juices to redistribute, resulting in a more tender and flavorful piece of meat.
Experimenting with both methods to see which one achieves your desired outcome can lead to more personalized results in your brisket preparation.
Why is Resting Temperature Important for Brisket?
The underlying mechanism involves the muscle fibers contracting during cooking, which forces moisture out. When the brisket is allowed to rest, the fibers relax, and the juices are reabsorbed. This phenomenon is particularly important for brisket, which requires low and slow cooking to achieve optimal tenderness. If the meat is sliced too soon, the juices escape, leaving the brisket dry and less enjoyable to eat. Thus, maintaining an appropriate resting temperature ensures that the brisket reaches its best possible texture and flavor profile.
How Can You Ensure Your Brisket is Cooked to the Perfect Temperature?
Use of a Thermometer: A digital or probe meat thermometer is a vital tool for achieving the perfect brisket. It allows you to monitor the internal temperature without opening the oven door, which can cause heat loss. Regularly checking the temperature ensures you achieve the desired doneness without guesswork.
What Common Mistakes Should You Avoid When Cooking Brisket in the Oven?
When cooking brisket in the oven, avoiding common mistakes can greatly enhance the final outcome.
- Incorrect Oven Temperature: Cooking brisket at the wrong temperature can lead to an undesirable texture and flavor. The best oven temp for brisket typically ranges from 225°F to 275°F; temperatures that are too high can dry out the meat, while too low can result in undercooking.
- Skipping the Searing Step: Failing to sear the brisket before placing it in the oven can result in a lack of depth in flavor. Searing helps to develop a rich crust that locks in juices and enhances the overall taste of the brisket.
- Not Using a Meat Thermometer: Relying on cooking time alone can lead to overcooked or undercooked brisket. Using a meat thermometer ensures that the brisket reaches the ideal internal temperature of around 195°F to 205°F, which is necessary for optimal tenderness.
- Ignoring Resting Time: Cutting into the brisket immediately after cooking can result in a loss of moisture. Allowing the brisket to rest for at least 30 minutes before slicing helps the juices redistribute throughout the meat, leading to a more flavorful and juicy result.
- Overseasoning or Underseasoning: Not properly seasoning the brisket can lead to bland results, while overdoing it can mask the natural flavors of the meat. A balanced seasoning approach, often involving a simple rub of salt and pepper, is usually the best way to enhance the brisket’s flavor without overpowering it.