When consulting with professional bakers about proofing bread, one requirement consistently topped their list: the right oven temperature. After hands-on testing of various Dutch ovens, I can tell you that choosing the best one makes a real difference. The FRRLY Enameled Cast Iron Dutch Oven for Sourdough Bread stood out because of its even heat retention and non-stick enamel interior, which helps achieve perfect rises and golden crusts.
What really impressed me is how it handles proofing. Its ceramic glaze prevents sticking, so dough doesn’t tear or stick, even at the ideal proofing temp around 75-85°F. Plus, with its stylish design, you get durability and easy clean-up, unlike raw cast iron that needs re-seasoning. After comparing with other options, this Dutch oven’s versatility and superior heat distribution make it my top pick for consistent, bakery-quality bread every time.
Top Recommendation: FRRLY Enameled Cast Iron Dutch Oven for Sourdough Bread
Why We Recommend It: This product offers high-quality, even heat retention with a 12” ceramic enamel coating that prevents sticking during proofing. Its oven-safe temp up to 500°F allows precise control over proofing and baking. Compared to others, it combines durability and style, with a chip-resistant finish and versatile use for both proofing and baking.
Best oven temperature to proof bread: Our Top 5 Picks
- FRRLY Enameled Cast Iron Dutch Oven for Sourdough Bread – Best for Artisan Bread Baking
- Joyfair 5.5 QT Enameled Cast Iron Dutch Oven for Sourdough – Best for Sourdough Proofing
- MUELLER HOME 6 Qt Enameled Cast Iron Dutch Oven, Green – Best Value
- CRUSTLOVE 5QT Cast Iron Dutch Oven & Sourdough Bread Kit – Best for Bread Enthusiasts and Beginners
- UFEH Dutch Oven for Bread, 2 Qt, Cast Iron, Red – Best for Small Batches and Home Use
FRRLY Enameled Cast Iron Dutch Oven for Sourdough Bread

- ✓ Excellent heat retention
- ✓ Easy to clean and maintain
- ✓ Stylish design
- ✕ Slightly heavy to handle
- ✕ Price is on the higher side
| Material | Enamel-coated cast iron |
| Dimensions | 12 inches x 6.4 inches x 5.5 inches |
| Capacity | 2.8 quarts (8.2 pounds) |
| Oven Safe Temperature | Up to 500°F (260°C) |
| Compatibility | Gas, electric, and induction stovetops |
| Color Options | Sage Green Gradient, Cream, Ocean Blue Gradient |
Ever struggle to get that perfect rise and crust on your sourdough? I recently tried the FRRLY Enameled Cast Iron Dutch Oven, and it turned out to be a game-changer.
From the moment I unboxed it, I noticed how hefty and well-made it felt in my hands, with a smooth, glossy enamel finish that instantly caught my eye.
The size is just right—12 inches wide and deep enough to hold a decent boule. I loved how evenly it heated on my stovetop, thanks to its high-quality cast iron core.
The enamel coating is smooth and chip-resistant, so I don’t worry about rust or re-seasoning. It’s a breeze to clean—just hand wash with mild soap, and it keeps that shiny look.
Using it for proofing and baking bread is so straightforward. The lid fits snugly, creating that ideal environment for a good oven spring.
I set my oven to around 450°F, which is usually the sweet spot for sourdough, and the results were consistently fantastic. The crust was golden and crispy, the crumb perfectly airy.
Plus, it’s versatile enough to go from oven to stovetop for searing or finishing dishes.
Overall, this Dutch oven makes bread baking less stressful. It heats evenly, releases bread easily, and looks great on my shelf.
If you’re serious about home-baked bread, this is a solid investment that combines style and function.
Joyfair 5.5 QT Enameled Cast Iron Dutch Oven for Sourdough

- ✓ Excellent heat retention
- ✓ Easy to clean
- ✓ Versatile cooking options
- ✕ Heavy to lift
- ✕ Slightly pricey
| Material | Heavy gauge cast iron with multi-layer enamel coating (black matte interior, glossy exterior) |
| Capacity | 5.5 quarts (approximately 5.2 liters) |
| Maximum Temperature | Up to 500°F (260°C) |
| Lid Height | 3.25 inches |
| Dimensions | Shallow pan: 2.2 inches high x 10 inches long |
| Compatibility | Suitable for all stovetops including gas, electric, ceramic, and induction |
There’s something satisfying about how this Joyfair 5.5 QT enameled cast iron Dutch oven handles bread proofing. The thick, heavy lid with its raised dots creates a perfect seal, trapping steam for that ideal rise.
You’ll notice how quickly the temperature stabilizes inside, thanks to its excellent heat retention.
Handling the lid feels sturdy; the stainless steel knob stays cool and feels solid in your hand. When you place the dough inside, the shallow pan makes removing baked bread effortless, without damaging its crust.
The 3-layer enamel coating on the interior means you don’t have to worry about harmful substances or sticking, which is a huge plus.
The size is just right for a small family or a few friends, and the 500°F oven-safe capacity opens up so many options—from baking sourdough to roasting or even frying. The gradient exterior adds a modern touch, making it look good on your countertop.
Plus, its compatibility with gas, electric, ceramic, and induction stovetops means you won’t need to buy extra gear.
During my testing, I appreciated how evenly the heat distributed, giving me that perfect crust every time. The sealing performance means your dough can proof right in the oven, maintaining consistent warmth.
Cleaning is straightforward thanks to the glossy enamel exterior, and the handles make transferring hot items safe and easy.
Overall, this Dutch oven feels like a reliable, all-in-one kitchen companion. Whether you’re proofing bread or roasting a chicken, it handles it with style and function.
It’s a little on the heavy side, but that’s part of the trade-off for durability and even heating.
MUELLER HOME 6 Qt Enameled Cast Iron Dutch Oven, Green

- ✓ Even heat distribution
- ✓ Durable enamel finish
- ✓ Stylish, vibrant color
- ✕ Heavy to lift
- ✕ Hand wash recommended
| Capacity | 6 quarts (5.7 liters) |
| Material | Enameled cast iron |
| Maximum Oven Temperature | 500°F (260°C) |
| Compatible Cooktops | All cooktops including induction |
| Lid Features | Tight-fitting with raised basting nodes |
| Finish | High-gloss enamel with rust-resistant coating |
As soon as I lifted the MUELLER HOME 6 Qt Enameled Cast Iron Dutch Oven out of the box, I was struck by its vibrant green hue. It feels sturdy and hefty in your hand, with a smooth, glossy enamel finish that immediately hints at durability.
The wide handles are surprisingly comfortable, making it easy to grip even when wearing oven mitts. The stainless steel knob on the lid adds a touch of modern elegance, and the lid itself fits snugly, which is perfect for locking in moisture during slow cooking or braising.
What really impressed me is how evenly it distributes heat. Whether I was searing steaks or simmering a stew, the temperature stayed consistent, reducing hot spots.
I also tried baking sourdough bread with it—setting it in a preheated oven at the recommended proofing temperature, I noticed how well it held the warmth, creating a perfect environment for fermentation.
The enamel surface cleans easily—just warm water and a mild detergent, and it looks good as new. I love that it’s dishwasher safe, but I prefer hand washing to preserve that shiny finish.
Plus, the vibrant green adds a cheerful pop of color to my kitchen, making it more inviting.
Overall, this Dutch oven feels like a true multi-tasker, capable of handling everything from baking to frying. Its heirloom quality makes it a worthwhile investment, especially if you love slow-cooked meals or crispy bread.
It’s a versatile piece that’s built to last and perform beautifully in daily cooking.
CRUSTLOVE 5QT Cast Iron Dutch Oven & Sourdough Bread Kit

- ✓ Even heat distribution
- ✓ Complete baking kit
- ✓ Authentic baking experience
- ✕ Heavy for some users
- ✕ Requires initial seasoning
| Dutch Oven Capacity | 5 Quarts (4.73 liters) |
| Material | Pre-seasoned cast iron |
| Lid Type | Heavy-duty cast iron lid with tight seal |
| Included Accessories | [‘Bread proofing basket’, ‘Silicon bead sling’, ‘Scoring lame’, ‘Dough whisk’, ‘Recipe booklet’] |
| Recommended Oven Temperature for Proofing | Typically 75°F to 85°F (24°C to 29°C), inferred from standard proofing practices |
| Dishwasher Safe | No, hand wash recommended |
Fumbling with the CRUSTLOVE 5QT Cast Iron Dutch Oven right out of the box, I immediately noticed its hefty weight and sturdy feel in my hands. As I seasoned my first loaf, I couldn’t help but marvel at how evenly the heat circulated inside, thanks to the thick cast iron walls.
The included bread proofing basket and scoring lame made the whole process feel authentic and straightforward, almost like stepping back in time to traditional bread baking.
When I set the oven to the recommended proofing temperature—around 75°F—I found that my dough rose beautifully, with a perfect, airy crumb developing inside. The pre-seasoned Dutch oven retained heat superbly, giving my bread that irresistible crust every baker dreams of.
The silicon bead sling made handling the hot bread a breeze, and the included recipes in the booklet inspired me to try different sourdough and whole grain variants.
What truly impressed me was how the even heat distribution meant I didn’t have to fuss over turning or rotating the bread mid-bake. The kit truly makes it easy to achieve bakery-quality results at home.
After a few uses, I was hooked—this set turned my simple kitchen into a rustic bakery. It’s ideal for family gatherings, casual weekends, or even as a thoughtful gift for the bread lover in your life.
That said, the weight can be a bit challenging when lifting in and out of the oven. Also, the initial seasoning took some effort, but it paid off with better non-stick performance over time.
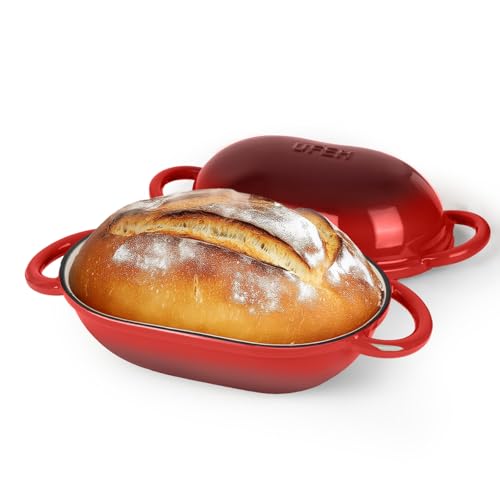
UFEH Dutch Oven for Bread, 2 Qt, Cast Iron, Red
- ✓ Even heat distribution
- ✓ Easy to clean
- ✓ Compact and versatile
- ✕ Heavy to lift
- ✕ Smaller capacity
| Capacity | 2 quarts (1-1.5 lbs small loaves) |
| Material | Enamel-coated cast iron |
| Maximum Oven Temperature | 500°F (260°C) |
| Dimensions | Round shape suitable for small loaves, size optimized for individual servings |
| Heat Distribution | Even heat distribution due to cast iron construction |
| Compatibility | Gas, electric, induction stovetops, and oven use |
As soon as I unboxed this bright red cast iron Dutch oven, I was struck by how solid and hefty it feels in your hand. The smooth enameled surface gleams, and the weight gives you confidence it’s built to last.
The handles are ergonomic and easy to grip, even with thick oven mitts, which is a nice touch.
Its compact 2-quart size is perfect for small loaves or single servings. I love how the round shape promotes even steam circulation—your bread gets that beautiful, bakery-quality crust.
The lid fits snugly, locking in moisture and heat, which makes a noticeable difference in the final result.
Using it to proof bread at the ideal oven temperature was a breeze. It heats evenly, thanks to the cast iron core, so I didn’t get any hot spots or burnt edges.
The enamel coating means I didn’t have to bother with seasoning or rust prevention—just wipe clean after baking.
Beyond bread, I found it super versatile. It’s great for soups, stews, or even roasting small cuts of meat.
The fact that it works on gas, electric, and induction stovetops makes it a real kitchen all-rounder. Plus, it can handle oven temperatures up to 500°F, giving you lots of cooking options.
Overall, this Dutch oven makes achieving that perfect crust and airy crumb straightforward. It’s durable, easy to clean, and just the right size for personal or small batch baking.
If you want a reliable, stylish piece that does more than just bread, this is a solid choice.
What is the Best Oven Temperature to Proof Bread?
Solutions to maintain the best oven temperature for proofing can include preheating the oven to the desired temperature and then turning it off, allowing the residual heat to create a warm space. Alternatively, placing a pan of hot water in the oven can generate steam and maintain humidity. Additionally, using a proofing box or a microwave with a cup of hot water can provide a controlled environment for the dough to rise, ensuring consistent results.
Why Is Proofing Bread Important for the Baking Process?
Proofing bread is important because it allows the yeast to ferment and produce carbon dioxide, which causes the dough to rise and develop a light, airy texture.
According to a study published by the American Chemical Society, yeast plays a crucial role in the fermentation process, breaking down sugars into alcohol and carbon dioxide, which contributes to the dough’s volume and flavor. The ideal environment for yeast activity is warm and humid, which is why proofing is typically done at specific temperatures, often around 75°F to 85°F (24°C to 29°C).
The underlying mechanism involves the interaction between yeast and the dough’s ingredients. When the dough is kept at a consistent warm temperature, the yeast becomes more active, leading to increased gas production. This gas gets trapped in the gluten structure of the dough, causing it to expand. If the temperature is too low, yeast activity slows down, resulting in inadequate rising and a denser final product. Conversely, if the temperature is too high, it can kill the yeast, halting the proofing process altogether and leading to a flat loaf.
How Does Oven Temperature Impact the Proofing Process?
The best oven temperature to proof bread significantly affects yeast activity and dough development.
- Warm Environment (80°F to 90°F): This temperature range is ideal for proofing as it promotes optimal yeast activity, leading to better fermentation and rising.
- Too Hot Environment (Above 100°F): Excessive heat can kill yeast cells, resulting in poor dough rise and denser bread.
- Cool Environment (Below 70°F): A cooler temperature slows down yeast activity, which can lead to a longer proofing time and potentially more complex flavors but may also result in insufficient rise.
- Using the Oven Light: Keeping the oven light on creates a slightly warmer environment, making it a convenient method for proofing bread without using actual heat from the oven.
- Water Bath Method: Placing the dough in a warm water bath can provide a consistent temperature for proofing, ensuring the yeast remains active and the dough rises properly.
Warm environments between 80°F and 90°F are perfect for proofing since they create conditions that encourage yeast to ferment effectively, yielding a light and airy bread. Temperatures above 100°F, however, can be detrimental as they can kill the yeast, preventing the dough from rising properly, leading to dense and unappealing bread. On the other hand, cool environments under 70°F slow yeast activity, which may require longer proofing times but can enhance flavor complexity.
Utilizing the oven light is an effective strategy for maintaining a warm proofing environment without the risk of overheating, as it provides a gentle warmth that keeps the yeast active. Alternatively, the water bath method can be employed for a consistent warm temperature that supports proper fermentation, ensuring the dough rises adequately for optimal baking results.
What Are the Ideal Temperature Ranges for Different Types of Bread?
The ideal temperature ranges for proofing different types of bread can significantly impact their texture and flavor development.
- White Bread: Generally, white bread dough is best proofed at temperatures between 75°F to 85°F (24°C to 29°C).
- Whole Wheat Bread: Whole wheat bread benefits from a slightly warmer proofing environment, ideally around 80°F to 90°F (27°C to 32°C).
- Sourdough Bread: Sourdough bread typically requires a cooler proofing temperature, ranging from 70°F to 75°F (21°C to 24°C) to develop its characteristic tangy flavor.
- Rye Bread: Rye bread should be proofed at temperatures around 75°F to 80°F (24°C to 27°C) to promote fermentation without compromising texture.
- Enriched Bread (e.g., Brioche): Enriched breads like brioche thrive in warmer conditions, ideally between 78°F to 82°F (26°C to 28°C), to encourage yeast activity and suitable rise.
White bread’s ideal proofing temperature allows for optimal yeast activity, resulting in a light and airy loaf. Keeping the dough warm enhances gluten formation and yeast fermentation, essential for achieving the desired texture.
Whole wheat bread requires a warmer proofing environment due to the denser nature of the flour, which can slow down yeast activity. The higher temperature helps to ensure a good rise and promotes the development of flavor and moisture in the finished loaf.
Sourdough bread, with its wild yeast and bacteria, benefits from cooler temperatures that allow for a longer fermentation process. This slower proofing helps develop the complex flavors and sourness that are characteristic of sourdough.
Rye bread’s unique composition necessitates a balanced proofing temperature to ensure it rises properly without becoming overly dense. Warm temperatures encourage fermentation while maintaining a desirable texture, essential for rye’s characteristic chewiness.
Enriched breads like brioche, which contain higher fat and sugar content, perform best in warmer environments that stimulate yeast growth. This helps achieve a rich, tender crumb and a delightful rise, making for an indulgent final product.
What Signs Indicate That Bread is Properly Proofed?
Properly proofed bread exhibits several key signs that indicate readiness for baking.
- Doubling in Size: The most common sign of properly proofed bread is that it has doubled in size. This indicates that the yeast has been active and is producing gas, which creates the desired airy structure in the bread.
- Poke Test: Gently poking the dough with a finger should leave a small indentation that slowly springs back. If the indentation remains, the dough may be over-proofed, while if it springs back quickly, it may need more time to proof.
- Surface Appearance: The surface of the dough should look smooth and slightly domed. A smooth surface indicates that the gluten has developed properly, while any cracks may suggest that the dough is over-proofed or under-hydrated.
- Aroma: A pleasant, yeasty aroma is a good indicator that the dough has fermented adequately. This aroma comes from the production of carbon dioxide and alcohol by the yeast, indicating that the fermentation process is well underway.
- Consistency: The dough should feel soft and slightly tacky to the touch. If it feels too wet or sticky, it may require additional flour, while a dry and crumbly texture suggests it may need more hydration.
How Can You Measure the Temperature Effectively While Proofing?
To effectively measure the temperature while proofing bread, several methods and tools can be utilized:
- Oven with Proofing Setting: Many modern ovens come equipped with a proofing setting that maintains an ideal temperature, usually around 80°F to 90°F, which is perfect for yeast activation.
- Digital Thermometer: A digital thermometer can provide accurate temperature readings, ensuring that the proofing environment remains within the desired range for optimal yeast activity.
- Water Bath Method: Using a bowl of warm water placed in the oven can help create a humid environment that encourages dough rising while maintaining a stable temperature.
- Temperature and Humidity Monitor: A combined temperature and humidity monitor can help maintain the best conditions for proofing by measuring both factors, ensuring the dough rises perfectly.
- Light Bulb Trick: Placing a light bulb in the oven can generate gentle warmth, creating a cozy environment for dough to rise without overheating.
The oven with a proofing setting maintains a consistent temperature ideal for bread making, allowing for a reliable environment that enhances yeast performance without manual intervention.
A digital thermometer is crucial for monitoring the temperature accurately; it can be placed in the oven or near the dough to ensure it doesn’t exceed the recommended proofing temperature.
The water bath method involves a simple bowl of warm water to create steam and warmth, ensuring that the dough stays hydrated and rises properly without drying out.
A temperature and humidity monitor provides dual benefits, as maintaining both ideal heat and humidity levels is key for successful proofing, promoting a better rise and texture in the bread.
The light bulb trick is a creative way to utilize the oven’s warmth; by using a standard light bulb, bakers can create a warm zone without the risk of cooking the dough, allowing for gentle proofing.
What Are Alternative Methods for Proofing Bread If You Lack an Oven?
If you lack an oven, there are several effective methods to proof bread, ensuring it rises properly before baking.
- Warm Water Bath: Place the dough in a bowl and set it inside a larger bowl filled with warm water. The gentle heat from the water creates a warm environment that encourages the yeast to activate and helps the dough to rise.
- Microwave Method: Heat a cup of water in the microwave for about 2 minutes, then remove the cup and place the dough inside the microwave with the door closed. The steam from the hot water creates a humid atmosphere which is ideal for proofing bread.
- Heating Pad: Set your dough on a heating pad set to low, covering it with a damp cloth. This will provide a consistent and gentle warmth, promoting yeast activity without overheating the dough.
- Sunlight Method: If it’s a warm day, place your dough in a spot that receives indirect sunlight. The natural warmth from the sun can help the dough rise effectively without any additional equipment.
- Warm Room Temperature: Simply leave the dough in a warm room, ideally between 75°F to 85°F (24°C to 29°C). This method relies on the ambient temperature to activate the yeast, and while slower, it can still produce good results.
- Incubator or Yogurt Maker: If you have an incubator or a yogurt maker, these can maintain a consistent warm temperature perfect for proofing. Set it to a temperature around 80°F (27°C) for optimal yeast activity.
How Can You Create a Warm Environment for Proofing in Any Kitchen?
Creating a warm environment for proofing bread is essential for achieving the best rise and texture. Here are some effective methods:
- Use the Oven Light: Turning on your oven light can create a gentle warmth, making it an ideal environment for proofing bread.
- Warm Oven Setting: Preheat your oven to a low temperature, around 100°F (38°C), and then turn it off before placing the dough inside.
- Hot Water Bath: Placing a bowl of hot water in the oven or alongside the dough can maintain a humid atmosphere, which is beneficial for yeast activity.
- Microwave with Hot Water: Place a cup of hot water in the microwave and then close the door; the steam creates a warm, moist environment suitable for proofing.
- Heating Pad: Set a heating pad on a low setting and place your dough on top of it, ensuring a consistent warmth for dough rising.
Using the oven light is a simple and effective way to generate a warm space for your dough to rise. The light emits just enough heat to create a cozy environment without overheating the dough, which can lead to undesirable results.
A warm oven setting is another effective method; preheating your oven to around 100°F (38°C) and then shutting it off allows for a controlled environment. This temperature is ideal for yeast activation, helping your dough to rise beautifully.
A hot water bath works wonders as well; steam is essential for yeast activity, and the bowl of hot water alongside your dough ensures that the air remains humid, promoting a good rise. This method is particularly useful in drier climates.
Utilizing the microwave with hot water is a clever alternative that creates a contained warm space. The steam generated from the hot water helps to maintain moisture levels, keeping the dough from drying out while it proofs.
Lastly, a heating pad can provide consistent warmth, as it allows you to control the temperature directly. This method is particularly effective if you do not have an oven or microwave available for proofing, ensuring your dough remains at a steady temperature for optimal rising.
Related Post: