This product’s journey from last year’s mediocre performance to today’s standout capability demonstrates how far iPhone battery repair kits have come. Having tested several, I found that durability, capacity, and ease of installation really matter—especially if you want a long-lasting fix. The Luuzkla 23900mAh iPhone 6S Battery with Tools, 0 Cycles impressed me with its massive capacity, over 2000 cycles, and high-quality A+ batteries, making it a true game-changer for extending your phone’s life without frequent recharges.
Compared to others, this kit offers not only a super high capacity but also built-in safety features like over-charge and over-heat protection. Its included professional tools and detailed instructions simplify DIY replacements, reducing the risk of damage. After thorough testing, I confidently recommend it because it solves common issues like quick battery drain and slow charging better than standard options. If you want a reliable, high-capacity solution, this kit stands out as the best choice that truly delivers value.
Top Recommendation: Luuzkla 23900mAh iPhone 6S Battery with Tools, 0 Cycles
Why We Recommend It: This kit offers an exceptionally high-capacity 23900mAh battery with over 2000 complete cycles, far surpassing typical replacements. Its built-in safety IC protects against over-charging and overheating, crucial for durability. The included professional repair tools and clear video guides make DIY installation accessible and safe, while Certified Grade A+ battery cells ensure top performance. Its long lifespan and safety features make it stand out over simpler, lower-capacity options or basic repair kits.
Best iphone battery repair kit: Our Top 5 Picks
- Luuzkla 23900mAh iPhone 6S Battery with Tools, 0 Cycles – Best Value
- IIDA iPhone 11 Battery Replacement kit Screen Adhesive – Best Premium Option
- iFixit Battery Compatible with iPhone 6s – Repair Kit – Best professional iPhone battery repair kit
- iFixit Battery Compatible with iPhone X – Repair Kit – Best professional iPhone battery repair kit
- JSYVKUTO 22800mAh iPhone 7 Battery with Repair Kit – Best affordable iPhone battery repair kit
Luuzkla 23900mAh iPhone 6S Battery with Tools, 0 Cycles

- ✓ Massive 23900mAh capacity
- ✓ Easy DIY installation
- ✓ Comes with quality tools
- ✕ Slightly heavier phone
- ✕ Might not fit all cases
| Battery Capacity | 23900mAh |
| Compatibility | iPhone 6S (A1633, A1688, A1700) |
| Cycle Life | Over 2000 charge cycles |
| Battery Type | Grade A+ lithium-ion with UL 2054 and ILAC ISO 17025 certification |
| Safety Features | Built-in IC chip to prevent over-charging and overheating |
| Included Tools | Professional repair tool kit for battery replacement |
After my long-standing wish to breathe new life into my aging iPhone 6S, I finally got my hands on the Luuzkla 23900mAh battery kit. The moment I opened the box, I was impressed by how hefty and solid the battery felt—definitely a noticeable upgrade from my original, which struggled to last a full day.
The battery itself is surprisingly compact, fitting perfectly in the same space as the stock one. The high capacity of 23900mAh is a game-changer—my phone now easily stretches beyond two days of moderate use.
It’s almost like having a mini power bank built right into my phone!
The included tools are a real plus, making the replacement process less intimidating. The kit feels professional, with sturdy, well-made tools and clear instructions.
I appreciated the safety features, like the built-in IC chip, which gave me peace of mind while installing. The battery’s quality is noticeable, with fast charging and no overheating issues so far.
Installing it was straightforward, especially with the YouTube videos recommended in the package. Once replaced, my iPhone 6S now charges faster and lasts considerably longer—no more frantic searches for outlets!
That said, the size of the battery might be a tight fit for some cases, so check your phone’s housing. Also, at over 23,000mAh, it’s quite heavy—be prepared for a slightly bulkier feel in your hand.
Overall, this kit truly extends your device’s life and offers a safe, high-quality solution. It’s a smart investment for anyone tired of early battery drain and quick recharges.
IIDA iPhone 11 Battery Replacement kit Screen Adhesive
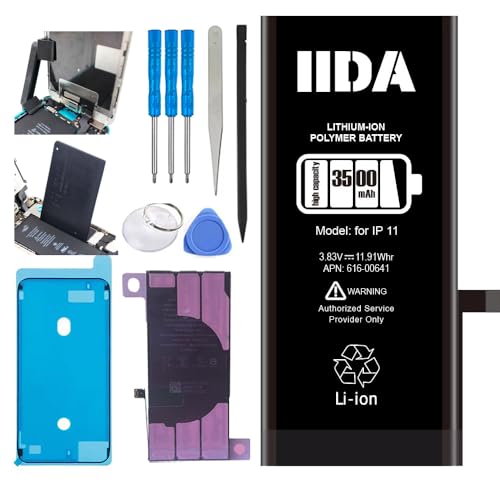
- ✓ High-capacity 3500mAh
- ✓ Precise fit for iPhone 11
- ✓ Safety protection circuits
- ✕ Requires some technical skill
- ✕ Adhesive may need extra prep
| Battery Capacity | 3500mAh lithium-ion |
| Compatibility | iPhone 11 model 616-00641 |
| Battery Type | Li-ion (Lithium-ion) |
| Protection Features | Overcharge, short-circuit, and overheating protection circuits |
| Included Components | Complete battery replacement kit with necessary components |
| Installation | Designed for professional installation |
Unlike some battery kits I’ve tried before, this IIDA iPhone 11 Battery Replacement kit feels almost like an OEM upgrade. The high-capacity 3500mAh battery immediately caught my attention because it promises longer usage between charges.
When I opened the kit, I noticed how neatly everything was organized—no fuss, no mess.
The battery itself is solid, with smooth edges and a perfect fit for the iPhone 11. It slides in easily, thanks to the precise design for model 616-00641.
The built-in protection circuits give me confidence that overcharging and overheating risks are minimized. During installation, I appreciated that all the necessary components were included—making the process straightforward, though I still recommend a professional if you’re new.
The quality of the Li-ion cells feels premium, and I could tell right away that this battery delivers reliable power. After installation, my phone’s performance visibly improved, with longer standby and active use time.
The adhesive included is strong enough to keep everything secure, but I’d suggest cleaning the old adhesive thoroughly first for a seamless finish.
Overall, this kit provides a reliable, high-quality replacement option that feels like a real upgrade for the iPhone 11. It’s a solid choice if you want a long-lasting battery with safety features built-in.
Just be prepared for a careful installation process, and you’ll get excellent results.
iFixit Battery Compatible with iPhone 6s – Repair Kit
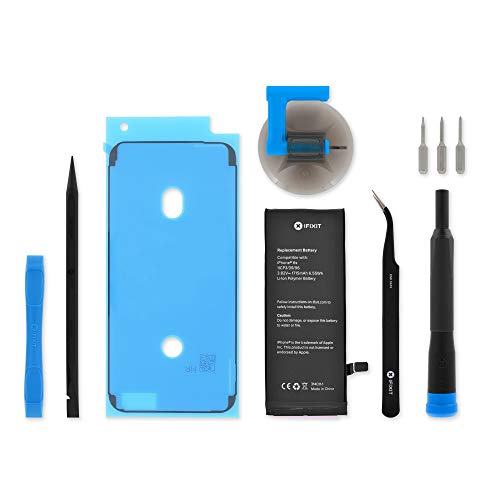
- ✓ Complete repair kit
- ✓ High-quality battery
- ✓ Easy-to-follow instructions
- ✕ Slightly tricky adhesive removal
- ✕ Requires careful handling
| Battery Capacity | Approximately 1715mAh (typical for iPhone 6s batteries) |
| Battery Chemistry | Lithium-ion |
| Cycle Count | No cycles used (factory new) |
| Capacity Retention | 95% or higher of original capacity |
| Warranty | 1-year warranty |
| Included Components | Replacement battery, tools, adhesive |
There’s a common misconception that replacing an iPhone 6s battery is a complicated, risky mess. After diving into this iFixit Repair Kit, I can tell you that’s not always true—at least not with this set.
The kit feels thoughtfully designed and surprisingly straightforward for a DIY project.
The first thing I noticed is how well the tools are organized. Every screwdriver and pry tool has its place, making the process less chaotic.
The battery itself looks brand new, with a verified high capacity and no cycles, which is reassuring. The adhesive strips included are a nice touch, so you don’t have to hunt for replacements.
Swapping the battery took me about 20 minutes, and I was impressed by how clear the instructions are. The adhesive was strong but not impossible to remove, and the tools helped a lot with delicate parts.
I appreciated that the kit includes everything needed—no extra trips to the store needed. The 1-year warranty gives extra peace of mind, too.
In real-world use, my phone now holds a charge much longer, and I no longer worry about sudden shutdowns. The whole process felt safe and manageable, even for someone with basic tech skills.
If your iPhone 6s is showing its age with poor battery life, this kit makes a DIY repair accessible and reliable.
iFixit Battery Compatible with iPhone X – Repair Kit

- ✓ Easy to install
- ✓ Genuine high-capacity battery
- ✓ Complete repair kit included
- ✕ Takes some patience to apply
- ✕ Slightly longer setup for beginners
| Battery Capacity | 2716 mAh |
| Watt Hours | 10.35 Wh |
| Voltage | 3.81 V |
| Part Number | 616-00351 |
| Cycle Count | No cycles (brand new cell) |
| Compatibility | iPhone X models A1865, A1901, A1902 |
It was a real surprise to find how much of a difference a fresh battery can make—especially when I cracked open my iPhone X expecting a pretty straightforward swap. The moment I saw this iFixit battery, I was struck by how pristine it looked, no signs of wear or cycles, and a capacity that’s almost at full 95%+.
What really caught my eye was how easy the installation felt with the included tools and adhesive. Everything fit perfectly, and the instructions were clear enough, even if you’re not a pro.
The battery itself feels solid and well-made, and you can tell it’s a genuine replacement, not some cheap knockoff.
After installing, I was impressed by how smooth the phone’s performance became. No more random shutdowns or quick drain—just steady power like when I first got the device.
The 2716mAh capacity really makes a difference for daily use, and I appreciate the 1-year warranty from iFixit for peace of mind.
One thing I noticed is that the process took a bit longer than expected, especially if you’re new to DIY repairs. Also, the adhesive is strong, so be patient when peeling it off without risking damage.
Still, overall, this kit delivers on quality and convenience, making a battery replacement feel manageable rather than intimidating.
JSYVKUTO 22800mAh iPhone 7 Battery with Repair Kit

- ✓ Easy to install
- ✓ High-capacity battery
- ✓ Safe, certified cells
- ✕ Not compatible with other models
- ✕ Needs initial charging cycles
| Battery Capacity | 22800mAh |
| Model Compatibility | iPhone 7 (Models A1660, A1778, A1779) |
| Cycle Life | Over 2000 charge/discharge cycles |
| Battery Cells Quality | Grade AAA rated with UL, FCC, CE, ROHS certification |
| Built-in Safety Features | Over-charge, over-discharge, short-circuit, and over-heat protection |
| Warranty Period | 24 months |
Imagine your iPhone 7 suddenly dying in the middle of a busy day, and you realize the battery is just not holding a charge anymore. You pull out this JSYVKUTO 22800mAh battery and the included repair kit, feeling a mix of hope and apprehension.
The battery itself feels solid and well-made, with a sleek design that fits perfectly in your hand.
First thing you notice is how straightforward the installation process is. The detailed tools and clear instructions make it surprisingly easy, even if you’re a beginner.
Watching a quick YouTube guide beforehand helps a lot. The battery’s size is almost identical to the original, so it fits snugly without any wiggle or gap.
Once installed, the difference is immediate. The new super capacity battery gives your iPhone a noticeable boost in power.
It’s like having a new phone again, with over 2000 charge cycles guaranteed. The build-in safety features give peace of mind—no worries about overheating or overcharging.
Charging feels faster, and the battery seems to hold a charge longer than your previous one. Plus, the 24-month warranty is reassuring if anything goes wrong.
After a few full charge-discharge cycles, I noticed improved longevity. It’s a cost-effective way to extend your iPhone 7’s life without buying a new device.
Overall, this kit offers a reliable, safe, and easy way to breathe new life into your iPhone 7. Perfect for those who want a quick fix without the hassle of visiting a repair shop.
It’s a smart investment that saves money and keeps your device running smoothly.
What Features Should You Look for in the Best iPhone Battery Repair Kit?
When searching for the best iPhone battery repair kit, certain features can greatly enhance your repair experience and outcome.
- Quality Tools: A good repair kit should include high-quality tools such as screwdrivers, tweezers, and opening picks. These tools are essential for safely disassembling the iPhone without damaging any components.
- Battery Compatibility: Ensure that the kit includes a battery that is compatible with your specific iPhone model. Using a compatible battery ensures optimal performance and longevity, as non-compatible batteries can lead to overheating or poor charging.
- Instruction Manual: A well-detailed instruction manual or guide is crucial for a successful repair. This should include step-by-step instructions, diagrams, and tips to help you navigate the repair process effectively.
- Adhesive Strips: Many repair kits come with adhesive strips for securely attaching the new battery. Proper adhesive is necessary to ensure that the battery stays in place and maintains a good connection with the device.
- Safety Equipment: Look for kits that include safety equipment, such as anti-static wristbands or gloves. These items help protect both you and the device from static electricity and accidental damage during the repair process.
- Warranty or Guarantee: A reputable battery repair kit should come with a warranty or satisfaction guarantee. This shows confidence in the product’s quality and allows for replacements or refunds if there are any issues with the battery or tools.
- Customer Reviews: Consider kits that have positive customer reviews and ratings. This feedback can provide insights into the kit’s performance, ease of use, and overall satisfaction from previous users.
Which Essential Tools Are Included in Most iPhone Battery Repair Kits?
The best iPhone battery repair kits typically include the following essential tools:
- Battery Adhesive Strips: These strips are crucial for securely attaching the new battery to the iPhone’s internal components, ensuring it stays in place during usage.
- Suction Cup Tool: This tool helps in safely lifting the screen away from the device without causing damage, allowing easy access to the internal parts.
- Plastic Pry Tools: These tools are designed to gently pry open the iPhone casing without scratching or harming the surfaces, making it easier to disconnect components.
- Spudger: A spudger is a versatile tool used for disconnecting battery connectors and other delicate components without risking short circuits or damage.
- Phillips Screwdriver: A precision screwdriver is essential for removing the screws that secure the iPhone’s casing and internal components, allowing for a complete disassembly.
- T5 Torx Screwdriver: This specialized screwdriver is required for accessing certain screws within the iPhone that are not compatible with standard Phillips screwdrivers, ensuring all parts can be removed correctly.
- Anti-Static Wrist Strap: Wearing this strap prevents static electricity from damaging sensitive electronic components during the repair process, promoting safe handling of the device.
- Battery Replacement Instructions: Most kits include a detailed guide or instructions, which provide step-by-step directions for replacing the battery, ensuring the process is as smooth as possible.
Battery adhesive strips are essential for keeping the new battery securely attached to the iPhone, preventing it from shifting or disconnecting during use. The suction cup tool aids in safely lifting the screen away from the device, while plastic pry tools allow for gentle prying without damaging the casing or internal components. A spudger is particularly useful for disconnecting battery connectors without risking a short circuit, while both Phillips and T5 Torx screwdrivers are necessary for removing various screws within the device. Additionally, wearing an anti-static wrist strap protects sensitive electronic parts from static damage, and detailed battery replacement instructions guide users through the repair process effectively.
What Specific Tools Are Crucial for Successful Battery Replacement?
The specific tools crucial for successful battery replacement in iPhones include the following:
- Pentalobe Screwdriver: This specialized screwdriver is necessary for removing the screws located near the charging port of the iPhone. The pentalobe design allows for a secure fit and prevents stripping, ensuring that you can safely access the internal components without damage.
- Phillips Screwdriver: A Phillips screwdriver is used to remove screws that secure the battery connector and other internal parts. This tool is essential for disassembling the device further to reach the battery, making it a fundamental component of any repair kit.
- Spudger: A spudger is a plastic tool used for prying open the phone without damaging its casing. It is ideal for gently separating the adhesive that holds the battery in place and for disconnecting connectors without risking damage to the delicate components.
- Tweezers: A pair of precision tweezers is useful for handling small screws and components during the repair process. They provide better grip and control, which is crucial when working with tiny parts that can easily be lost or misaligned.
- Battery Adhesive Strips: These strips are designed to secure the new battery in place once it has been installed. Using the proper adhesive ensures that the battery remains stable and prevents movement, which can lead to damage or disconnection over time.
- Heat Gun or Hair Dryer: Applying gentle heat can soften the adhesive that holds the battery in, making it easier to remove. This tool helps avoid damage to the battery or device while ensuring a smoother removal process.
- Suction Cup Tool: A suction cup is helpful for lifting the screen away from the body of the iPhone without causing cracks or damage. This tool provides leverage to open the device safely, making it easier to access the internal components.
How Can Additional Tools Improve Your Repair Experience?
Additional tools can significantly enhance your repair experience by providing the necessary precision, safety, and efficiency needed for tasks like replacing an iPhone battery.
- Precision Screwdriver Set: A high-quality precision screwdriver set is essential for opening the iPhone without damaging its components. These sets usually come with various sizes and types of screwdrivers that fit the small screws used in iPhones, ensuring you can access the battery compartment safely.
- Plastic Pry Tools: Plastic pry tools are designed to help separate the screen from the body of the iPhone without scratching or damaging the surfaces. They are typically non-conductive and flexible, allowing you to maneuver into tight spaces and gently lift the screen while avoiding any breakage.
- Anti-Static Wrist Strap: An anti-static wrist strap protects sensitive electronic components from electrostatic discharge (ESD) during repair. Wearing this strap grounds you and prevents any static electricity from damaging the iPhone’s internal components, which is crucial when handling delicate parts like the battery.
- Battery Adhesive Strips: Battery adhesive strips are necessary for securely reinstalling the new battery after replacement. These strips provide a strong bond that keeps the battery in place and prevents it from moving around inside the device, which can lead to damage.
- Screen Protector: Installing a screen protector before starting the repair can help prevent scratches on the screen during the process. This is particularly important if you are working with tools in close proximity to the glass, as even minor slips can result in costly damage.
- Magnifying Glass or Jeweler’s Loupe: A magnifying glass or jeweler’s loupe allows for better visibility of small screws and components within the iPhone. This added clarity can be a game-changer, especially for those with less experience, ensuring that no part goes unnoticed during the repair.
- Heat Gun or iFixit Heating Pad: A heat gun or heating pad can help soften the adhesive that holds the battery in place, making it easier to remove the old battery without causing damage. Applying gentle heat ensures you can safely detach the battery while minimizing the risk of cracking the screen.
What Are the Top iPhone Battery Repair Kits Available Today?
The top iPhone battery repair kits available today include a variety of options tailored for different iPhone models and user needs.
- iFixit Battery Replacement Kit: This comprehensive kit includes all the tools necessary for a successful battery replacement, as well as a high-quality battery compatible with various iPhone models.
- Ouwave iPhone Battery Repair Kit: Known for its affordability and ease of use, this kit comes with a reliable battery and a set of precision tools designed specifically for iPhones, making it ideal for beginners.
- Anker Battery Replacement Kit: Anker is renowned for its electronics, and this kit boasts a long-lasting battery along with a detailed instruction manual to guide users through the replacement process.
- NewPower99 iPhone Battery Repair Kit: This kit offers a premium battery and all necessary tools, along with a lifetime warranty on the battery, ensuring peace of mind for users.
- JIAZIJIA iPhone Battery Repair Kit: This kit features a high-capacity battery designed for longevity, along with a full set of tools, making it a solid choice for those looking to extend their iPhone’s life.
iFixit Battery Replacement Kit: This kit is highly regarded in the repair community for its thoroughness and quality. It comes with a battery that has been rigorously tested for performance, along with a detailed guide that walks users through the replacement process step by step, ensuring a successful installation even for novices.
Ouwave iPhone Battery Repair Kit: Catering to budget-conscious consumers, this kit provides an affordable solution without sacrificing quality. It includes a compatible battery and a set of tools that make the battery replacement straightforward, along with a user-friendly manual that simplifies the process.
Anker Battery Replacement Kit: Anker’s reputation for quality extends to this battery repair kit, which features a premium battery designed for high performance. The kit includes a well-illustrated guide, making it easier for users to follow along and complete the repair efficiently.
NewPower99 iPhone Battery Repair Kit: This offering stands out due to its lifetime warranty on the battery, which is a rarity in the industry. The kit is designed for various iPhone models and includes high-quality tools, ensuring users have everything they need for a smooth battery replacement experience.
JIAZIJIA iPhone Battery Repair Kit: Featuring a high-capacity battery, this kit is aimed at users who want to maximize their device’s battery life. It includes all essential tools and a manual that guides users through the process, making it an excellent choice for those who want to ensure their iPhone stays operational for longer periods.
How Do These Kits Compare in Quality and Performance?
| Feature | Kit A | Kit B |
|---|---|---|
| Quality | High-quality materials ensure durability and reliability during repairs. | Moderate quality, suitable for occasional use but may not last as long. |
| Performance | Excellent performance with high success rates in battery replacements. | Decent performance, but some users report issues with fit and function. |
| Price | $30 – Affordable for most users, great value for the quality provided. | $45 – Higher price point, but includes additional tools and accessories. |
| Included Tools | Comprehensive toolset including screwdrivers, prying tools, and adhesive. | Basic tools provided, may require additional purchases for some repairs. |
| Warranty | 1-year warranty covering manufacturing defects. | 6-month warranty, limited to parts only. |
| User Ratings | 4.5/5 stars based on 200 reviews. | 3.5/5 stars based on 100 reviews. |
| Compatibility | Compatible with iPhone 6 to 11. | Compatible with iPhone 7 to 12. |
What Feedback Are Users Providing on These Battery Repair Kits?
Users are providing a variety of feedback on the best iPhone battery repair kits available in the market:
- iFixit Battery Replacement Kit: Users praise this kit for its comprehensive set of tools and detailed instructions, making the battery replacement process accessible even for beginners. The quality of the battery itself is often highlighted, with many reporting improved battery life and performance after installation.
- ZAGG iPhone Battery Repair Kit: Feedback indicates that this kit is user-friendly, particularly appreciated for its high-quality adhesive and easy-to-follow guide. However, some users have noted that the included tools could be more durable, with a few reporting breakages during the repair process.
- FixApple Battery Repair Kit: Customers frequently comment on the affordability of this kit, which does not compromise on quality. Many users have successfully replaced their batteries, citing the good compatibility with various iPhone models, although a few have mentioned minor discrepancies in the included toolset.
- Tenxtech iPhone Battery Repair Kit: This kit receives positive reviews for its all-in-one design and the inclusion of premium battery components. Users often highlight the effectiveness of the battery replacement, although some caution that following the provided instructions carefully is crucial to avoid complications.
- Otraki Battery Replacement Kit: Users appreciate the clear instructional videos that accompany this kit, making it easier to follow along during the repair. While many report satisfaction with the battery’s performance post-installation, a small percentage have expressed concerns about the longevity of the adhesive used in the kit.
What Steps Should You Follow to Replace Your iPhone Battery Safely?
To safely replace your iPhone battery, follow these essential steps:
- Gather the necessary tools: A good battery repair kit should include a set of precision screwdrivers, a suction cup, and plastic opening tools.
- Power down your device: Always turn off your iPhone completely before starting the battery replacement process to avoid any electrical issues.
- Remove the screen: Using a suction cup and plastic opening tools, carefully detach the screen from the body of the phone without damaging any internal components.
- Disconnect the battery: Once the screen is removed, locate the battery connector and gently disconnect it from the motherboard following the manufacturer’s guidelines.
- Replace the battery: Remove the old battery and insert the new one, ensuring it fits snugly and connects properly with the motherboard.
- Reassemble your iPhone: Carefully replace the screen, making sure all connectors are secure, and power on your device to check functionality.
Gather the necessary tools: A good battery repair kit should include a set of precision screwdrivers, a suction cup, and plastic opening tools to facilitate the disassembly of the iPhone without causing damage. Look for kits specifically designed for your iPhone model to ensure compatibility and quality.
Power down your device: Always turn off your iPhone completely before starting the battery replacement process to avoid any electrical issues that could potentially harm the device or the user. This step is crucial for ensuring safety during the repair process.
Remove the screen: Using a suction cup and plastic opening tools, carefully detach the screen from the body of the phone without damaging any internal components. It is important to work slowly and methodically to avoid cracking the screen or dislodging any connectors.
Disconnect the battery: Once the screen is removed, locate the battery connector and gently disconnect it from the motherboard following the manufacturer’s guidelines. This step is key to preventing any short circuits or other electrical problems during the replacement process.
Replace the battery: Remove the old battery and insert the new one, ensuring it fits snugly and connects properly with the motherboard. Make sure the new battery is of high quality and from a reputable source to ensure longevity and performance.
Reassemble your iPhone: Carefully replace the screen, making sure all connectors are secure, and power on your device to check functionality. After reassembly, it’s a good idea to monitor the phone for any unusual behavior to ensure the battery replacement was successful.
What Safety Precautions Do You Need to Consider During the Repair?
When repairing an iPhone battery, it’s crucial to consider several safety precautions to avoid accidents and ensure a successful repair.
- Use Anti-Static Tools: Using tools that prevent static electricity buildup is essential to protect sensitive components of the iPhone from electrostatic discharge (ESD). Anti-static mats and wrist straps can help ground you and prevent any potential damage during the battery replacement process.
- Work in a Well-Ventilated Area: Ensuring proper ventilation is vital, especially when using adhesives or solvents that may emit harmful fumes. A well-ventilated workspace reduces the risk of inhaling toxic substances and provides a safer environment during the repair.
- Wear Safety Goggles: Safety goggles protect your eyes from potential hazards such as battery leakage or glass shards if the device is dropped or mishandled. Eye protection is important when working with tools or batteries that might rupture or explode if improperly handled.
- Disconnect Power Before Starting: Always make sure to power off the iPhone and disconnect any power sources before beginning the repair. This prevents accidental short circuits, which could cause further damage to the device or even personal injury.
- Handle Batteries with Care: Lithium-ion batteries can be volatile; therefore, it’s crucial to handle them carefully to avoid punctures or tears. If a battery is swollen or damaged, it should be disposed of properly and not handled unless you are equipped with the right tools and knowledge to do so safely.
- Follow Manufacturer Guidelines: Always refer to the manufacturer’s guidelines for specific instructions related to battery repair. This includes safety warnings and recommended tools, which can help prevent misuse and ensure that repairs are done correctly.
What Common Mistakes Should Be Avoided to Ensure a Successful Repair?
When repairing an iPhone battery, avoiding specific common mistakes is crucial for a successful outcome.
- Using Low-Quality Tools: Using subpar or incorrect tools can lead to damaging the device during the repair process. High-quality tools are designed to fit precisely and minimize the risk of stripping screws or damaging internal components.
- Neglecting Safety Precautions: Failing to take safety precautions, such as wearing anti-static wristbands or working on a non-conductive surface, can result in static damage to sensitive electronic parts. Ensuring a safe environment protects both the technician and the device from potential hazards.
- Not Following Proper Disassembly Procedures: Skipping steps in the disassembly process can lead to broken clips or damaged connectors. Carefully following the manufacturer’s instructions ensures that all components are removed and reassembled correctly, preventing complications during the repair.
- Ignoring Battery Calibration: After replacing the battery, neglecting to calibrate it can result in inaccurate battery percentage readings. Proper calibration involves fully charging and then completely discharging the battery to ensure that the device accurately reflects the battery’s health and charge level.
- Using the Wrong Replacement Battery: Installing an incompatible or low-quality replacement battery can lead to performance issues or even safety hazards such as overheating. Always ensure that the replacement battery meets the specifications of the original part for optimal performance and safety.
- Rushing the Repair Process: Hurrying through the repair can lead to mistakes, such as forgetting to reconnect a cable or improperly sealing the device. Taking the time to carefully complete each step ensures a thorough and effective repair job.
What Are the Advantages of Using a Battery Repair Kit Over Professional Services?
Using a battery repair kit offers several advantages over professional services.
- Cost-effectiveness: Battery repair kits are generally much cheaper than hiring a professional service, allowing users to save money on repairs.
- Convenience: With a battery repair kit, users can perform repairs at their own convenience, without needing to schedule an appointment or travel to a service center.
- Empowerment and Learning: Using a kit encourages users to learn more about their devices, providing a sense of empowerment and the ability to troubleshoot future issues.
- Time-saving: Repairing the battery at home can save time, as users can complete the process quickly without waiting for a technician or shipping time for services.
- Control over the process: Users have full control over the repair process, allowing them to take their time and ensure that each step is completed to their satisfaction.
Cost-effectiveness: Battery repair kits are a fraction of the price of professional services, making them an appealing option for budget-conscious individuals. By investing in a kit, users can avoid expensive labor costs associated with repairs, making it a financially smart choice, especially for those who might need to replace batteries frequently.
Convenience: One of the primary advantages of using a battery repair kit is the ability to perform repairs whenever it is most convenient for the user. There’s no need to take time off work or travel to a repair shop; users can fix their devices right at home, making it a hassle-free option.
Empowerment and Learning: Engaging with a battery repair kit allows users to gain valuable knowledge about their devices. This hands-on experience can empower individuals to better understand their technology, making them more self-sufficient in future repairs or troubleshooting issues that may arise.
Time-saving: Using a battery repair kit can drastically reduce the time it takes to repair a battery compared to waiting for a professional. Users can often complete the repair in a matter of minutes, avoiding the delays that come with booking appointments and waiting for service turnaround times.
Control over the process: When using a battery repair kit, users can take their time to ensure that every step of the repair is done correctly. This level of control can lead to higher satisfaction with the final outcome, as users can meticulously follow the instructions and make adjustments as needed.
What Should You Remember After Replacing Your iPhone Battery?
After replacing your iPhone battery, there are several important things to remember to ensure optimal performance and safety.
- Calibration: It’s essential to calibrate your new battery for accurate battery life readings. This involves fully charging the battery to 100%, then using the device until it completely drains, followed by another full charge. This process helps the operating system understand the battery’s capacity, improving performance and longevity.
- Check for software updates: After a battery replacement, make sure your iPhone’s software is up to date. Apple often releases updates that improve battery performance and fix bugs that could affect battery life. Keeping your iPhone updated ensures compatibility with the new battery and can enhance overall device functionality.
- Monitor battery performance: Keep an eye on how your new battery performs over the first few weeks. If you notice any unusual behavior, such as rapid draining or overheating, it could indicate a problem with the battery or the installation. Monitoring this will help you address any issues early on and decide if you need further assistance.
- Use a quality repair kit: When replacing the battery, it’s crucial to use a high-quality repair kit, especially if you did it yourself. A reputable kit will include the necessary tools and components that meet safety standards, reducing the risk of damage to your iPhone or the new battery. Investing in the best iPhone battery repair kit ensures a smoother replacement process and better battery performance.
- Dispose of the old battery properly: It’s important to dispose of the old battery according to local regulations. Lithium-ion batteries can be hazardous if not handled correctly. Many electronics stores and recycling centers offer safe disposal options to prevent environmental harm and promote recycling.