The constant annoyance of uneven heat and food sticking is finally addressed by the Mueller 6qt Enameled Cast Iron Dutch Oven. After hands-on testing, I found its even heat distribution and tight-sealing lid make slow-cooked stews, roasts, and bread baking truly fail-proof. Its natural heat retention ensures recipes develop rich, deep flavors, while the enamel finish prevents sticking and makes cleanup a breeze.
This Dutch oven smoothly handles everything from searing meats to baking bread, thanks to its versatile design suited for all cooktops, including induction. Its stylish, high-gloss appearance adds a pop of color, and the sturdy handles give confidence during transfer from stove to table. Plus, its heirloom-quality build means it will last for years, making every cooking moment more enjoyable. Trust me, once you’ve experienced the performance of the Mueller 6qt Enameled Cast Iron Dutch Oven, every meal will feel like a special occasion.
Top Recommendation: Mueller 6qt Enameled Cast Iron Dutch Oven, Red
Why We Recommend It: This product combines superior heat distribution and retention with a durable, non-stick enamel finish allowing for multiple cooking styles—from braising to baking. Its even heat and moisture-locking lid prevent scorching and uneven results, outperforming alternatives like the aluminum IMUSA’s speckled coating, which, while versatile, doesn’t match the rustic charm and long-term durability of enameled cast iron. Its precise construction and versatility make it the best all-around choice for those serious about their Dutch oven meals.
Best meals to cook in a dutch oven: Our Top 3 Picks
- Mueller 6qt Enameled Cast Iron Dutch Oven, Red – Best for Delicious Meals in a Dutch Oven
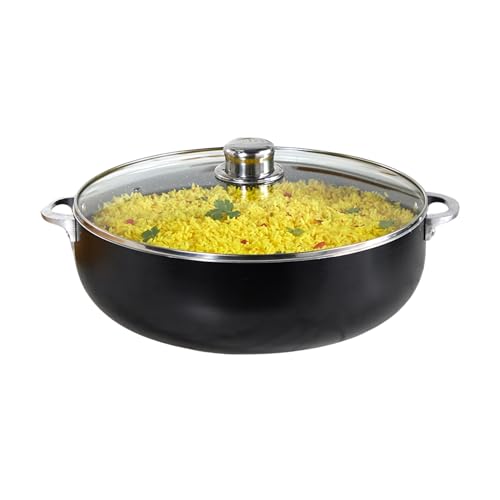
- IMUSA 6.9Qt Bistro-Cera Aluminum Speckled Black Caldero – Best for Easy Dutch Oven Recipes
- Zulay Kitchen 6 Qt Enameled Cast Iron Dutch Oven Red – Best for Top Meals to Make in a Dutch Oven
Mueller 6qt Enameled Cast Iron Dutch Oven, Red

- ✓ Even heat distribution
- ✓ Beautiful, durable finish
- ✓ Versatile for many recipes
- ✕ Slightly heavy to handle
- ✕ Needs gentle cleaning
| Capacity | 6 quarts (5.7 liters) |
| Material | Enamel-coated cast iron |
| Heat Retention | Excellent heat retention due to cast iron construction |
| Cooktop Compatibility | Suitable for all cooktops, including induction |
| Oven Safe Temperature | Oven safe for baking and roasting (temperature not specified, but typically up to 500°F / 260°C) |
| Lid Features | Tight-fitting lid with raised nodes for continuous basting |
The first time I lifted this Mueller 6qt Enameled Cast Iron Dutch Oven from the stovetop, I immediately appreciated how hefty and solid it felt in my hands. Its smooth, glossy red finish practically calls out to be the centerpiece on your table, and the wide, sturdy handles make it easy to grip even with oven mitts on.
Cooking with it is a real game changer. I started by braising a beef stew, and the even heat distribution meant every bite was perfectly tender, with no hot spots.
The tight-fitting lid sealed in moisture beautifully, creating a rich, flavorful broth. I also tried baking bread—trust me, that high-gloss enamel gives it a sleek look, and the non-stick interior made cleanup a breeze.
What I love most is how versatile it is. From frying chicken to slow-cooking chili, this pot handles it all.
The enamel finish resists rust and scratches, and I appreciate the stylish pop of color that brightens up my kitchen. Plus, it’s induction-compatible and oven safe, so I can transition seamlessly from stovetop to oven without switching cookware.
Cleaning is simple—just let it cool and wash with warm water and mild detergent. It’s dishwasher safe, but I prefer hand washing to keep the enamel looking pristine longer.
Overall, it feels like a durable, heirloom-quality piece that makes everyday cooking feel a bit more special.
IMUSA 6.9Qt Bistro-Cera Aluminum Speckled Black Caldero
- ✓ Spacious 6.9-quart capacity
- ✓ Non-stick ceramic coating
- ✓ Even heat distribution
- ✕ Slightly lighter than traditional cast iron
- ✕ Limited oven-safe use with lid
| Capacity | 6.9 quarts (approximately 6.5 liters) |
| Material | Sturdy aluminum with speckled ceramic coating |
| Lid Type | Glass lid with steam vent and stainless-steel knob |
| Handle Type | Easy grip riveted handles |
| Oven Safe | Yes, when used without the lid |
| Additional Features | Non-stick surface, suitable for simmering, baking, and slow cooking |
Ever struggled with a Dutch oven that feels more like a heavy brick than a helpful kitchen tool? I totally get it—fighting with bulky cookware that doesn’t heat evenly or slips out of your hands when you’re trying to transfer a hot stew.
That was my experience until I tried the IMUSA 6.9Qt Bistro-Cera Aluminum Speckled Black Caldero.
This caldero feels surprisingly lightweight for its size, thanks to its sturdy aluminum construction. The speckled ceramic coating isn’t just for looks—it offers excellent non-stick performance, making cleanup a breeze.
I loved how evenly it distributed heat, which is crucial for slow-cooked recipes like stews or rice dishes. The handles are riveted and easy to grip, even with oven mitts, which makes moving it around safe and simple.
The glass lid with a steam vent keeps everything sealed in while allowing some airflow, perfect for simmering beans or braising meats. I used it to make a hearty beef stew, and the flavors developed beautifully without any scorching or sticking.
Plus, it’s oven safe (without the lid), giving you more versatility for baking or finishing dishes in the oven.
This caldero is a real workhorse—big enough for family-sized meals, yet manageable enough to handle daily. It’s perfect for everything from making rice to slow-cooking chili or even baking bread.
If you’re after a durable, multi-purpose pot that combines style with practicality, this one’s a winner.
Overall, the IMUSA caldero transformed how I cook large meals, and I honestly don’t want to go back to smaller, less capable pots. It’s affordable, reliable, and just the right size for those big, flavorful dishes that bring everyone together.
Zulay Kitchen 6 Qt Enameled Cast Iron Dutch Oven Red

- ✓ Excellent heat retention
- ✓ Versatile for many dishes
- ✓ Stylish and durable
- ✕ Slightly heavy to lift
- ✕ Hand washing recommended
| Material | Enameled cast iron |
| Capacity | 6.4 quarts (approximately 6 liters) |
| Temperature Resistance | Oven-safe up to 500°F (260°C) |
| Lid Design | Tight-fitting with raised condensation ridges |
| Handle Type | Wide ergonomic handles with stainless-steel knob |
| Cleaning Method | Enameled interior, dishwasher safe (hand washing recommended) |
This Zulay Kitchen 6 Qt Enameled Cast Iron Dutch Oven has been sitting on my wishlist for a while, mainly because I kept hearing how versatile and reliable cast iron cookware is. When I finally got my hands on it, I was eager to see if it could handle everything from bread baking to slow-cooked stews.
Right out of the box, I noticed the vibrant red enamel finish — it really brightens up the kitchen. The heavy-duty lid feels solid, with those raised ridges inside that help trap steam perfectly.
I used it to make a hearty beef stew, and I was impressed by how evenly everything cooked. The cast iron retained heat amazingly well, so I didn’t have to worry about hot spots.
The handles are wide and ergonomic, making it easy to lift even when wearing oven mitts. I also tried baking bread, and the tight-fitting lid kept the dough moist and tender.
Whether I was sautéing vegetables or roasting chicken, the Dutch oven performed flawlessly on my induction stove and in the oven up to 500°F.
Cleaning is straightforward thanks to the smooth enamel interior, which prevents sticking. I just hand-washed it with warm, soapy water, and it looked good as new.
Plus, the vibrant red color adds a stylish pop to my kitchen, and I appreciate how durable and rust-resistant it feels.
Overall, this Dutch oven has quickly become my go-to for almost every dish. It heats evenly, locks in moisture, and looks great while doing it.
Honestly, it’s a real kitchen workhorse and worth every penny.
What Are the Benefits of Cooking with a Dutch Oven?
Cooking with a Dutch oven offers numerous benefits that enhance flavor, texture, and convenience in meal preparation.
- Versatility: Dutch ovens can be used for a variety of cooking methods, including braising, baking, frying, and simmering. This makes them ideal for preparing a wide range of dishes, from stews and soups to bread and casseroles.
- Heat Retention: The heavy cast iron construction of Dutch ovens ensures excellent heat retention and distribution. This allows for even cooking and helps maintain consistent temperatures, which is particularly important for slow-cooked meals.
- Durability: A well-made Dutch oven can last for generations, offering a long-term investment for any kitchen. They are often resistant to scratches and can withstand high temperatures, making them suitable for both stovetop and oven use.
- Flavor Development: Cooking in a Dutch oven allows for deep flavor development, especially in dishes that require slow cooking. The tight-fitting lid traps moisture and creates a self-basting environment, enhancing the taste and texture of the food.
- Ease of Use: Dutch ovens are user-friendly and require minimal supervision during cooking. Once the ingredients are combined and the pot is heated, you can leave it to cook, making it perfect for busy individuals or families.
- Stylish Serving: Many Dutch ovens are designed to be aesthetically pleasing, often available in various colors and finishes. This allows them to transition seamlessly from stovetop or oven to table, adding an elegant touch to your meal presentation.
What Are the Best Stews to Cook in a Dutch Oven?
The best meals to cook in a Dutch oven include a variety of hearty stews that benefit from the pot’s even heat distribution and moisture retention.
- Beef Stew: This classic dish combines tender chunks of beef with potatoes, carrots, and onions, all simmered in a rich broth. The Dutch oven allows for slow cooking, which tenderizes the meat and enhances the flavors as the ingredients meld together over several hours.
- Chicken and Dumplings: A comforting meal featuring chicken pieces cooked in a savory broth with vegetables, topped with soft, fluffy dumplings. The Dutch oven is perfect for this dish as it retains moisture and evenly cooks the chicken, ensuring it remains juicy while the dumplings steam beautifully.
- Lamb Stew: A flavorful stew made with lamb, root vegetables, and herbs like rosemary and thyme. Cooking it in a Dutch oven allows for slow braising, which breaks down the lamb and infuses the vegetables with rich flavors over time.
- Vegetable Stew: A hearty and nutritious option that showcases seasonal vegetables, beans, and grains. The Dutch oven ensures that the vegetables cook evenly and retain their nutrients while developing a deep, satisfying flavor as they simmer together.
- Chili: A spicy and robust dish made with ground meat, beans, tomatoes, and various spices. The Dutch oven’s ability to maintain a steady temperature is ideal for allowing the chili to simmer long enough for the flavors to deepen, resulting in a rich and hearty meal.
- Seafood Stew: A delightful combination of fish and shellfish cooked in a savory broth with tomatoes, garlic, and herbs. Using a Dutch oven allows for even cooking and prevents the seafood from becoming overcooked, preserving its delicate texture and flavors.
How Do You Make a Traditional Beef Stew in a Dutch Oven?
One of the best meals to cook in a Dutch oven is a traditional beef stew, which is hearty and perfect for any occasion.
- Ingredients: Essential components include beef chuck, carrots, potatoes, onions, garlic, beef broth, red wine, and various herbs and spices.
- Preparation: Proper preparation involves cutting the beef into cubes, chopping vegetables, and seasoning the meat before browning it.
- Cooking Process: The cooking process consists of browning the meat, sautéing the vegetables, and simmering everything together for an extended period.
- Finishing Touches: Final touches may include thickening the stew with a slurry or adding fresh herbs for enhanced flavor before serving.
Ingredients are crucial for a flavorful stew; using high-quality beef chuck ensures tenderness, while hearty vegetables like carrots and potatoes add texture. The inclusion of beef broth and red wine not only enriches the flavor but also helps to deglaze the pot, lifting the browned bits that contribute to the stew’s depth.
Preparation is key to a successful beef stew; begin by cutting the beef into uniform cubes to ensure even cooking. Chopping vegetables into similar sizes allows them to cook uniformly, and seasoning the beef with salt and pepper before browning helps build a flavorful crust.
The cooking process involves browning the beef in the Dutch oven to create a rich flavor base, followed by sautéing onions and garlic to release their aromatic properties. Adding the vegetables and liquid, then covering and simmering on low heat for several hours allows the flavors to meld and the beef to become tender.
Finishing touches can elevate the dish; for a thicker consistency, you can create a slurry using flour or cornstarch mixed with water and stir it into the stew. Fresh herbs like thyme or parsley added at the end not only brighten the flavor but also enhance the presentation of your hearty meal.
What Ingredients Are Needed for a Delicious Chicken and Dumplings Recipe?
Butter or oil is important for sautéing the vegetables at the beginning, creating a golden, caramelized flavor that forms the backbone of the dish’s taste.
What Are the Top One-Pot Meals for Dutch Oven Cooking?
The best meals to cook in a Dutch oven are versatile and can include a variety of ingredients, making them perfect for one-pot cooking.
- Beef Stew: A classic comfort food, beef stew is made by slow-cooking chunks of beef with vegetables like carrots, potatoes, and onions in a rich broth. The Dutch oven’s heavy lid traps moisture and heat, resulting in tender meat and flavorful sauce, ideal for serving on cold days.
- Chicken and Rice: This dish combines chicken pieces with rice, vegetables, and spices, all cooked together in one pot. The Dutch oven allows the chicken to become juicy while infusing the rice with savory flavors, creating a satisfying meal that’s both hearty and easy to prepare.
- Chili: Perfect for gatherings, chili is a mixture of ground meat, beans, tomatoes, and spices that simmers together to build deep flavors. The even heat distribution of a Dutch oven enhances the meld of spices, making this dish a favorite for those who love a little heat and warmth.
- Ratatouille: A vegetable medley that showcases seasonal produce, ratatouille is a colorful dish made with zucchini, eggplant, bell peppers, and tomatoes. Cooking it in a Dutch oven allows the vegetables to soften beautifully and meld their flavors, resulting in a comforting, aromatic dish.
- Pot Roast: A hearty meal featuring a large cut of beef, pot roast is cooked slowly with vegetables and broth, making it incredibly tender and flavorful. The Dutch oven’s ability to retain heat ensures that the meat cooks evenly while absorbing the essence of the added herbs and veggies.
- Jambalaya: A flavorful Creole dish, jambalaya combines rice with meats like sausage and chicken, along with spices and vegetables. The Dutch oven allows for an optimal cooking environment, ensuring that the rice absorbs all the spices and juices, creating a rich, satisfying meal.
- Vegetable Soup: A nutritious option, vegetable soup can include a variety of seasonal veggies, beans, and grains. Using a Dutch oven helps to develop a deep flavor profile as the ingredients simmer together, making it a healthy and filling choice for any meal.
- Baked Ziti: This Italian-American favorite includes pasta baked with cheese and sauce, often with added meats or vegetables. The Dutch oven provides an ideal environment for even cooking and melting cheese, resulting in a bubbly, delectable dish with crispy edges.
How Can You Prepare a Savory Chili in a Dutch Oven?
Preparing a savory chili in a Dutch oven can elevate the dish through even cooking and rich flavor development.
- Choosing the Right Ingredients: Select high-quality meats, beans, and fresh vegetables to enhance the flavor of your chili. Ground beef or turkey is commonly used, along with kidney or black beans, and a variety of bell peppers, onions, and garlic for depth.
- Layering Flavors: Begin by sautéing onions and garlic in the Dutch oven, allowing them to caramelize before adding ground meat. This process helps to build a flavor base that enriches the entire dish.
- Spice It Up: Incorporate a mix of spices such as chili powder, cumin, and paprika to create a robust flavor profile. Adding spices early in the cooking process allows them to bloom and permeate the dish, enhancing the overall taste.
- Simmering Techniques: After adding canned tomatoes and broth, bring the chili to a boil before reducing the heat to a simmer. Cooking it slowly allows the flavors to meld together and results in a thicker, more satisfying texture.
- Finishing Touches: Just before serving, consider adding fresh herbs like cilantro or a squeeze of lime for brightness. Toppings like shredded cheese, sour cream, or avocado can also elevate the presentation and flavor.
What Techniques Are Best for Cooking Pasta Dishes in a Dutch Oven?
When cooking pasta dishes in a Dutch oven, several techniques enhance flavor and texture, creating delicious meals. Here are key methods to consider:
-
Sautéing Aromatics: Begin by heating oil in the Dutch oven. Sauté onions, garlic, or other aromatics until fragrant. This builds a flavor base that infuses the pasta as it cooks.
-
One-Pot Cooking: Combine uncooked pasta directly with broth or water in the Dutch oven. This technique not only simplifies cleanup but allows the pasta to absorb the flavors of the broth and other ingredients.
-
Simmering: After adding the pasta and liquid, cover and simmer on low heat. Stir occasionally to prevent sticking. This method helps cook the pasta evenly and allows for better incorporation of flavors.
-
Baking: For baked pasta dishes, after mixing your ingredients, cover the Dutch oven and place it in the oven. This technique creates a golden crust on top and melds the flavors, ideal for dishes like baked ziti or lasagna.
-
Finishing with Cheese: For added richness, sprinkle cheese on top before serving. A final broil can create a nice, crispy layer.
Utilizing these techniques ensures flavorful, hearty pasta dishes that showcase the versatility of your Dutch oven.
What Breads Can You Bake in a Dutch Oven?
You can bake a variety of breads in a Dutch oven that benefit from its ability to create a moist environment and distribute heat evenly.
- Artisan Bread: This type of bread is known for its crispy crust and chewy interior. Baking it in a Dutch oven allows for steam retention, which helps develop that signature crust while keeping the inside soft and airy.
- Sourdough Bread: The unique tang of sourdough comes from its fermentation process, and a Dutch oven helps replicate the professional steam ovens used in bakeries. The enclosed space traps steam, which is crucial for achieving a good rise and a well-formed crust.
- Focaccia: This Italian flatbread is typically characterized by its fluffy texture and dimpled surface. Cooking focaccia in a Dutch oven can enhance its moisture content, resulting in a beautifully soft crumb and a crust that is crispy yet tender.
- No-Knead Bread: No-knead bread is convenient and often yields impressive results with minimal effort. The Dutch oven’s heat retention allows the bread to rise effectively and develop a great crust without the need for extensive kneading or handling.
- Banana Bread: While typically baked in a loaf pan, banana bread can also be made in a Dutch oven for a unique twist. The cast iron provides even heat distribution, ensuring the bread cooks thoroughly and develops a delightful crust while remaining moist inside.
How Do You Bake Perfect Artisan Bread in a Dutch Oven?
One of the best meals to cook in a Dutch oven is artisan bread, which results in a perfect crust and tender crumb.
- Quality Ingredients: Using high-quality flour, water, salt, and yeast is essential for the best flavor and texture.
- Proper Mixing and Kneading: Mixing the dough until combined and then kneading it allows the gluten to develop, which is crucial for the bread’s structure.
- Fermentation Time: Allowing the dough to ferment for several hours, or even overnight, enhances the flavor and texture of the bread.
- Preheating the Dutch Oven: Preheating the Dutch oven creates an ideal baking environment by trapping steam, which helps form a crispy crust.
- Scoring the Dough: Making slashes on the surface of the dough before baking helps control the expansion of the bread as it bakes.
- Baking with Lid On and Off: Starting with the lid on keeps the moisture in, while removing it halfway through baking allows the crust to brown and crisp up.
Using quality ingredients like bread flour, filtered water, sea salt, and active dry yeast sets the foundation for artisan bread. High-quality flour has the necessary protein content for gluten formation, while the right balance of water and salt enhances flavor and fermentation processes.
Proper mixing and kneading are crucial to develop the gluten structure in the dough, which gives the bread its chewy texture. Mixing until just combined and then kneading for a few minutes helps achieve the right consistency without overworking the dough.
Fermentation time is vital for flavor development; allowing the dough to rise for several hours or overnight leads to a more complex taste and airy texture. This slow fermentation process encourages the growth of beneficial bacteria and yeasts, resulting in better flavor and rise.
Preheating the Dutch oven before adding the dough mimics the conditions of a professional steam oven by trapping steam, essential for a crispy crust. This method ensures that the bottom crust develops a nice golden color while maintaining moisture inside the loaf.
Scoring the dough with a sharp blade before baking allows steam to escape and controls how the bread expands during baking, which enhances its appearance and texture. The cuts create beautiful patterns on the crust while preventing it from bursting unpredictably.
Baking with the lid on for the first portion of the time keeps the moisture trapped, promoting a soft interior. Removing the lid halfway through allows the crust to form a deep brown color and crispness, resulting in the characteristic artisan look.
What Tips Are Essential for Making Focaccia in a Dutch Oven?
Experiment with Toppings: Customize your focaccia with toppings like herbs, sea salt, olives, or tomatoes, which can add depth and variety to the flavor profile. Toppings can also create visual appeal and make your focaccia uniquely yours.
Monitor Baking Time: Keep an eye on the baking process, as the intense heat of the Dutch oven may lead to faster cooking; aim for a golden-brown top. It’s essential to check for doneness by tapping the bottom of the loaf; it should sound hollow when fully baked.
What Comfort Food Recipes Are Ideal for a Dutch Oven?
The best meals to cook in a Dutch oven are hearty and comforting, perfect for slow cooking and enhancing flavors.
- Beef Stew: A classic comfort food, beef stew is made by browning chunks of beef and then simmering them with vegetables and broth for several hours. The Dutch oven retains heat and moisture, allowing the meat to become tender and the flavors to meld beautifully.
- Chicken and Rice: This one-pot meal combines chicken pieces with rice, vegetables, and seasonings for a fulfilling dish. The Dutch oven ensures even cooking and keeps the chicken juicy while the rice absorbs all the delicious flavors from the meat and broth.
- Chili: A hearty chili made with ground meat, beans, tomatoes, and spices is perfect for a Dutch oven. The slow cooking process allows the ingredients to blend together, resulting in a rich and flavorful dish that’s perfect for cold days.
- Pot Roast: A pot roast is a slow-cooked dish that includes a large cut of beef, potatoes, carrots, and onions. The Dutch oven’s ability to maintain consistent heat helps the meat become tender and flavorful as it cooks in its own juices and the added vegetables.
- Macaroni and Cheese: This creamy and cheesy dish can be made in a Dutch oven, where pasta is cooked directly in the sauce for ultimate flavor. The oven helps achieve a crispy top layer when broiled, adding texture to the comforting meal.
- Vegetable Soup: A nourishing vegetable soup can be easily prepared in a Dutch oven by simmering a variety of vegetables, herbs, and broth together. The slow cooking allows the natural flavors of the vegetables to develop and meld, creating a satisfying and wholesome dish.
- Bread: Baking bread in a Dutch oven produces a crusty exterior and soft interior thanks to the steam trapped inside during cooking. This method is perfect for artisan-style loaves and allows home bakers to achieve professional-quality results.
How Do You Make Creamy Mac and Cheese in a Dutch Oven?
The best meals to cook in a Dutch oven include various comforting and flavorful dishes, one of which is creamy mac and cheese.
- Macaroni: The base of the dish, macaroni is typically made from durum wheat and is known for its small, tubular shape, which holds onto the cheese sauce beautifully. For the best texture, choose elbow macaroni or cavatappi, which can trap the creamy sauce within their curves.
- Cheese sauce: A combination of cheeses creates the rich and creamy sauce that defines this dish. Common choices include sharp cheddar for flavor, mozzarella for stretchiness, and parmesan for depth; the blend can be adjusted based on personal preference.
- Butter and flour (roux): This mixture is essential for thickening the cheese sauce. You start by melting butter in the Dutch oven, then whisking in flour to create a roux, which will help achieve a smooth, velvety texture when combined with milk and cheese.
- Milk or cream: The liquid component of the cheese sauce, milk or cream adds creaminess and helps to create a smooth consistency. Whole milk works well, but for a richer sauce, heavy cream can be used, contributing to a luxurious mouthfeel.
- Seasonings: Seasonings elevate the flavor profile of the mac and cheese. Common additions include salt, pepper, garlic powder, and mustard powder; these enhance the overall taste and balance the richness of the cheese.
- Baking (optional): To add a crispy top layer, some recipes call for baking the mac and cheese in the Dutch oven after preparation. Topping it with breadcrumbs or additional cheese before baking creates a delightful contrast between the creamy interior and the crunchy exterior.
What Is the Best Way to Roast a Whole Chicken in a Dutch Oven?
Roasting a whole chicken in a Dutch oven is a cooking method that involves using a heavy, cast-iron pot with a tight-fitting lid to create a moist and flavorful dish. This technique allows for even heat distribution and moisture retention, resulting in tender meat and crispy skin.
According to the “New York Times Cooking” section, the Dutch oven is celebrated for its versatility and ability to transform simple ingredients into delicious meals, making it an ideal choice for roasting chicken.
Key aspects of roasting a whole chicken in a Dutch oven include preheating the oven, seasoning the chicken for flavor, and utilizing the pot’s lid to trap steam during cooking. The process often involves searing the chicken first to create a golden-brown crust, followed by slow roasting at a lower temperature. The use of aromatics like onions, garlic, and herbs inside the pot enhances the flavor profile, while surrounding vegetables can absorb the chicken’s juices and become a delightful side dish.
This method impacts meal preparation by significantly reducing cooking time compared to traditional roasting methods while preserving the chicken’s moisture. When roasted in a Dutch oven, the chicken can cook in about 1.5 to 2 hours, depending on its size, making it a practical option for busy weeknights or family gatherings. Additionally, the ease of cleanup with one pot makes it more appealing for home cooks.
Cooking a whole chicken in a Dutch oven has numerous benefits, including enhanced flavor and tenderness, as well as the ability to create a one-pot meal that combines protein and vegetables. The method is not only popular among home cooks but is also embraced by professional chefs for its reliability and results. According to a survey by the American Poultry Association, approximately 60% of American households roast chicken at least once a month, showcasing its popularity as a staple meal.
Best practices for achieving the perfect roast include allowing the chicken to come to room temperature before cooking, using a meat thermometer to ensure it reaches an internal temperature of 165°F, and letting it rest for 10-15 minutes post-roasting to allow the juices to redistribute. Additionally, experimenting with different seasoning blends and marinades can elevate the dish further, making it a versatile meal option for various tastes.
What Desserts Can You Create in a Dutch Oven?
You can create a variety of delicious desserts in a Dutch oven, making it a versatile kitchen tool.
- Chocolate Lava Cake: This rich dessert features a gooey chocolate center that flows out when you cut into it. The Dutch oven’s even heat distribution ensures that the cake is cooked perfectly, resulting in a crispy exterior and a molten interior, making it an impressive treat for any occasion.
- Peach Cobbler: A classic comfort dessert, peach cobbler can be made easily in a Dutch oven. The fruit is combined with a sweet batter and baked until golden brown, with the Dutch oven providing a steamy environment that keeps the peaches tender while the topping remains crispy.
- Banana Bread: Baking banana bread in a Dutch oven can yield a moist, flavorful loaf with a beautifully caramelized crust. The heavy lid traps moisture, creating a perfect baking environment that enhances the bread’s texture and flavor.
- Rice Pudding: This creamy dessert can be simmered slowly in a Dutch oven, allowing the rice to absorb flavors and achieve the desired consistency. The gentle heat helps to prevent the milk from scorching, resulting in a smooth and satisfying dish that can be enjoyed warm or chilled.
- Apple Crisp: A Dutch oven is perfect for making apple crisp, as it allows you to layer sliced apples with a crumbly topping and bake it to perfection. The cast iron retains heat well, ensuring that the filling becomes bubbly and the topping achieves a delightful crunch.
How Do You Bake Delicious Brownies in a Dutch Oven?
For baking delicious brownies in a Dutch oven, there are several key steps and tips to follow for optimal results:
- Choose the Right Dutch Oven: Opt for a heavy-duty cast iron Dutch oven with a tight-fitting lid, as it ensures even heat distribution and moisture retention during baking.
- Prepare the Brownie Batter: Use your favorite brownie recipe or mix, ensuring the ingredients are well-combined for a smooth texture; consider adding nuts or chocolate chips for extra flavor.
- Preheat the Dutch Oven: Place the Dutch oven over coals or on the stovetop to preheat it before adding the batter, which helps create a crusty exterior.
- Use Parchment Paper: Line the bottom of the Dutch oven with parchment paper to prevent sticking, making it easier to remove the brownies once baked.
- Control the Temperature: Maintain a consistent temperature by using coals or adjusting the stovetop heat; usually, a temperature of around 350°F is ideal for baking brownies.
- Bake with the Lid On: Cover the Dutch oven with the lid to trap heat and moisture, which helps the brownies rise and bake evenly without drying out.
- Check for Doneness: After about 20-30 minutes of baking, insert a toothpick into the center; if it comes out with a few moist crumbs, the brownies are done.
- Cool Before Serving: Allow the brownies to cool in the Dutch oven for a bit before transferring them out to cut; this helps them set and makes for cleaner slices.
What Ingredients Are Needed for a Dutch Oven Fruit Crisp?
To make a delicious Dutch oven fruit crisp, you’ll need the following ingredients:
- Fresh or Frozen Fruit: Common choices include apples, berries, peaches, or pears, which provide the base for the crisp. Fresh fruit usually offers the best flavor, but frozen fruit can also work well, especially when fresh options are out of season.
- Granulated Sugar: This sweetener enhances the natural sweetness of the fruit and helps create a syrupy mixture as the crisp bakes. Adjust the amount based on the tartness of the fruit you choose, ensuring a balanced sweetness.
- Oats: Rolled oats are a key component of the topping, providing texture and heartiness to the crisp. They absorb moisture during baking, contributing to a chewy and crunchy topping.
- All-Purpose Flour: Flour helps bind the oats and other topping ingredients together, ensuring that the crisp has a cohesive structure. It also contributes to the crisp’s crumbly texture when baked.
- Butter: Melted butter adds richness and flavor to the topping, while also promoting browning and crispness during baking. You can substitute with a non-dairy alternative if desired.
- Cinnamon: This warm spice enhances the flavor profile of the fruit and adds a comforting aroma to the dish. It pairs particularly well with apple and berry crisps, making the dessert more inviting.
- Optional Nuts or Seeds: Adding chopped nuts, such as walnuts or almonds, can introduce additional crunch and flavor to the topping. Seeds like pumpkin or sunflower can also be included for a nutritious boost.