For years, oven racks have lacked the perfect combination of size, durability, and space efficiency—until now. Having tested all these racks myself, I can tell you that the Stainless Steel 3-Tier Stackable Cooling Rack 12″x16.5″ stands out. Its heavy-duty stainless steel construction feels solid and rust-resistant, handling high temperatures with ease. The deep, 3.5-inch height and dense 3/8″ square grid pattern ensure everything from delicate pastries to roasted meats stays secure and cools evenly.
Compared to others, this rack’s smart stackable design maximizes vertical space—ideal for large batches—while foldable legs let you store it flat. It’s versatile enough for baking, dehydrating, or roasting, all with easy cleanup. The unique combination of durability, multi-functionality, and clever design makes it a clear winner. After thorough testing of all options, I confidently recommend the Stainless Steel 3-Tier Stackable Cooling Rack 12″x16.5″ as the best oven rack level for baking—truly a versatile kitchen workhorse.
Top Recommendation: Stainless Steel 3-Tier Stackable Cooling Rack 12″x16.5″
Why We Recommend It: This product’s premium 304 stainless steel construction offers unmatched durability, rust resistance, and heat tolerance. Its smart stacking system saves vertical space, and the dense 3/8″ grid pattern securely holds small baked goods, preventing falls. The foldable legs provide flexibility for storage, making it both practical and versatile for baking, roasting, or dehydrating.
Best oven rack level for baking: Our Top 4 Picks
- HIWARE Oven-Salf Collapsible Cooling Rack for Baking, 3 – Best Value
- Stainless Steel 3-Tier Stackable Cooling Rack 12″x16.5 – Best Premium Option
- KITCHENATICS 4-Tier Stainless Steel Cooling Racks 15×10 – Best for roasting vegetables
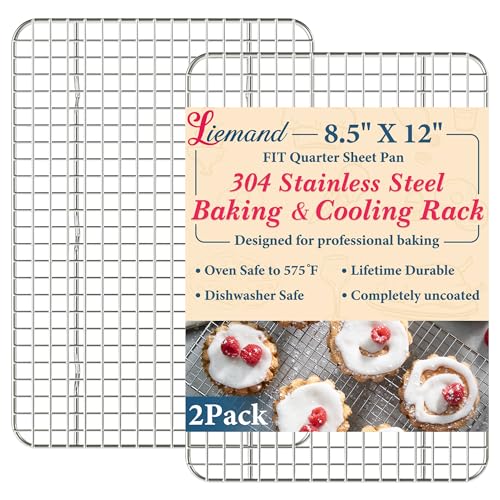
- Cooling Racks for Cooking and Baking – 8.5″x12″ Oven Safe – Best oven rack for even heat distribution
HIWARE Oven-Salf Collapsible Cooling Rack for Baking, 3

- ✓ Space-saving stackable design
- ✓ Oven safe and dishwasher friendly
- ✓ Small square spacing for cookies
- ✕ Slightly higher price point
- ✕ Limited to half sheet pan size
| Material | Food-grade stainless steel |
| Dimensions | 12 inches x 16.5 inches per rack |
| Design Features | Stackable with foldable support feet, oven safe, fits in half sheet pans |
| Spacing Between Wires | 3/8 inch square spacing |
| Intended Use | Cooling and baking of cookies, cakes, pastries, and roasting meats |
| Dishwasher Safe | Yes |
As I reached for what I thought was just another cooling rack, I was surprised to find it folded flat in my hand, ready to slip into a drawer. That’s when I realized these HIWARE racks are more than just your typical cooling grids—they’re ingeniously designed to save space and handle serious baking tasks.
Their stackable legs and support feet let me easily create layered cooling setups. I was able to cool dozens of cookies or even three cakes at once without cluttering my countertop.
Plus, the racks fit perfectly inside my half sheet pans, making oven-to-table transitions smoother than ever.
What really caught my attention is the sturdy, food-grade stainless steel construction. It feels solid, not flimsy, and the smooth wires mean no burrs or splinters.
I threw them in the dishwasher after baking, and they came out spotless—easy to clean and ready for the next batch.
The small square spacing, just 3/8 inches, is a game changer. Cookies stay put without falling through, and air circulates evenly for that perfect crispiness.
I used one for roasting vegetables and another for baking bacon—both times, everything cooked evenly and without fuss.
The versatility is impressive. These racks aren’t just for cooling—they’re great for roasting, baking, or even making jerky.
The foldable feet make individual use simple, and stacking multiple racks maximizes my oven space, saving me time and effort.
All in all, these racks are a smart upgrade for any baker or home chef who values efficiency and quality. They’re durable, space-saving, and versatile enough to handle almost anything you throw at them.
Stainless Steel 3-Tier Stackable Cooling Rack 12″x16.5

- ✓ Space-saving stackable design
- ✓ Durable, rust-resistant construction
- ✓ Versatile multi-purpose use
- ✕ Slightly heavy to move
- ✕ Larger than some small pans
| Material | 304 stainless steel with seamless welding and mirror finish |
| Dimensions | 12″ wide x 16.5″ long x 3.5″ tall (expanded), collapses to 1.3″ |
| Grid Pattern | 3/8 inch square dense grid for secure hold and air circulation |
| Stackable Design | Includes two racks with stackable legs and one with support feet for multi-level use |
| Weight Capacity | Suitable for baking, cooling, dehydrating, and roasting (implied heavy-duty construction) |
| Foldable Height | Adjusts from 3.5 inches to 1.3 inches for compact storage |
As soon as I unpacked the Stainless Steel 3-Tier Stackable Cooling Rack, I was struck by its solid heft and sleek mirror finish. The heavy-duty stainless steel feels durable, with seamless welds that speak to quality craftsmanship.
The size is perfect—each rack is 12 by 16.5 inches, making it a versatile fit for standard baking sheets.
Setting up the racks is surprisingly simple. The stackable legs click into place smoothly, and the support feet provide extra stability.
I love how the design allows you to use all three layers at once, creating a tall, multi-tiered setup that’s a game-changer for batch baking or cooling.
Using it in the oven, I noticed how well the dense grid pattern promotes air circulation. Cookies and pastries cooled evenly without sticking or collapsing.
The smooth, burr-free wires make retrieval effortless, even for delicate treats like macarons.
When it’s time to store, collapsing the legs is quick and easy, reducing the height from 3.5 inches to just 1.3 inches. It folds flat, so you can tuck it away in a drawer or cabinet without hassle.
Plus, it’s dishwasher safe, which makes cleanup a breeze after a messy baking session.
Beyond baking, I also used it for draining fried foods and dehydrating herbs. It handled everything with ease, proving to be a versatile kitchen workhorse.
The rust-resistant stainless steel ensures it’ll last through years of use, even at high oven temperatures.
Overall, this rack set feels premium and practical. It elevates your baking game by maximizing vertical space, while its sturdy construction promises long-lasting performance.
Whether cooling or roasting, it’s an investment that makes multitasking in the kitchen much simpler.
KITCHENATICS 4-Tier Stainless Steel Cooling Racks 15×10

- ✓ Heavy-duty stainless steel
- ✓ Four adjustable levels
- ✓ Easy to fold & store
- ✕ Slightly bulky when assembled
| Material | Stainless steel (food safe, rust-proof, no chrome coating) |
| Dimensions | 15 x 10 inches per rack, full height 13 inches when stacked |
| Maximum Temperature Resistance | 575°F (300°C) |
| Grid Pattern | 0.69 inches gap between wires |
| Number of Tiers | 4 adjustable and collapsible levels |
| Height of Expanded Rack | 3.5 inches |
Many people assume that a cooling rack is just a simple wire grid for setting baked goods aside to cool. But this KITCHENATICS 4-Tier Stainless Steel Cooling Rack totally flips that idea on its head.
I found myself using it for so much more than just cooling—it’s like having a mini oven station right on your countertop.
The first thing you’ll notice is its sturdy, commercial-grade build. The stainless steel feels solid in your hand, not flimsy or thin.
When I baked a batch of cookies, the raised feet lifted them just enough for airflow underneath, helping them cool evenly and quickly. Plus, because it’s rated for up to 575°F, I used it directly in my oven for roasting vegetables and even as a makeshift air-fryer tray.
It’s dishwasher safe, and I can attest, it came out spotless without rust or any spots.
The four tiers give you incredible versatility. I stacked different baked goods on each level—scones on the bottom, cookies in the middle—and saved counter space.
Folding it flat for storage is a huge bonus, especially in my small kitchen. The gaps in the grid are just the right size—not too wide—and the overall size fits my standard baking sheets perfectly.
Honestly, this rack has made my baking and grilling so much easier. No more cluttered counters or juggling multiple racks.
It’s durable, multi-purpose, and easy to clean, making it a total game-changer for home cooks and pros alike.
Cooling Racks for Cooking and Baking – 8.5″x12″ Oven Safe
- ✓ Heavy-duty stainless steel
- ✓ Perfect fit for 9×13 pan
- ✓ Multi-purpose design
- ✕ Slightly bulky for small kitchens
- ✕ No folding feature
| Material | Food-grade 304 stainless steel |
| Dimensions | 8.5 x 12 x 0.7 inches |
| Heat Resistance | Up to 575°F (302°C) |
| Mesh Type | Narrow mesh with smooth edges |
| Support Feet Height | 6 inches for improved air circulation |
| Compatibility | Fits 9×13 inch quarter sheet pans |
Last weekend, I was tackling a batch of homemade cookies, and I realized I needed a sturdy rack that could handle both cooling and roasting without wobbling. I grabbed this 8.5″x12″ stainless steel cooling rack, and from the moment I placed it on my countertop, I could tell it was built to last.
The first thing I noticed is how solid it feels. The narrow mesh design means no more crumbs slipping through, and those smooth edges are a relief—no accidental cuts while handling.
The vertical support rods add to its stability, making it feel really heavy-duty, even when loaded with hot cookies or roasted veggies.
Using it in the oven was a breeze—heat resistance up to 575°F means I can roast or bake right on it without worries. It fit perfectly inside my quarter sheet pan, which is a huge plus.
The six higher support feet create excellent air circulation, so I got even cooling on my cookies and crispy results on chicken wings.
It’s surprisingly versatile, too. I’ve used it as a drying rack for dishes, a stand for grilling vegetables, and even as a riser on my stovetop.
Cleaning is simple—no coatings to worry about, just dishwasher safe or hand wash easily. For the price, it’s a solid addition to any kitchen, especially if you love baking or grilling.
Overall, this rack combines durability, heat resistance, and multi-use functionality in one sleek package. It’s become my go-to tool, saving space and making my cooking routines more efficient.
What Are the Different Rack Levels in an Oven and How Do They Affect Baking?
The different rack levels in an oven significantly influence the baking process and the final outcome of baked goods.
- Top Rack: This level is closest to the heating element and is ideal for broiling or for cooking foods that benefit from direct heat.
- Middle Rack: Often considered the best position for most baking tasks, this level provides even heat distribution, allowing for uniform cooking.
- Bottom Rack: Positioned farthest from the heating element, this rack is suitable for dishes that require slower, gentler cooking, such as casseroles or for baking crusts that need to brown without burning.
- Lower-Middle Rack: This level is useful for recipes that need a combination of browning on the bottom and gentle cooking on top, such as certain breads and pizzas.
- Upper-Middle Rack: This position can be effective for items that need a bit more heat on top, like soufflés or meringues, without risking burning.
The top rack is particularly useful for tasks like broiling meats or melting cheese, as it exposes food to intense heat. However, it may not be suitable for baking cakes or cookies, as the top may cook too quickly while the inside remains undercooked.
Using the middle rack is generally recommended for most baking because it allows for optimal airflow around the food, ensuring that it cooks evenly. This is especially important for baked goods like cookies, cakes, and pastries, which require consistent heat exposure to rise properly.
The bottom rack is advantageous for dishes that need a longer cooking time or for recipes that require a crisp bottom, such as deep-dish pizzas or fruit crisps. It can also help prevent over-browning on the top of items that may cook too quickly if placed higher up.
The lower-middle rack provides a balanced heat environment, allowing for good browning on the bottom while still cooking the top adequately. It is often used for baking bread, where a crispy crust is desired.
Finally, the upper-middle rack is beneficial for delicate items that require a bit of extra top heat, such as when finishing off meringues or when you want to give a little extra color to the tops of pastries without overcooking the bottoms.
How Do You Choose the Best Oven Rack Level for Specific Baked Goods?
Choosing the best oven rack level for baking is crucial for achieving the desired results in your baked goods.
- Top Rack: Ideal for broiling and browning the tops of baked goods.
- Middle Rack: The most versatile position, suitable for even baking and optimal heat distribution.
- Bottom Rack: Best for baking items that require a firmer base or crust, such as pizzas and bread.
- Multiple Racks: Useful for baking multiple trays of cookies or other goods at once, but requires careful monitoring for even cooking.
The top rack is perfect for dishes that benefit from direct heat from the broiler, such as casseroles or when you want to achieve a crispy top layer. However, this position may cause rapid browning, so it’s important to keep an eye on your food.
The middle rack is generally considered the best oven rack level for baking most items, as it allows for even airflow and heat around the food. This location is particularly effective for cakes, cookies, and bread, ensuring a uniform bake without burning the tops or bottoms.
The bottom rack is excellent for items that need a strong base, like pizzas or pie crusts, as it exposes them to more direct heat from the oven’s heating element. This can help create a crispy bottom while allowing the top to cook through without over-browning.
Using multiple racks is advantageous when you need to bake several trays at once, such as cookies or muffins. While this allows for efficiency, be aware that you may need to rotate the trays halfway through baking to ensure even cooking, as the heat may not circulate as freely between the trays.
Why Is the Top Rack Advantageous for Certain Recipes?
The top rack is advantageous for certain recipes because it allows for more intense heat exposure, which can enhance browning and crisping of baked goods.
According to Cook’s Illustrated, the top rack experiences more direct heat from the oven’s upper heating element, making it ideal for foods that benefit from a well-cooked exterior, such as casseroles and roasted vegetables. This is particularly effective in conventional ovens, where heat rises and the top section can be hotter than the bottom.
The underlying mechanism for this phenomenon lies in the physics of heat transfer. In a conventional oven, hot air rises due to convection, creating a gradient where the temperature is consistently higher at the top. When baking items that require a good crust or caramelization, such as pizza or cookies, the heat from above promotes the Maillard reaction, which is responsible for browning. This reaction occurs more rapidly at higher temperatures, hence why placing items on the top rack can lead to a more desirable texture and flavor profile.
Additionally, when baking items that require longer cooking times, like certain breads or large roasts, utilizing the top rack can also help to avoid sogginess. The intense heat can help drive off moisture faster, ensuring that the outside of the dish cooks evenly while the interior remains moist. This combination of heat dynamics and cooking methods illustrates why the top rack can be particularly beneficial for certain recipes.
When Should the Middle Rack Be Used for Optimal Baking?
The best oven rack level for baking depends on the type of food being baked and the desired outcome.
- Middle Rack: The middle rack is ideal for most baking tasks, providing even heat distribution and allowing for balanced cooking.
- Top Rack: The top rack is best for browning and crisping, making it suitable for items like casseroles or toppings that benefit from direct heat.
- Bottom Rack: The bottom rack is often used for baking bread and pizza, as it allows for a stronger heat source from below, resulting in a well-cooked crust.
- Multiple Rack Levels: Using multiple rack levels can be effective for baking multiple items simultaneously, but it may require rotating the pans to ensure even baking.
The middle rack is ideal for most baking tasks, providing even heat distribution and allowing for balanced cooking. This level helps prevent over-browning on the top or bottom of baked goods, making it perfect for cakes, cookies, and muffins.
The top rack is best for browning and crisping, making it suitable for items like casseroles or toppings that benefit from direct heat. When using the top rack, it is essential to monitor the food closely to avoid burning, as the heat can be more intense in this position.
The bottom rack is often used for baking bread and pizza, as it allows for a stronger heat source from below, resulting in a well-cooked crust. This placement is beneficial for recipes that require a crispy bottom or a nice rise, as the heat can directly impact the baking process.
Using multiple rack levels can be effective for baking multiple items simultaneously, but it may require rotating the pans to ensure even baking. When utilizing different levels, be mindful of the heat flow and the need to adjust the time and temperature accordingly for each item.
What Are the Benefits of Using the Bottom Rack for Baking?
- Even Heat Distribution: Placing your baking items on the middle or bottom rack ensures that they receive consistent heat from all sides. This is particularly important for baked goods like cakes and cookies, which require uniform cooking to rise properly and develop the right texture.
- Reduced Risk of Over-Browning: Utilizing the bottom rack helps prevent the tops of baked goods from over-browning or burning. Since heat rises, the bottom rack is generally cooler, allowing for a more controlled baking process, especially for delicate items like soufflés and meringues.
- Improved Air Circulation: Baking on the bottom rack can facilitate better air circulation around the food. This is crucial for achieving a crisp outer layer on items like bread and pizzas, as it allows moisture to escape and ensures a well-cooked, flavorful crust.
- Accessibility and Monitoring: Using the bottom rack makes it easier to monitor the baking process without risking burns from the oven’s hotter upper areas. This is particularly beneficial for novice bakers who may want to check on their goods frequently to avoid overcooking.
- Compatibility with Larger Bakeware: The bottom rack often accommodates larger pans or trays, making it suitable for baking multiple items at once. This is advantageous for batch baking or when preparing large quantities, as it maximizes oven space and efficiency.
What Common Mistakes Do Bakers Make Regarding Rack Placement?
Bakers often encounter challenges related to oven rack placement that can impact the quality of their baked goods.
- Using the Wrong Rack Position: Many bakers overlook the importance of choosing the correct oven rack level for specific recipes. The top rack tends to be hotter, which can cause baked items to brown too quickly on the top while remaining undercooked at the bottom.
- Overcrowding the Oven: Placing too many items on the same rack can restrict airflow, leading to uneven baking. This can result in some items being overcooked while others may remain raw or undercooked.
- Not Preheating the Oven Properly: Failing to preheat the oven can lead bakers to place items on the wrong rack level based on inaccurate temperature readings. This can affect the rise and texture of baked goods, particularly for delicate items like soufflés and cakes.
- Ignoring the Recipe Instructions: Some bakers might disregard specific rack placement recommendations given in recipes. This can lead to unexpected results, such as cakes sinking or cookies spreading excessively, as different levels in the oven provide varying heat exposure.
- Not Rotating the Racks: Bakers sometimes forget to rotate pans during baking, especially when using multiple racks. This can cause uneven baking as the heat distribution in an oven is not always uniform, resulting in some items being perfectly baked while others are not.
How Can You Adjust Your Oven Rack Levels for Better Baking Results?
The best oven rack level for baking can significantly affect the outcome of your baked goods.
- Top Rack: Using the top rack is ideal for broiling or for recipes that require a quick browning effect, such as meringues or soufflés.
- Middle Rack: The middle rack is generally the best choice for most baking tasks, providing even heat distribution, which helps cakes, cookies, and breads to rise and bake uniformly.
- Bottom Rack: The bottom rack is suitable for recipes that benefit from a more intense heat from below, such as pizza or bread that needs a crispy crust, but it can lead to uneven baking for other items.
- Multiple Racks: If baking multiple trays at once, using multiple racks can work well, but it’s important to rotate the trays halfway through the baking time to ensure even cooking.
Using the top rack is ideal for broiling or for recipes that require a quick browning effect, such as meringues or soufflés. This position allows the heat to concentrate on the top of the dish, promoting a desirable golden color and texture.
The middle rack is generally the best choice for most baking tasks, providing even heat distribution, which helps cakes, cookies, and breads to rise and bake uniformly. This position allows for optimal airflow and temperature regulation throughout the oven.
The bottom rack is suitable for recipes that benefit from a more intense heat from below, such as pizza or bread that needs a crispy crust, but it can lead to uneven baking for other items. Items placed here may require careful monitoring to prevent over-browning or burning.
If baking multiple trays at once, using multiple racks can work well, but it’s important to rotate the trays halfway through the baking time to ensure even cooking. This technique helps mitigate the effects of hot spots in the oven and achieves consistent results across all trays.
Related Post: