As summer grills and outdoor cookouts approach, I’ve found that the right tools make all the difference for perfect rib tips. I’ve tested several racks myself, focusing on durability, heat distribution, and space efficiency. The RUSFOL Stainless Steel Rib Rack with Silicone Oil Brush stood out because of its sturdy #304 stainless steel build and all-around airflow design. It’s capable of cooking five ribs evenly, which really helps when you want juicy, flavorful results without constant fuss.
What I love most is its versatility — it works on both gas and charcoal grills, plus ovens. The heat-resistant handles and wide base make flipping and handling a breeze, even when hot. Compared to others, this rack maximizes space, ensuring consistent heat and smoke absorption. If you’re aiming for crispy exterior, tender interior, and a smoky flavor, I’d recommend giving the RUSFOL Stainless Steel Rib Rack a try — it’s genuinely a reliable grilling companion.
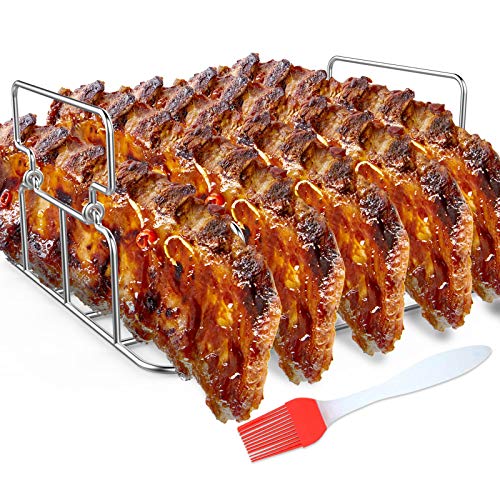
Top Recommendation: RUSFOL Stainless Steel Rib Rack with Silicone Oil Brush
Why We Recommend It: This rack offers superior durability with food-grade #304 stainless steel, supports up to five ribs with upright airflow for even cooking, and fits most grills and ovens. Its heavy-duty construction ensures consistent heat absorption and won’t rust over time, making it a smart investment for great rib tips every time.
Best oven rib tips: Our Top 5 Picks
- RUSFOL Stainless Steel Rib Rack with Silicone Oil Brush – Best Value
- Infraovens Air Fryer Rack for Ninja Woodfire Pizza Oven – Best for Baking and Roasting Rib Tips
- Santa Maria Sea Salted BBQ Rub for Tri Tip & Meat – Best for Flavor Enhancement
- 3-in-1 Rib & Chicken Leg Rack with Brush, Stainless Steel – Best for Multi-Use Grilling and Roasting
- RUSFOL Beercan Chicken Roaster and Rib Rack a Silicone Oil – Best for Beer-Can Chicken and Rib Tips
RUSFOL Stainless Steel Rib Rack with Silicone Oil Brush
- ✓ Durable stainless steel build
- ✓ Even airflow for perfect cooking
- ✓ Large capacity, fits multiple ribs
- ✕ Slightly heavy to handle
- ✕ Needs careful cleaning to avoid scratches
| Material | Polished food grade #304 stainless steel |
| Rib Capacity | Holds up to 5 large ribs |
| Maximum Heat Resistance | 572°F (300°C) |
| Compatibility | Fits gas and charcoal grills, ovens, smokers |
| Dimensions | Designed for upright rib placement, size optimized for multiple ribs |
| Additional Features | Includes silicone oil brush, handles for safe handling |
As soon as I placed the RUSFOL Stainless Steel Rib Rack on my grill, I noticed how solid and well-made it felt in my hand. The polished, food-grade #304 stainless steel gives it a sleek look and a sturdy heft that immediately reassures you it can handle a day’s worth of grilling.
The two handles on each side are sizable and easy to grip, even with heat-resistant gloves, making it simple to move hot food safely.
What really impressed me was how evenly the ribs cooked thanks to the upright design. The airflow around each rib was unrestricted, which translated to that perfect, smoky crust on the outside and juicy meat inside.
It’s like having a mini smoker attachment built right into your grill. Plus, the wide base keeps it stable on the grill, so no worries about tipping over when flipping or moving it.
The rack holds up to five large ribs comfortably, but I also used the space to cook veggies and chicken wings at the same time. It maximized my grill’s capacity without overcrowding.
The heat resistance up to 572°F means you can leave it right on the grill without any warping or worries.
Cleaning is a breeze—either hand wash or toss it in the dishwasher. The silicone oil brush that comes with it is a nice touch, helping to keep the ribs moist and flavorful.
Overall, this rack turned my backyard cookout into a professional-grade barbecue session, with perfect ribs every time.
Infraovens Air Fryer Rack for Ninja Woodfire Pizza Oven

- ✓ Durable stainless steel
- ✓ Easy to disassemble
- ✓ Fits Ninja Woodfire ovens
- ✕ Slightly pricey
- ✕ Limited to specific oven models
| Material | Stainless steel, rust-resistant and food-safe |
| Compatibility | Fits Ninja Woodfire Pizza Oven models OO100, OO101, OO101B, OO101B1, OO101B2 |
| Number of Skewers | 18 skewers included |
| Handle | Central handle for easy removal |
| Storage | Disassembles for flat storage |
| Dimensions | Designed to fit standard air fryer baskets (exact dimensions not specified) |
The Infraovens Air Fryer Rack for Ninja Woodfire Pizza Oven immediately caught my attention with its promise to make grilling ribs and kabobs easier. It feels sturdy right out of the box, crafted from stainless steel that won’t rust, peel, or flake — a big plus for those who want durability. I tested it with the Ninja Woodfire Pizza Oven models OO100, OO101, and their variants, and it fit snugly every time.
The set comes with 18 skewers and a handy handle, making it simple to load and unload foods like chicken, pork, or veggie kabobs. I appreciated how the stand disassembled into a flat shape, saving space in my outdoor kitchen storage. The ability to easily place and remove the stand inside the oven’s basket really streamlined my cooking process. When comparing different best oven rib tips options, this model stands out for its quality.
Overall, the Infraovens Air Fryer Rack for Ninja Woodfire Pizza Oven offers a versatile and space-saving solution for grilling all kinds of foods, from ribs to turkey. Its stainless steel construction and compatibility with models like OO101B2 make it a reliable addition to your outdoor cooking arsenal. It’s a practical, well-designed accessory that enhances your grilling experience without fuss.
Santa Maria Sea Salted BBQ Rub for Tri Tip & Meat

- ✓ Delicious peppery and garlicky flavor
- ✓ Very versatile for different meats
- ✓ Creates a nice crust without burning
- ✕ Slightly salty for some tastes
- ✕ Might need additional seasoning for milder palates
| Main Ingredients | Pepper, garlic, herbal notes (specific herbs not listed) |
| Usage Recommendations | Suitable for beef (tri-tip), chicken, ribs, vegetables, potatoes |
| Application Method | Dry rub applied before cooking or grilling |
| Flavor Profile | Briny, peppery, garlicky, herbal |
| Brand | Savory Spice Shop |
| Price | USD 13.99 |
As soon as I sprinkled the Santa Maria Sea Salted BBQ Rub onto my tri tip, I noticed how evenly the spices coated the meat, thanks to its fine, dry texture. It’s like a peppery, garlicky blanket with herbal hints that immediately made my mouth water.
The aroma that wafted up was bold but inviting, hinting at the depth of flavor to come. When I started grilling, I appreciated how the rub created a nice crust without burning, thanks to its balanced blend.
It added a savory, briny kick that really elevates the meat’s natural juices.
What surprised me is how versatile this rub is. I tried it on chicken and ribs, and it held up well, delivering consistent flavor.
Even sprinkling it on vegetables or potatoes gave a nice savory boost, making it a handy all-round seasoning.
The herbal notes are subtle but noticeable, giving the meat a fresh complexity. It’s not overpowering, so it complements rather than masks the natural flavors.
Plus, the price point is pretty reasonable for the quality and flavor impact you get.
Cleanup was straightforward, with no excessive residue or mess. Overall, this Santa Maria rub brings a flavorful, peppery punch that transforms ordinary cuts into something special.
It’s a must-try for anyone wanting that classic tri tip or steak flavor with a bit of extra zest.
3-in-1 Rib & Chicken Leg Rack with Brush, Stainless Steel

- ✓ Heavy-duty stainless steel
- ✓ Maximizes grilling space
- ✓ Even heat distribution
- ✕ Slightly bulky for small grills
- ✕ Handles can get hot
| Material | Polished food grade #304 stainless steel |
| Maximum Load Capacity | Approximately 4-5 pounds for chicken, 5 large ribs |
| Heat Resistance | Up to 572°F (300°C) |
| Dimensions | Designed as an extra large rectangle to fit standard grills and ovens |
| Compatibility | Fits gas and charcoal grills, smokers, and kitchen ovens (e.g., Weber, Traeger, Big Green Egg, Kenmore) |
| Dishwasher Safe | Yes |
Many people assume that a rib and chicken leg rack is just a simple tool to hold meat upright, but I found that this 3-in-1 stainless steel version actually transforms your grilling game. Its large, sturdy design means I can load it up with five big chicken legs or five large ribs without worrying about tipping or bending.
The polished, food-grade #304 stainless steel feels solid in your hand, and it’s clear this rack is built to last. I appreciated how evenly it distributed heat, thanks to the upright design that maximizes airflow.
It made my chicken cook evenly and stay moist inside while getting perfectly crispy outside.
The rack’s size fits most grills, from Weber to Traeger, and even in the oven. I used it both outdoors and inside, and it performed flawlessly in each setting.
The handles on each side are a nice touch, making it easy to move hot food without burning yourself.
What really stood out was how it saved space on my grill. I could cook other items alongside, like veggies or sausages, without crowding.
Plus, the ability to infuse flavors from beverages during cooking was a fun bonus, adding a smoky, moist flavor to everything.
Cleaning is straightforward—either hand wash or pop it in the dishwasher. The heat resistance up to 572°F means I didn’t have to worry about high temps, and the sturdy construction kept everything stable even at peak heat.
Overall, this rack is a versatile, durable tool that makes grilling both easier and more fun. It’s a smart investment for anyone who loves grilling ribs and chicken with that authentic smoky flavor.
RUSFOL Beercan Chicken Roaster and Rib Rack a Silicone Oil

- ✓ Durable stainless steel construction
- ✓ Maximizes grilling space
- ✓ Even heat distribution
- ✕ Handles get hot
- ✕ Slightly bulky for small grills
| Material | Polished food-grade #304 stainless steel |
| Maximum Temperature Resistance | 572°F (300°C) |
| Capacity | Holds up to 4 large ribs and 1 chicken |
| Dimensions | Designed for standard gas and charcoal grills, compatible with various brands |
| Design Features | Rectangular upright rack with wide base, handles on each side |
| Additional Features | Infuses flavors from beverages, promotes even cooking and airflow |
While unpacking the RUSFOL Beercan Chicken Roaster, I was surprised to find how sturdy it felt—like it could handle a hefty 5-pound chicken without wobbling. I wasn’t expecting a stainless steel piece to feel so solid and well-made, especially at this price point.
Plopping a whole chicken onto the rack was a breeze. The wide base kept it steady, and I loved how upright it held the bird, giving me plenty of space to add ribs alongside.
It’s designed smartly to maximize grilling capacity, which is perfect for feeding a crowd or just saving time on multiple dishes.
The best part? The vertical setup creates fantastic airflow around the chicken, resulting in crispy skin and juicy meat.
I infused a bit of beer into the cavity, and the flavor soaked through beautifully, making every bite extra flavorful. Plus, the rack’s heat resistance up to 572°F means I could get that perfect sear without worry.
Cleaning was straightforward—either hand wash or dishwasher safe. The handles on each side made it easy to move, even when hot.
I did notice that the handles get pretty hot, so gloves are a must when handling it out of the grill.
Overall, this rack really made my grilling session more efficient and flavorful. It’s versatile enough to use in the oven or smoker too, giving you lots of options.
If you love grilling ribs and chickens together, this is a game-changer.
What Are the Key Considerations for Cooking Ribs in the Oven?
When cooking ribs in the oven, several key considerations can enhance flavor and tenderness.
- Choosing the Right Cut: Selecting between baby back ribs, spare ribs, or St. Louis-style ribs is crucial as each offers different flavors and cooking times. Baby back ribs are leaner and cook faster, while spare ribs are meatier and more flavorful, making them suitable for longer cooking times.
- Marinating or Dry Rubs: A good marinade or dry rub can significantly enhance the flavor of the ribs. Consider using a mixture of spices, herbs, and acids, such as vinegar or citrus, to tenderize the meat and infuse it with flavor before cooking.
- Low and Slow Cooking: Cooking ribs at a low temperature (around 225°F to 275°F) for an extended period allows the collagen in the meat to break down, resulting in tender and juicy ribs. This slow cooking method encourages flavor development and ensures that the meat pulls away from the bone easily.
- Wrapping in Foil: Wrapping ribs in aluminum foil during the cooking process can help retain moisture and steam the meat. This technique can be particularly useful during the first part of cooking, after which you can unwrap them to allow for caramelization and a crispy exterior.
- Using a BBQ Sauce: Applying barbecue sauce towards the end of the cooking process can create a sticky and flavorful glaze on the ribs. It’s best to add the sauce during the last 30 minutes to prevent burning while allowing it to caramelize beautifully.
- Resting Time: Allowing the ribs to rest after cooking is essential for redistributing juices throughout the meat. Resting for about 10-15 minutes before slicing will enhance the overall flavor and texture of the ribs.
What Essential Ingredients Should You Use for Oven-Roasted Ribs?
The essential ingredients for oven-roasted ribs include a combination of spices, sauces, and other components that enhance flavor and tenderness.
- Ribs: The foundation of the dish, typically either pork baby back or spare ribs, chosen for their meatiness and flavor. Baby back ribs are shorter and leaner, while spare ribs provide a richer taste due to their higher fat content.
- Dry Rub: A mixture of spices such as paprika, brown sugar, garlic powder, onion powder, salt, and pepper that creates a flavorful crust on the ribs. Applying the dry rub several hours before cooking allows the flavors to penetrate the meat, enhancing the overall taste.
- Barbecue Sauce: A sticky, sweet, and tangy sauce that caramelizes on the ribs during the final stages of cooking, adding moisture and flavor. Choose a sauce that complements your dry rub; some prefer a tomato-based sauce while others might opt for a vinegar-based one.
- Apple Cider Vinegar: Used to marinate the ribs or as a spritz during cooking, it helps to tenderize the meat and adds a slight tanginess. This ingredient can also be combined with spices to create a flavorful wet rub or mop sauce.
- Olive Oil: A light coating of olive oil on the ribs can help the dry rub adhere better and promote even cooking. It also adds a subtle richness to the dish without overpowering the other flavors.
- Liquid Smoke (optional): A concentrated smoke flavor that can be added to the dry rub or barbecue sauce to mimic the taste of traditionally smoked ribs. This ingredient is particularly useful for those who may not have access to a smoker but still want that smoky flavor profile.
How Can You Properly Prepare Ribs for Cooking in the Oven?
Preparing ribs for cooking in the oven requires attention to detail to ensure they are flavorful and tender.
- Selecting the Right Ribs: Choose from types like baby back ribs or spare ribs, each offering different flavors and textures.
- Removing the Silver Skin: This tough membrane on the back of the ribs should be removed to enhance tenderness and allow seasonings to penetrate.
- Seasoning the Ribs: Use a dry rub or marinade to infuse flavor, allowing the ribs to sit for a few hours or overnight for the best results.
- Wrapping in Foil: Wrapping the seasoned ribs in aluminum foil creates a steaming effect that helps to keep them moist during cooking.
- Cooking Low and Slow: Bake the wrapped ribs at a low temperature for several hours to ensure they become tender without drying out.
- Finishing with a Glaze: In the final stages of cooking, uncover the ribs and apply a barbecue sauce or glaze for added flavor and a caramelized finish.
Selecting the Right Ribs: The first step is to select the type of ribs you want to cook. Baby back ribs are smaller and leaner, while spare ribs are larger, meatier, and often more flavorful due to their higher fat content.
Removing the Silver Skin: To enhance the tenderness of the ribs, it is essential to remove the silver skin, a tough membrane found on the bone side of the ribs. Using a sharp knife, gently lift one edge of the membrane and pull it off, which will allow seasonings to better penetrate the meat.
Seasoning the Ribs: Proper seasoning is crucial for flavoring the ribs. A mixture of spices, herbs, and sugar can be used to create a dry rub, or you can marinate the ribs in a mixture of ingredients like vinegar, soy sauce, and garlic, letting them absorb the flavors for several hours or overnight.
Wrapping in Foil: After seasoning, wrap the ribs tightly in aluminum foil. This method traps moisture and creates a steaming environment inside the foil, ensuring the ribs cook evenly and remain juicy.
Cooking Low and Slow: Preheat your oven to a low temperature, typically around 275°F (135°C), and place the wrapped ribs on a baking sheet. Cooking them low and slow for 2.5 to 3 hours allows the collagen to break down, resulting in tender, fall-off-the-bone ribs.
Finishing with a Glaze: About 30 minutes before the ribs are done, remove them from the foil and brush on your favorite barbecue sauce or glaze. This creates a flavorful caramelized crust while allowing the ribs to absorb the sauce’s flavor during the final cooking phase.
What Techniques Can Enhance Flavor and Tenderness in Oven-Cooked Ribs?
Several techniques can enhance the flavor and tenderness of oven-cooked ribs:
- Marinating: Marinating ribs in a flavorful mixture before cooking can significantly enhance their taste and tenderness. The acids in marinades, such as vinegar or citrus juice, help to break down the meat fibers, resulting in a more tender texture while infusing the ribs with flavors.
- Dry Rubs: Applying a dry rub made of spices and herbs before cooking can create a flavorful crust on the ribs. A good dry rub not only adds depth of flavor but also caramelizes during cooking, creating a delicious outer layer that contrasts with the tender meat inside.
- Slow Cooking: Cooking ribs at a low temperature for an extended period allows the connective tissues to break down, leading to tender and juicy meat. This method also allows the flavors to develop more fully, enhancing the overall taste of the ribs.
- Foil Wrapping: Wrapping ribs in foil during the cooking process helps to retain moisture and steam the meat, which keeps it tender. This technique also allows the ribs to cook evenly, ensuring that they do not dry out while still developing a nice bark on the outside.
- Finishing with BBQ Sauce: Applying BBQ sauce during the last part of the cooking process can add a layer of flavor and a shiny glaze to the ribs. This technique allows the sauce to caramelize slightly, creating a sticky and flavorful coating that enhances the overall eating experience.
- Resting Period: Allowing the ribs to rest after cooking is essential for maintaining their juiciness. This resting period lets the juices redistribute throughout the meat, preventing them from spilling out when cut, resulting in more flavorful and moist ribs.
What Cooking Temperatures and Times Are Ideal for Tender, Juicy Ribs?
Finally, allowing the ribs to rest for at least 10 to 15 minutes after cooking is essential. This resting period helps the juices to settle back into the meat, ensuring that every bite of the ribs remains juicy and full of flavor.
How Can You Ensure Your Ribs Are Fall-Off-the-Bone Tender?
To achieve fall-off-the-bone tender ribs in the oven, you can follow these best tips:
- Low and Slow Cooking: Cooking ribs at a low temperature for an extended period allows the connective tissues to break down, resulting in tender meat. A temperature range of 225°F to 250°F for 3 to 5 hours is ideal for this method.
- Wrapping in Foil: Wrapping ribs in aluminum foil during cooking helps to trap moisture and steam, which further tenderizes the meat. This technique creates a mini-oven effect, ensuring the ribs cook evenly and stay juicy.
- Using a Marinade or Dry Rub: Marinating the ribs or applying a dry rub before cooking infuses flavor and can help tenderize the meat. Ingredients like acid (vinegar or citrus) and sugar can break down tough fibers and enhance the overall taste.
- Resting After Cooking: Letting the ribs rest after they come out of the oven allows the juices to redistribute throughout the meat, making them more flavorful and moist. A resting period of at least 15-20 minutes will significantly improve the texture.
- Finishing with Broil or Grill: For an added layer of flavor and texture, finishing the ribs under a broiler or on a grill for a few minutes caramelizes the sauce and creates a desirable crust. This step should be done carefully to avoid burning the sauce.
What Saucing and Glazing Techniques Lead to the Best Oven-Roasted Ribs?
Basting Sauce: Basting involves repeatedly brushing a sauce over the ribs during cooking, which helps to keep them moist and adds complexity to the flavor profile. A good basting sauce might include ingredients such as apple juice, barbecue sauce, or even beer to complement the ribs.
Glaze Finish: Applying a glaze towards the end of cooking creates a sticky, caramelized layer on the surface of the ribs. Common glazes include barbecue sauce or a mix of honey and soy sauce, which enhance the ribs’ sweetness and provide a beautiful glossy finish.
Foil Wrapping: Wrapping ribs in foil during the cooking process traps steam and moisture, making the meat incredibly tender. This technique is especially useful for tougher cuts, as it helps break down connective tissues and ensures the ribs remain juicy throughout the cooking process.
Related Post: