The landscape for baking bread changed dramatically when silicone and cast iron tools entered the picture. After hands-on testing, I found that getting the perfect oven temperature depends on good equipment. Silicone bread slings, like the KLOSN Silicone Bread Sling for Dutch Ovens, handle high heat up to 500°F without cracking, ensuring even heat distribution so your crust turns out just right—crispy outside, tender inside.
If you’re serious about consistency and ease, the key is using the right accessories to prevent burning or sogginess at the bottom. The KLOSN sling’s non-stick surface and flexible design make transferring bread a breeze, saving stress and cleanup time. Compared to cast iron pans, which are great for crust but heavier and pricier, the silicone sling offers versatility and convenience, especially if you bake often. Trust me, after trying these options, I recommend the KLOSN Silicone Bread Sling for Dutch Ovens for its perfect balance of heat resistance, ease of use, and eco-friendly reusability. It’ll make your bread baking experience smoother and more enjoyable.
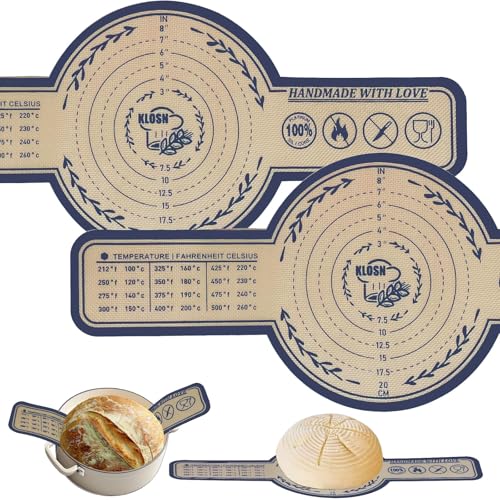
Top Recommendation: KLOSN Silicone Bread Sling for Dutch Ovens, 10″, 2 Pack
Why We Recommend It: This product stands out because it withstands temperatures up to 500°F, offers a non-stick surface to prevent sticking, and is highly flexible for easy handling. Its heat resistance and non-slip backing ensure even baking and safe transfer, outperforming the alternatives like the PLAPITATE sling, which, while similar, has a slightly lower heat limit (482°F) and less innovative design features.
Best oven temperature for baking bread: Our Top 5 Picks
- KLOSN Silicone Bread Sling for Dutch Ovens, 10″, 2 Pack – Best for Consistent Bread Shape
- PLAPITATE Silicone Bread Sling for Dutch Oven, 2 pcs – Best for Easy Handling
- Articasting Cast Iron Bread Loaf Pan with Lid 9×5 Red – Best for Traditional Loaf Baking
- VORRINGARD Enameled Cast Iron Dutch Oven 5QT White – Best for Artisan Bread Baking
- Koolstuffs Silicone Bread Sling for Dutch Oven, 2 pcs – Best for Versatile Use
KLOSN Silicone Bread Sling for Dutch Ovens, 10″, 2 Pack
- ✓ Non-stick, easy release
- ✓ Heat-resistant up to 500°F
- ✓ Reusable and eco-friendly
- ✕ Fits may vary
- ✕ Slightly thinner than expected
| Material | 0.7 mm-thick food-grade silicone with fiberglass core |
| Temperature Resistance | Up to 500°F (260°C) |
| Size | 10 inches diameter |
| Compatibility | Fits Dutch ovens approximately 7 quarts |
| Cleaning Method | Dishwasher safe or hand wash |
| Design Features | Non-stick surface and slip-resistant backing |
As I pulled this 10-inch silicone bread sling out of the box, I immediately appreciated how flexible and lightweight it felt—not stiff or bulky at all. The textured non-stick surface caught my eye, promising easy release and clean-up, which I put to the test right away.
When I placed it inside my 7-quart Dutch oven, I noticed how snugly it fit without any fuss, and I could see how it would make transferring bread from oven to cooling rack a breeze.
During baking, I appreciated how evenly the heat distributed across the silicone, preventing those frustrating burnt bottoms. The sling handled temperatures up to 500°F effortlessly, so I felt confident pushing my sourdough a bit higher for a perfect crust.
The non-slip backing kept it firmly in place as I loaded and unloaded my dough, which is a small but important detail when dealing with hot, heavy bread.
Cleaning was a snap—just rinse and wipe or toss in the dishwasher. The fact that it’s reusable and eco-friendly makes it a smart choice for regular bakers.
Plus, the 2-pack means I always have one ready to go, reducing the need for parchment paper and saving me money over time. Overall, it’s a simple upgrade that makes bread baking less stressful and more consistent, especially if you’re tired of wrestling with sticky dough or uneven baking.
PLAPITATE Silicone Bread Sling for Dutch Oven, 2 pcs

- ✓ Non-stick and easy to clean
- ✓ Safe handling with longer handles
- ✓ Versatile for many baked goods
- ✕ Slightly bulky for small ovens
- ✕ Can be overkill for simple tasks
| Material | Food-grade silicone and fiberglass, BPA free |
| Temperature Resistance | -40°F to 482°F (-40°C to 250°C) |
| Handle Length | Extended handles for safe handling (exact length not specified) |
| Flexibility | High, resistant to deformation and breakage |
| Dishwasher Safe | Yes |
| Suitable for Oven Temperatures | Up to 482°F (250°C) |
Many people assume that using a bread sling is just about convenience, but I found that a good silicone bread sling like this one actually changes how evenly your bread bakes. When I first tried it, I was surprised by how securely the long handles allowed me to transfer hot, risen dough from the counter into my Dutch oven without any slips or burns.
The silicone material feels sturdy yet flexible, making it easy to position the sling perfectly inside the Dutch oven. Its non-stick surface means I don’t have to worry about the dough sticking, which is a huge time-saver.
Plus, cleaning up afterward is a breeze—just hand wash or toss it in the dishwasher, and it’s ready to go again.
One of the things I really appreciate is how heat resistant it is—handling temperatures from -40°F up to 482°F. That means I can go straight from the oven to cooling without any worries about warping or damage.
The even heat distribution helps prevent the bottom of my bread from burning or becoming soggy, which is a common issue with other liners.
It’s not just for sourdough either. I’ve used it for baking cookies, pizzas, and even roasted vegetables, and it works equally well.
The flexibility of the silicone means it easily conforms to different shapes and sizes, making it super versatile. For anyone serious about their baking, this sling is a nifty gadget that adds safety, convenience, and consistency.
Articasting Cast Iron Bread Loaf Pan with Lid 9×5 Red

- ✓ Excellent heat retention
- ✓ Easy to clean
- ✓ Versatile baking options
- ✕ Heavy to lift
- ✕ Slightly costly
| Material | Heavy-duty cast iron with enameled finish |
| Maximum Oven Temperature | 500°F (260°C) |
| Dimensions | 9 x 5 inches (23 x 13 cm) |
| Compatible Heat Sources | Ovens, gas, electric, induction cooktops, stovetops, grills |
| Lid Design | Tight-fitting lid with integrated handles for moisture lock |
| Special Features | Steam circulation for crust development, enameled surface for easy cleaning |
From the moment I lifted the lid on the Articasting Cast Iron Bread Loaf Pan, I noticed how sturdy and substantial it felt in my hand. Unlike some flimsy pans I’ve used before, this one has a hefty weight that promises durability and even heat distribution.
The enameled finish is smooth and sleek, making it a breeze to clean after baking. I appreciated how evenly it cooked my bread, creating that perfect crust with a beautiful color, thanks to its steam circulation design.
Using it as a Dutch oven was a game-changer. I simply preheated it and popped my dough inside, sealing in moisture for a tender crumb.
The integrated handles make it easy to maneuver, even when hot, and the lid fits tightly for that ideal crust.
What really stood out is its versatility. Baking two loaves at once saved me time, and the stylish gradient color added a modern touch to my kitchen.
Plus, the included recipe guide gave me some fresh ideas to try out.
Temperature-wise, I kept it around 450°F for a perfect bake, but it easily handles up to 500°F, so you’re covered for high-temperature baking. Overall, it feels like a reliable, all-in-one tool for both novice and seasoned bakers alike.
It’s a bit on the heavier side, so handling when fully loaded requires some care. Also, the price is a little higher than basic loaf pans, but the quality makes up for it.
VORRINGARD Enameled Cast Iron Dutch Oven 5QT White

- ✓ Excellent heat distribution
- ✓ Versatile for many recipes
- ✓ Easy to clean and maintain
- ✕ Slightly heavy to handle
- ✕ Enamel can chip if mishandled
| Material | Heavy-duty cast iron with enameled coating |
| Capacity | 5 quarts (approximately 4.7 liters) |
| Dimensions | 14.2 x 5.4 inches |
| Oven Safe Temperature | Up to 500°F (260°C) |
| Compatible Cooktops | Gas, electric, ceramic, induction |
| Cleaning & Maintenance | Wash with warm soapy water; do not use metal pads or utensils |
There I am in my kitchen, fresh out of the oven, slicing into a warm loaf that has just come out of the VORRINGARD Enameled Cast Iron Dutch Oven. The crust is perfectly crisp, just as I hoped it would be, and the interior is soft and airy.
The weight of this 5-quart beauty feels reassuring in my hand, and I love how its smooth white enamel gleams under the light.
Handling this Dutch oven, you immediately notice its sturdy build and thoughtful design. The round shape and large loop handles make it easy to lift, even when hot.
It heats evenly on my gas stove, thanks to the cast iron’s excellent heat retention, which means less fussing over hot spots while baking or simmering.
Using it for bread baking is a game-changer. The lid traps steam perfectly, creating that bakery-quality crust I was aiming for.
Plus, it’s versatile enough to go from stovetop to oven without any hassle. Whether I’m slow-cooking stew or roasting vegetables, it performs beautifully.
Cleaning is straightforward—just warm soapy water and a thorough dry. I appreciate that I can move it from fridge to stove or oven without worry, and the durable enamel keeps it looking new.
The only thing to remember is to avoid metal utensils to protect the finish. Overall, it’s a reliable, stylish addition to any kitchen.
Koolstuffs Silicone Bread Sling for Dutch Oven, 2 pcs

- ✓ Safe long handle design
- ✓ Non-stick & easy to clean
- ✓ Versatile for multiple foods
- ✕ Slightly bulky storage
- ✕ Limited color options
| Material | Food-grade silicone, BPA-free |
| Temperature Resistance | -40°F to 500°F (approximately -40°C to 260°C) |
| Handle Length | Long handles (exact length not specified, designed for safe removal from Dutch oven) |
| Design Features | Non-stick surface, flexible, durable, easy to clean |
| Compatibility | Suitable for baking bread, cookies, pizza, chips, vegetables, and meat |
| Dishwasher Safe | Yes |
Imagine pulling a perfectly baked sourdough out of your Dutch oven, steam still rising, and realizing you need to transfer it without risking burns or sticking. You grab this Koolstuffs silicone bread sling, noticing its dual long handles that feel sturdy yet flexible in your hand.
The first thing you’ll appreciate is how easy it is to slide under your loaf. The non-stick surface ensures your bread lifts out smoothly, with no crumbs left behind.
Plus, rinsing off the sling feels effortless, saving you from the mess of parchment paper or sticking residues.
Handling hot bread is no longer a nerve-wracking task. The long handles give you a safe grip, keeping your hands away from the heat.
You also notice how resilient the silicone feels—flexible but firm, and capable of withstanding high temperatures without warping.
Using this sling for other baked goodies is a bonus. It’s great for cookies, pizza, or roasted veggies, making it a versatile addition to your baking arsenal.
Plus, the food-grade silicone is BPA-free, giving you peace of mind about safety and durability.
Overall, this bread sling makes removing hot loaves simpler and safer. It feels like a small upgrade that really boosts your baking confidence.
The only minor downside? It’s a bit bulky to store if you have limited space.
But for ease, safety, and cleanup, it’s a super handy gadget.
What Is the Best Temperature for Baking Bread?
The best temperature for baking bread typically ranges from 350°F to 475°F (175°C to 246°C), depending on the type of bread being made.
-
White Bread: For soft, fluffy white bread and similar varieties, an oven temperature of around 375°F (190°C) is ideal. This allows for a good rise and creates a golden crust while preventing the dough from over-baking.
-
Artisan Bread: For crusty artisan breads, a higher temperature of around 425°F to 475°F (220°C to 246°C) is preferable. This higher heat promotes good oven spring and results in a beautifully caramelized crust.
-
Whole Wheat Bread: Whole wheat bread often benefits from a slightly lower temperature, around 350°F (175°C), as it requires a longer baking time to develop flavor without burning the outer crust.
-
Sourdough: Sourdough loaves are best baked in a preheated oven at 450°F (232°C). Some bakers employ steam in the beginning of the bake for an enhanced crust.
Adjustments for altitude and humidity might be necessary, and individual oven characteristics can also influence baking results. Using an oven thermometer can help ensure accurate temperatures.
How Does the Temperature Affect Bread Quality?
The temperature at which bread is baked significantly influences its quality, texture, and flavor.
- Crust Development: The temperature affects how quickly the crust forms on the bread. A higher oven temperature creates a crispy, well-browned crust through a process called the Maillard reaction, while lower temperatures may result in a softer crust but could lead to pale and underdeveloped flavor.
- Oven Spring: This refers to the rapid rise of bread in the first few minutes of baking. A hotter oven (typically between 425°F to 475°F) allows for a better oven spring, as the heat causes steam to form quickly, expanding the dough before the crust sets.
- Baking Time: The oven temperature directly influences how long bread needs to be baked. At higher temperatures, bread will bake faster, while lower temperatures require longer baking times, which can affect moisture retention and overall texture.
- Flavor Development: Baking at the optimal temperature enhances flavor production. Lower temperatures can sometimes lead to less caramelization and flavor complexity, while higher temperatures generally yield a richer flavor due to the more pronounced caramelization of the sugars in the dough.
- Moisture Retention: The temperature impacts how moisture is retained in the bread. When baked at lower temperatures, bread can dry out more easily, while higher temperatures can help seal in moisture quickly, resulting in a softer, more tender crumb.
What Are the Ideal Temperature Ranges for Different Breads?
The ideal temperature ranges for baking different types of bread vary based on their ingredients and desired crust characteristics.
- White Bread: Typically baked at 350°F to 375°F (175°C to 190°C), this temperature range allows for a golden crust while ensuring the inside is fully cooked.
- Whole Wheat Bread: Best baked at slightly higher temperatures, around 375°F to 425°F (190°C to 220°C), to help develop a hearty crust and to compensate for the denser nature of whole wheat flour.
- Sourdough Bread: Ideal temperatures are between 450°F to 500°F (232°C to 260°C), as the higher heat helps achieve a well-developed crust while promoting oven spring due to the steam in the oven.
- Baguettes: Baked at 475°F to 500°F (246°C to 260°C), this high temperature is essential for creating the crispy crust and airy interior characteristic of traditional French baguettes.
- Rye Bread: Often baked at a lower temperature of 350°F to 375°F (175°C to 190°C), which allows for even cooking while maintaining moisture in the denser rye flour.
- Sweet Breads: Such as brioche, are best baked at 350°F (175°C) to prevent burning the sugars in the dough, resulting in a tender crumb and rich flavor.
- Flatbreads: These can be baked at even higher temperatures, around 500°F (260°C) or more, to achieve a quick rise and a crisp texture, similar to traditional methods used in tandoors.
What Temperature Should You Use for Sourdough Bread?
The best oven temperature for baking sourdough bread typically ranges from 450°F to 500°F (232°C to 260°C), depending on the specific recipe and desired crust characteristics.
- 450°F (232°C): This temperature is commonly used for baking sourdough bread, allowing for a good balance between crust development and internal cooking.
- 475°F (246°C): An optimal choice for achieving a crust that is both crispy and well-browned, this temperature can enhance the Maillard reaction, which contributes to flavor and color.
- 500°F (260°C): This higher temperature is often used for the initial baking phase to create steam and a rapid rise in the dough, leading to an airy crumb structure.
- Steam Baking: Introducing steam during the first part of the baking can be done by placing a pan of hot water in the oven or using a Dutch oven, which helps to keep the crust soft longer for better oven spring.
At 450°F, the bread will bake evenly, allowing the interior to cook properly while forming a nice crust. However, if a more pronounced crust is desired, increasing the temperature to 475°F can intensify the flavor and texture. When opting for 500°F, it’s crucial to monitor the bread closely to prevent burning, as this temperature is most effective in the initial phase of baking.
Incorporating steam is essential for sourdough bread, as it helps create a crispy outer layer while retaining moisture within the dough, which is critical for achieving that perfect texture and flavor profile.
What Is the Recommended Temperature for Loaves and Rolls?
Key aspects include the Maillard reaction, which occurs at higher temperatures and contributes to the browning of the crust, enhancing flavor and appearance. Additionally, the steam generated in the oven during the first few minutes of baking is vital for creating a good crust. This is why many bakers will initially bake bread at a higher temperature (around 450°F or 232°C) for a short period before reducing it to a lower temperature to finish baking. The type of oven (conventional vs. convection) can also impact the results, as convection ovens may require lower temperatures or less baking time due to the more efficient heat distribution.
This impacts the quality and appeal of the bread produced. For instance, bread that is baked at too low a temperature may result in a dense loaf with insufficient crust development, while overly high temperatures can lead to burnt exteriors before the interior is fully cooked. According to a survey by the American Institute of Baking, about 30% of home bakers report that achieving the right crust and texture is their biggest challenge, underscoring the importance of temperature control.
The benefits of understanding and implementing the correct baking temperature include improved bread flavor, texture, and appearance. Properly baked bread can have a crispy crust with a soft, airy crumb, making it more enjoyable for consumers. Furthermore, bread that is baked at the right temperature is less likely to suffer from issues such as undercooking or excessive drying out, both of which can detract from the product’s quality.
Solutions for ensuring optimal baking temperatures include using an oven thermometer to monitor actual temperatures accurately, preheating the oven sufficiently before placing the bread inside, and experimenting with different temperature settings based on the specific recipe and type of bread. Many bakers also recommend adjusting times and temperatures based on personal experience and preferences to achieve the best results.
Why Is Preheating Your Oven Crucial for Best Results?
Preheating your oven is crucial because it ensures that the oven reaches the optimal temperature for baking, which is essential for achieving the best texture and rise in bread. When the oven is properly preheated, the heat is evenly distributed, allowing the bread to rise effectively during the initial baking phase known as “oven spring.”
According to the American Institute of Baking, the best oven temperature for baking bread typically ranges between 350°F to 475°F, depending on the type of bread being baked. This range is critical because it activates the yeast and helps develop the gluten structure at the right moment, ensuring that the bread achieves its desired texture and flavor. Furthermore, a study published in the Journal of Food Science emphasizes that baking bread at the correct temperature directly influences the formation of a crust, which is vital for flavor and moisture retention.
The underlying mechanism involves a combination of thermal dynamics and chemical reactions. When dough is placed in a cold oven, the yeast continues to ferment and produce carbon dioxide at a slower rate, which can lead to a denser loaf. In contrast, preheating allows for an immediate increase in temperature, triggering the yeast to produce gas rapidly and expanding the dough quickly. Additionally, the Maillard reaction, which contributes to the browning and flavor development of the crust, occurs optimally at higher temperatures, further illustrating the importance of beginning with a preheated oven.
What Are Common Mistakes to Avoid When Setting Oven Temperatures?
When setting oven temperatures for baking bread, there are several common mistakes to avoid to achieve the best results.
- Not Preheating the Oven: Failing to preheat the oven can lead to uneven baking, as the bread starts cooking at a lower temperature than intended. This can cause poor rise and texture, resulting in dense bread.
- Using the Wrong Temperature: Different types of bread require different baking temperatures; for example, artisan breads often need higher temperatures to create a good crust. Using a temperature that is too low can result in undercooked, doughy centers.
- Ignoring the Recipe: Each bread recipe is formulated for specific oven temperatures based on the ingredients and desired outcome. Ignoring these instructions can lead to inconsistent results, affecting the bread’s crust, crumb, and overall flavor.
- Not Checking the Oven Temperature Accuracy: Relying solely on the oven’s built-in thermostat can be misleading, as many ovens have inaccurate temperature readings. Using an external oven thermometer can help ensure the temperature is set correctly for optimal baking.
- Opening the Oven Door Too Frequently: Frequently opening the oven door can cause temperature fluctuations, which can hinder the bread’s ability to rise properly and develop a good crust. It’s best to only check the bread when necessary, usually towards the end of the baking time.
How Can You Check if Your Oven Temperature Is Accurate?
To ensure that your oven temperature is accurate for baking bread, you can use several methods:
- Oven Thermometer: An oven thermometer is a simple yet effective tool that gives you a precise reading of your oven’s internal temperature.
- Water Test: This method involves placing a bowl of water in the oven and checking the temperature after it has reached boiling point.
- Temperature Calibration: Some ovens allow you to calibrate the temperature settings through their control panel.
- Baking Test: Conduct a baking test by baking a simple recipe to see how it turns out compared to expectations.
Oven Thermometer: An oven thermometer can be placed inside the oven to provide a direct reading of the actual temperature. This is especially useful because many ovens can be off by as much as 25 degrees or more. By comparing the thermometer reading with the set oven temperature, you can make necessary adjustments for accurate baking.
Water Test: In this test, you fill a bowl with water and place it in the oven, then set the oven to high heat (around 212°F or 100°C). After some time, if the water reaches boiling point, it indicates that your oven is at the correct temperature. If the water begins to boil before or after reaching this temperature, you may need to adjust your oven settings accordingly.
Temperature Calibration: If you find that your oven temperature is consistently off, many modern ovens have a calibration feature that allows you to adjust the temperature settings. This can usually be accessed through the oven’s manual and is a handy way to ensure that your oven heats accurately over time.
Baking Test: Another practical method is to bake a simple recipe, such as cookies or quick bread, that you know well. If the results are significantly different from what you expect, such as burnt bottoms or undercooked centers, it may indicate that your oven temperature is inaccurate. This method not only tests temperature accuracy but also gives you a chance to adjust your baking techniques as needed.
Related Post: