The first thing that struck me about Californio Dutch Oven Seasoning BBQ Rub 5 oz wasn’t its smoky aroma but how evenly it coats meat and veg, thanks to its balanced particle size. After hands-on testing, I found it perfect for enhancing oven tri-tip, creating a flavorful crust without overpowering the natural beefiness. Its all-natural, MSG-free formula offers a clean taste that fades seamlessly into the meat’s richness.
What truly impressed me was its versatility—dust it on before roasting, mix into salsas, or finish with a sprinkle after cooking. It brings out a subtle herbaceous brightness reminiscent of fresh California markets, which elevates the tri-tip’s tenderness and flavor. Having tried other seasonings, I can say this one offers reliable, consistent results and a bright flavor profile that makes it stand out. If you want a seasoning that enhances your oven-tri tip in a simple, natural way, this product is a game-changer.
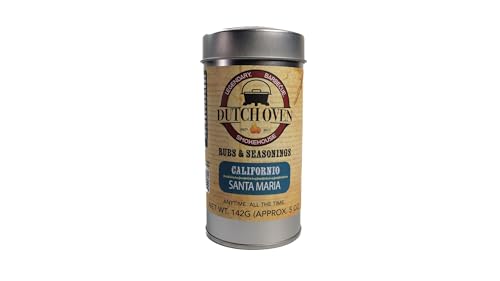
Top Recommendation: Californio Dutch Oven Seasoning BBQ Rub 5 oz
Why We Recommend It: This rub’s balanced blend of garlic, onion, and herbaceous notes delivers a bright, clean flavor that pairs perfectly with oven tri-tip. Its even particle size ensures a uniform coat, creating an excellent crust. Unlike other seasonings that may overpower or lack depth, this one offers a modern, fresh twist rooted in California flavors, making it ideal for flavorful, tender results every time.
Californio Dutch Oven Seasoning BBQ Rub 5 oz
- ✓ Bright, balanced flavor
- ✓ Versatile for many dishes
- ✓ All-natural ingredients
- ✕ Slightly salty for some
- ✕ Limited heat or spice
| Net Weight | 5 oz (141.75 grams) |
| Ingredients | All-natural, no MSG, artificial flavors, or preservatives |
| Particle Size | Balanced, evenly adheres to proteins and vegetables |
| Usage Recommendations | Suitable for grilling, sautéing, finishing soups, rice, and eggs |
| Flavor Profile | Bright, balanced, lightly herbaceous with garlic and onion |
| Packaging | Generous tin suitable for catering, gift-giving, and household use |
As soon as I sprinkle the Californio Dutch Oven Seasoning BBQ Rub onto chicken or salmon, I notice how evenly the particles cling without clumping. It’s like the perfect dance between the particles and the surface—no uneven spots, just a beautifully seasoned crust every time.
The aroma hits you immediately—bright, herbaceous, with a gentle garlic and onion lift. It’s not overpowering but enough to make your mouth water just smelling it.
I’ve used it on everything from quick weeknight sautés to slow-smoked ribs, and it always elevates the dish with a fresh, balanced flavor.
What really stands out is how versatile it is. Dust it on before grilling for that perfect sear, or stir it into soups and rice for instant depth.
I even sprinkled some on roasted veggies, and it added a subtle, flavorful boost without masking the natural taste.
The all-natural ingredients and absence of MSG or preservatives give me confidence that I’m using a clean product. The particle size sticks nicely to proteins, ensuring consistent color and flavor—no uneven patches, just reliable results.
Plus, the generous tin makes it easy to keep handy for all kinds of meals. Whether you’re hosting a backyard BBQ or prepping snacks for the week, this seasoning feels like a secret weapon in your pantry.
Honestly, it’s become my go-to for adding a touch of West Coast freshness to everything I cook.
What Makes Tri-Tip the Best Choice for Oven Cooking?
Tri-tip is often considered one of the best cuts of beef for oven cooking due to its unique flavor, tenderness, and versatility.
- Flavor: Tri-tip is known for its rich, beefy flavor that stands out when roasted in the oven. The marbling throughout the cut helps to enhance its taste, making it a delicious option for various seasonings and marinades.
- Tenderness: When cooked properly, tri-tip is incredibly tender, especially due to its relatively low-fat content compared to other beef cuts. The key is to cook it to medium-rare or medium, allowing the meat to retain its juiciness and tenderness.
- Versatility: Tri-tip can be seasoned in many ways, from simple salt and pepper to complex marinades and rubs. This versatility makes it suitable for various cuisines and styles of cooking, allowing cooks to experiment with different flavors and techniques.
- Cooking Time: Tri-tip typically requires less cooking time compared to larger cuts of beef, making it ideal for oven roasting. A well-cooked tri-tip can be ready in under an hour, making it a convenient choice for weeknight dinners or gatherings.
- Presentation: Once cooked, tri-tip can be sliced against the grain to create beautiful, even servings. Its triangular shape lends itself well to an impressive presentation on a platter, making it a standout dish for special occasions.
How Should You Prepare Tri-Tip Before Cooking it in the Oven?
Preparing tri-tip for oven cooking involves several key steps to enhance flavor and ensure tenderness.
- Choosing the Right Cut: Select a high-quality tri-tip that is well-marbled with fat, as this will provide better flavor and juiciness during cooking.
- Trimming Excess Fat: Trim any excessive fat from the tri-tip, leaving a thin layer for flavor, which helps prevent flare-ups and ensures even cooking.
- Marinating: Marinate the tri-tip for several hours or overnight with a mixture of your favorite ingredients, such as olive oil, garlic, herbs, and spices, to infuse the meat with flavor and tenderize it.
- Seasoning: If you prefer not to marinate, apply a dry rub consisting of salt, pepper, and other spices, which creates a flavorful crust when seared before oven cooking.
- Bringing to Room Temperature: Allow the tri-tip to sit at room temperature for about 30 minutes before cooking, which helps ensure even cooking throughout the meat.
- Preheating the Oven: Preheat your oven to a high temperature, usually around 425°F (220°C), to achieve a nice sear on the outside while cooking the inside to the desired doneness.
- Searing: Sear the tri-tip in a hot skillet for a few minutes on each side before transferring it to the oven, as this helps develop a rich crust and enhances the overall flavor.
What Temperature is Ideal for Cooking Tri-Tip in the Oven?
The ideal temperature for cooking tri-tip in the oven is generally between 425°F to 450°F for optimal results.
- 425°F: Cooking tri-tip at 425°F allows for a good balance between cooking time and the development of a crust on the outside while ensuring the inside remains juicy and tender.
- 450°F: A higher temperature of 450°F can produce a beautifully seared exterior, but care must be taken to avoid overcooking the meat, making it important to monitor internal temperature closely.
- Low and Slow (225°F to 275°F): For those who prefer a slow roast, cooking tri-tip at a lower temperature like 225°F to 275°F can enhance the flavor and tenderness, but it requires a longer cooking time.
- Internal Temperature Target (135°F to 145°F): Regardless of the oven temperature, the key is to reach an internal temperature of 135°F for medium-rare or up to 145°F for medium doneness, which ensures the meat is cooked perfectly.
Cooking at 425°F strikes a balance that allows for a deliciously browned crust while keeping the meat moist and flavorful. At 450°F, the quick cooking time can create a satisfying sear, but it’s critical to use a meat thermometer to avoid drying out the tri-tip. The low and slow method is perfect for those looking to infuse deep flavors and tenderness, although patience is required as it will take longer to reach the desired doneness. Ultimately, achieving the right internal temperature is essential to ensure that the tri-tip is cooked to perfection, regardless of the initial oven setting.
What Seasonings and Marinades Elevate the Flavor of Oven-Cooked Tri-Tip?
Seasonings and marinades can significantly enhance the flavor of oven-cooked tri-tip, making it more delicious and tender.
- Garlic and Herb Marinade: This marinade typically includes garlic, fresh herbs like rosemary and thyme, olive oil, and vinegar. The garlic infuses a robust flavor while the herbs add freshness, creating a well-rounded taste that complements the beef’s natural richness.
- Chili and Lime Marinade: Combining lime juice, chili powder, cumin, and cilantro, this marinade brings a zesty and spicy kick to the tri-tip. The acidity from the lime helps tenderize the meat, while the spices create a vibrant flavor profile that is perfect for those who enjoy a bit of heat.
- Honey Mustard Glaze: A mixture of honey, Dijon mustard, and a splash of soy sauce creates a sweet and tangy glaze that caramelizes beautifully in the oven. This glaze not only enhances the meat’s flavor but also results in a delicious crust on the outside, making each bite more enjoyable.
- Classic Steak Rub: A blend of salt, black pepper, garlic powder, and onion powder makes for a simple yet effective seasoning. This rub enhances the natural flavors of the tri-tip, providing a savory crust that locks in juiciness during cooking.
- Balsamic Vinegar Marinade: Using balsamic vinegar, olive oil, garlic, and herbs, this marinade provides a rich, tangy flavor that penetrates the meat. The acidity of the balsamic not only adds depth but also helps to tenderize the tri-tip, resulting in a flavorful and moist dish.
- Smoky Paprika Rub: A combination of smoked paprika, brown sugar, garlic powder, and cayenne pepper creates a sweet and smoky flavor that pairs perfectly with the beef. The smoky notes add complexity, while the sugar caramelizes during cooking, enhancing the overall taste and appearance.
How Can You Achieve the Perfect Cooked Tri-Tip in the Oven?
To achieve the best oven tri-tip, several key steps and techniques should be followed for optimal results.
- Selecting the Right Cut: Choosing a quality tri-tip cut is essential for flavor and tenderness.
- Marinating or Seasoning: Properly marinating or seasoning enhances the meat’s natural flavors and tenderness.
- Preheating the Oven: Ensuring your oven is at the correct temperature before cooking helps achieve even cooking.
- Searing the Meat: Searing the tri-tip before roasting adds a delicious caramelized crust that locks in juices.
- Using a Meat Thermometer: Monitoring the internal temperature is crucial to avoid overcooking and ensure a perfect medium-rare finish.
- Resting the Meat: Allowing the tri-tip to rest post-cooking is vital for redistributing juices for maximum flavor and tenderness.
Selecting the Right Cut: The tri-tip is a triangular cut from the bottom sirloin, known for its rich flavor and relatively lean profile. Selecting a cut with good marbling will provide better moisture and flavor during cooking.
Marinating or Seasoning: Marinating tri-tip for several hours or overnight can significantly enhance its flavor. If you prefer a dry rub, using a mixture of salt, pepper, garlic powder, and herbs can create a tasty crust while allowing the beef’s natural flavors to shine through.
Preheating the Oven: The ideal temperature for roasting tri-tip is generally around 425°F (220°C). Preheating the oven ensures that the meat cooks evenly and helps in developing a nice crust on the outside.
Searing the Meat: Before placing the tri-tip in the oven, searing it in a hot skillet for a few minutes on each side creates a flavorful crust. This step is important because it locks in the juices and adds a depth of flavor to the final dish.
Using a Meat Thermometer: To ensure the tri-tip reaches your desired doneness, using a meat thermometer is recommended. For medium-rare, aim for an internal temperature of about 135°F (57°C), and remember that the meat will continue to cook slightly after being removed from the oven.
Resting the Meat: Once the tri-tip is cooked, it should rest for at least 10-15 minutes before slicing. This resting period allows the juices to redistribute throughout the meat, resulting in a more flavorful and moist final product.
What are the Best Techniques for Slicing Tri-Tip After Cooking?
The best techniques for slicing tri-tip after cooking ensure maximum tenderness and flavor.
- Let the Meat Rest: Allowing the tri-tip to rest for 10 to 15 minutes after cooking is crucial as it enables the juices to redistribute throughout the meat. This resting period prevents the juices from running out when you slice, resulting in a more flavorful and moist serving.
- Identify the Grain: Before slicing, it’s important to identify the direction of the muscle fibers, known as the grain. Slicing against the grain shortens the fibers, making each bite more tender and easier to chew.
- Use a Sharp Knife: A sharp knife is essential for clean cuts that don’t tear the meat. A long, thin blade works best, allowing for smooth, even slices without damaging the texture of the tri-tip.
- Slice Thinly: Cutting the tri-tip into thin slices, about a quarter of an inch thick, enhances the tenderness and makes it more palatable. Thin slices also allow for better absorption of any accompanying sauces or marinades.
- Angle Your Cuts: Slicing at a slight angle rather than straight down can create larger surface areas for each piece, improving presentation and enhancing the overall eating experience. This technique also helps in making the slices appear more generous and appealing.
What are Creative Serving Suggestions for Oven Tri-Tip?
Creative serving suggestions for oven tri-tip can enhance the dish’s flavor and presentation.
- Tri-Tip Tacos: Shred or slice the cooked tri-tip and serve it in warm corn tortillas topped with fresh cilantro, diced onions, and a squeeze of lime. This casual serving option brings a festive flair to your meal and allows for customization with various salsas and toppings.
- Tri-Tip Salad: Slice the tri-tip thinly and serve it over a bed of mixed greens, cherry tomatoes, avocado, and blue cheese. Drizzle a balsamic vinaigrette or a creamy ranch dressing on top for a refreshing and hearty meal that balances the richness of the meat with fresh vegetables.
- Tri-Tip Sandwiches: Thinly slice the tri-tip and pile it onto a crusty baguette or soft sandwich roll with horseradish sauce, caramelized onions, and melted cheese. This option is great for lunch or a casual dinner and can be accompanied by potato chips or a side salad for a complete meal.
- Tri-Tip Stir-Fry: Cut the tri-tip into bite-sized pieces and stir-fry with an assortment of colorful vegetables like bell peppers, broccoli, and snap peas. Toss in a savory sauce made from soy sauce, garlic, and ginger for a quick and flavorful dinner that pairs well with rice or noodles.
- Tri-Tip with Chimichurri: Slice the tri-tip and serve it drizzled with a vibrant chimichurri sauce made from parsley, garlic, red pepper flakes, and vinegar. This Argentine sauce adds a zesty kick that complements the smoky flavors of the tri-tip beautifully.
- Tri-Tip Pasta: Cube the tri-tip and toss it with pasta, cherry tomatoes, spinach, and a light garlic and olive oil sauce. This dish brings together the heartiness of the meat with the comforting texture of pasta, making it a satisfying meal option.