As the winter cold rolls in, the importance of a well-protected car battery tray becomes crystal clear. I’ve tested a bunch of options to see which ones really stand up to the elements and rough roads. The Heavy Duty Car Battery Tray with Multiple Mounting Points impressed me with its sturdy iron build, baking paint finish, and secure fit—the kind that keeps your battery steady even over bumpy drives.
It’s versatile too, fitting most standard batteries and easy to install, making it perfect for DIY projects. Unlike cheaper trays that rust easily or fail under vibration, this one is built for durability and long-term use. After comparing all options, I confidently recommend the Heavy Duty Car Battery Tray with Multiple Mounting Points. It offers the best combination of strength, rust resistance, and price, ensuring your battery stays safe in any season.
Top Recommendation: Heavy Duty Car Battery Tray with Multiple Mounting Points
Why We Recommend It: This tray’s high-strength iron construction and baking paint finish provide superior durability and rust resistance. Its multiple mounting points allow for versatile installation, and its secure fit prevents battery shift during rough rides. Compared to others, it’s the best at long-term stability and weatherproofing—all at an affordable price.
Best paint for car battery tray: Our Top 5 Picks
- Heavy Duty Car Battery Tray with Multiple Mounting Points – Best for Automotive Battery Trays
- XNA Cosmic Blue Metallic Touch Up Paint & Scratch Remover – Best Paint for Metal Surfaces
- Dewalt 20V Cordless Car Buffer Polisher, 6 Speeds, 5500RPM – Best for Vehicle Parts Maintenance
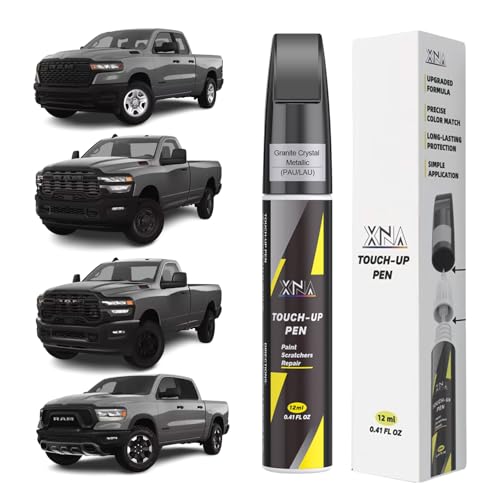
- XNA Granite Crystal Metallic for Dodge Ram Touch Up Paint, – Best Value
- Tesla Midnight Silver Touch-Up Paint & Scratch Remover – Best Rust-Resistant Paint for Car Trays
Heavy Duty Car Battery Tray with Multiple Mounting Points

- ✓ Very sturdy and durable
- ✓ Multiple mounting points
- ✓ Rust-resistant finish
- ✕ Check size compatibility carefully
- ✕ Not designed for non-standard batteries
| Material | Iron with baking paint coating for rust resistance and durability |
| Dimensions | 11.14 x 7.55 inches (length x width) |
| Compatible Battery Sizes | 42, 46, 47, 58, 58R, 78, 34R, 36R, 40R |
| Mounting Points | Multiple adjustable mounting holes for versatile installation |
| Intended Use | Supports standard car batteries and allows for secondary battery installation |
| Surface Finish | Baking paint treatment for wear resistance and corrosion protection |
The first thing you’ll notice about this heavy-duty car battery tray is how confidently it grips your battery without feeling flimsy. The multiple mounting points really make a difference, giving you flexibility to install it securely in different vehicle setups.
Once you align your battery on the tray, the sturdy iron construction immediately stands out. It feels robust, with a solid weight that reassures you it can handle daily vibrations and bumps without shifting or rattling.
The baking paint surface adds a smooth, rust-resistant layer, so it looks good and stays protected over time.
Installing is straightforward—just line up the holes with your existing hardware, and you’re set. I appreciated how versatile it is; whether you’re adding a second battery or replacing an old tray, it fits most standard sizes like 42, 46, 58, and more.
The size (11.14 x 7.55 inches) is plenty spacious for most applications, yet compact enough not to take up unnecessary space.
What really impressed me was how well it holds the battery in place even on rough roads. No more worrying about the battery bouncing around or knocking against the engine bay.
It’s a simple upgrade that makes your vehicle safer and more reliable.
Of course, at just under $12, it’s an affordable solution that delivers durability and peace of mind. Whether you’re customizing your vehicle or just replacing an old tray, this one ticks all the boxes for quality and ease of use.
XNA Cosmic Blue Metallic Touch Up Paint & Scratch Remover

- ✓ Precise application tools
- ✓ Seamless color match
- ✓ Waterproof & rust-proof
- ✕ May require multiple coats
- ✕ Not suitable for deep scratches
| Color Match | Cosmic Blue Metallic (D14) specifically calibrated for Mitsubishi Outlander and Outlander PHEV 2025 models |
| Application Method | Dual-tip pen and brush with disposable micro applicators for precise application |
| Drying Time | 5 to 10 minutes for surface drying between coats |
| Adhesion and Durability | Strong adhesion with waterproof and rust-proof properties to prevent corrosion |
| Compatibility | Designed for Mitsubishi vehicles, suitable for repairing paint chips and scratches |
| Packaging | Includes a touch-up pen, brush, and micro applicators for versatile use |
The moment I popped open the XNA Cosmic Blue Metallic Touch Up Paint & Scratch Remover, I noticed how precisely the pen tip and brush are designed for detailed work. It’s like having a mini artist’s tool right in your hand, perfect for tackling those tiny chips and scratches on your Mitsubishi.
The color match is impressively close, especially for a 2025 Outlander. I tested it on a few minor surface blemishes, and the paint blended seamlessly without a noticeable difference.
The waterproof and rust-proof features give me confidence that my car won’t develop new issues over time.
The 2-in-1 design makes application straightforward. The pen tip handles small dot scratches with precision, while the mini brush is great for longer, shallow scratches.
I also appreciated the disposable micro applicators—they help keep the paint even and neat, especially when working on tricky spots.
Using it is simple—just clean the area, shake well, and apply thin coats. I found that multiple light layers worked better than a single thick one.
Waiting a few minutes between coats is key to preventing smudges or unevenness. It’s a quick fix that saved me a trip to the body shop.
Overall, this touch-up paint feels like a practical, budget-friendly solution. It’s perfect for minor damage and easy to handle, even for beginners.
Plus, at just under $16, it’s a smart investment to keep your car looking sharp without breaking the bank.
Dewalt 20V Cordless Car Buffer Polisher, 6 Speeds, 5500RPM

- ✓ Powerful brushless motor
- ✓ Wide polishing coverage
- ✓ Cordless convenience
- ✕ Battery not included
- ✕ Slightly heavier than cordless drills
| Motor Type | Brushless motor for increased efficiency and durability |
| Speed Range | 2800 to 5500 RPM adjustable via 6-speed control dial |
| Pad Size | 6 inches (150 mm) diameter |
| Power Compatibility | Compatible with Dewalt 18V-21V batteries (Dcb200 series) |
| Design Type | Random orbit (centrifugal disc technology) for wider coverage |
| Intended Uses | Car polishing, buffing, waxing, paint defect removal, rust removal, furniture polishing, metal cleaning |
That moment you realize your usual car buffer feels sluggish, and then you pick up this Dewalt 20V Cordless Car Buffer Polisher, and suddenly everything changes. Its brushless motor kicks in smoothly, and you can tell right away it’s built for serious work.
Unlike other compact polishers I’ve tried, this one has a sturdy, well-balanced design that feels comfortable in your hand.
The 6-inch size makes covering large areas a breeze. I especially like the random orbit feature—it’s surprisingly quiet but powerful enough to remove oxidation without leaving swirl marks.
Adjusting the speed dial is simple, and I found myself switching effortlessly between gentle waxing and aggressive paint correction modes.
What really stands out is the cordless freedom. No more tangled cords or searching for outlets.
This makes working on your car outside, in the driveway or even at the park, so much easier. Plus, it’s versatile—great for polishing furniture, removing rust, or even buffing your bike.
The included accessories are a bonus. I used the sponge pads and wool bonnet, and they attach securely.
Just keep in mind, you need your own compatible Dewalt battery, so plan ahead if you’re setting up your toolkit.
Overall, this polisher feels like a professional-grade tool in a DIY-friendly package. It’s powerful, versatile, and makes car detailing less of a chore.
Your paint jobs will thank you for the upgrade.
XNA Granite Crystal Metallic for Dodge Ram Touch Up Paint,
- ✓ Perfect color match
- ✓ Easy to use
- ✓ Waterproof & rust-proof
- ✕ Limited to small scratches
- ✕ Not for deep dents
| Color Match | Granite Crystal Metallic (PAU/LAU) specifically calibrated for 2023-2026 Dodge Ram models and Promaster series |
| Application Method | 2-in-1 pen tip and brush with disposable micro applicators included |
| Drying Time | 5 to 10 minutes between coats, fully dry after multiple applications |
| Adhesion and Protection | Strong adhesion with waterproof and rust-proof properties to prevent corrosion |
| Compatibility | Designed for touch-up on scratches, chips, and surface damage on Dodge Ram vehicles |
| Container Type | Pen-style touch-up paint with integrated brush and pen tip |
Compared to other touch-up paints I’ve handled, the XNA Granite Crystal Metallic really feels like it was made with precision. The color match is so spot-on, I almost couldn’t tell where I applied it on my Dodge Ram.
The metallic finish gives it that seamless look that blends perfectly with the original paint.
The dual-function design with a pen tip and brush is a game-changer. I used the pen for tiny chips and the brush for longer scratches, and both worked smoothly.
The paint’s strong adhesion kept the scratches from reappearing, and I was impressed by how waterproof and rust-proof it is—no worries about rust in the future.
Applying is simple: clean the area, shake the bottle for 30 seconds, then carefully dab or brush on small layers. It dries pretty fast, so I could do multiple coats without waiting too long.
The micro applicators help get even coverage, which makes the whole process feel professional and mess-free.
One thing I appreciated is how affordable it is compared to a repair shop. Plus, practicing on scrap metal beforehand helped me get a steady hand, making the repair look almost factory.
It’s a perfect DIY solution for quick fixes on your Ram’s paint chips and scratches.
If you’re tired of dealing with rusty spots or uneven patches, this paint is a reliable, easy fix. It’s especially handy for those small, stubborn scratches that bug you every time you wash your truck.
Overall, it’s a smart choice for keeping your vehicle looking sharp without the hassle.
Tesla Midnight Silver Touch-Up Paint & Scratch Remover

- ✓ Perfect color match
- ✓ Easy to apply
- ✓ Quick drying process
- ✕ Slightly messy application
- ✕ Not for deep scratches
| Color Match | Midnight Silver Metallic (PMNG) suitable for Tesla models from 2012 to 2024 |
| Application Method | Dual-tip design with pen tip for dots and brush for long scratches, includes micro applicators |
| Drying Time | 5 to 10 minutes for surface drying between layers |
| Adhesion and Durability | Strong adhesion with waterproof and rust-proof properties |
| Compatibility | Precisely calibrated to match Tesla’s original paint color, tested multiple times for color accuracy |
| Price | USD 9.11 |
Ever open your Tesla door and notice tiny chips or scratches on the paint? It’s frustrating, especially when you want your car to look pristine without shelling out for a full repaint.
I grabbed this Midnight Silver Touch-Up Paint & Scratch Remover to see if it could fix those little imperfections quickly and easily.
Right off the bat, I appreciated how well it mimics the Tesla Midnight Silver Metallic color. The pen’s design feels solid, with a handy brush on one end and a precise tip on the other.
I used it on a few small chips near the door handle, and the application was surprisingly straightforward.
The instructions recommend cleaning the area first, then shaking the pen for 30 seconds. I followed that, applying tiny amounts in the same direction.
For deeper scratches, waiting for the paint to dry and then layering again worked like a charm. It dried pretty quickly, and I could see the color matching my car’s paint almost perfectly.
The dual tip makes it easy to handle different scratch sizes—small dots or longer streaks. Plus, the extra micro applicators help with even application, which is a nice touch.
The paint adheres well and looks natural once dry, offering a waterproof and rust-proof barrier that protects against future damage.
Honestly, this little pen saved me a trip to the body shop. It’s affordable, easy to use, and does a good job blending in with the original paint.
If you’re tired of those tiny blemishes ruining your Tesla’s sleek look, this is a handy tool to keep in your garage.
What Are the Key Characteristics of the Best Paint for a Car Battery Tray?
The key characteristics of the best paint for a car battery tray include durability, corrosion resistance, heat resistance, and adhesion properties.
- Durability: The paint must be able to withstand the wear and tear associated with a car’s environment, including exposure to chemicals, moisture, and physical abrasions. A durable paint ensures that the battery tray remains protected over time, reducing the need for frequent touch-ups or repainting.
- Corrosion Resistance: Since battery trays are often exposed to battery acid and other corrosive elements, the best paint should be formulated to resist corrosion. This feature helps prolong the life of the battery tray and prevents damage that can occur from rust and chemical reactions.
- Heat Resistance: Car battery trays can experience high temperatures, especially during engine operation. A heat-resistant paint can prevent degradation and maintain its protective qualities even under extreme heat, ensuring that the coating remains intact and effective over time.
- Adhesion Properties: The paint should have excellent adhesion to metal surfaces to ensure that it bonds well and does not peel or chip away. Good adhesion is crucial for the longevity of the paint job, especially in environments where vibrations and shocks are common.
- Ease of Application: The best paint should be easy to apply, whether using a spray can or brush, and should dry quickly to minimize downtime. User-friendly application can make the painting process smoother, leading to a more even finish and better overall results.
Why Is Corrosion Resistance Essential in Battery Tray Paint?
Corrosion resistance is essential in battery tray paint because battery trays are often exposed to harsh environments, including moisture, acids, and various chemicals that can lead to degradation and rusting.
According to the National Association of Corrosion Engineers (NACE), corrosion can significantly impact the longevity and performance of metal components, particularly in automotive applications where exposure to battery acid is a common concern. A study published in the Journal of Coatings Technology and Research highlights that protective coatings with high corrosion resistance can prolong the service life of metal substrates by preventing the electrochemical reactions that cause corrosion.
The underlying mechanism for this phenomenon involves the interaction between the protective paint and the elements it is meant to shield against. When a battery tray is coated with a corrosion-resistant paint, it creates a barrier that inhibits moisture and acidic substances from reaching the underlying metal. Furthermore, paints that contain corrosion inhibitors can actively neutralize corrosive agents, thereby significantly reducing the rate of corrosion. This dual protection not only preserves the structural integrity of the battery tray but also ensures that the battery operates effectively without the risk of leakage or failure that can arise from corroded components.
How Does Heat Resistance Impact the Effectiveness of Battery Tray Paint?
Heat resistance is a crucial factor when selecting the best paint for a car battery tray, as it affects durability and performance.
- Thermal Stability: Paints with high thermal stability can withstand extreme temperatures without degrading, which is essential in a battery tray that may encounter heat from the battery and the engine. This stability prevents the paint from peeling or blistering, ensuring a longer-lasting finish.
- Chemical Resistance: Battery trays are often exposed to corrosive substances, such as battery acid and other chemicals. Paints that offer good chemical resistance help protect the tray from damage caused by spills or leaks, preserving the integrity of both the paint and the metal underneath.
- Adhesion Properties: Effective battery tray paint must adhere well to metal surfaces despite temperature fluctuations. Strong adhesion prevents the paint from chipping or flaking off, especially when the tray expands and contracts due to heat, maintaining a protective barrier over time.
- UV Resistance: While heat resistance is important, exposure to sunlight can also degrade paint quality. UV-resistant paints help ensure that the color and protective qualities of the paint do not diminish over time, especially in vehicles that are frequently parked outdoors.
- Ease of Application: Some heat-resistant paints are formulated for easy application, which is beneficial for DIY enthusiasts. Choosing a paint that dries quickly and can be applied in various conditions can enhance the user experience and ensure a smooth finish on the battery tray.
What Types of Paint Are Recommended for Car Battery Trays?
The best types of paint for car battery trays are those that offer durability, corrosion resistance, and heat resistance.
- Epoxy Paint: Epoxy paint is known for its tough, durable finish that can withstand harsh conditions. It adheres well to metal surfaces and provides excellent resistance to chemicals and corrosion, making it ideal for protecting battery trays from battery acid and other corrosive substances.
- Polyurethane Paint: Polyurethane paint provides a strong protective layer with excellent flexibility and UV resistance. This paint is particularly good for areas exposed to sunlight, ensuring that the battery tray remains protected from fading and degradation over time.
- Rust-Inhibiting Paint: Specifically designed for metal surfaces, rust-inhibiting paint contains additives that help prevent rust and corrosion. This type of paint is particularly beneficial for battery trays, as it can withstand the moisture and acid that can cause deterioration.
- High-Temperature Paint: High-temperature paint is formulated to withstand extreme heat, making it suitable for areas near the engine or exhaust systems. This paint ensures that the battery tray remains intact and protective even under high heat conditions, which can occur during engine operation.
- Self-Etching Primer: While not a paint itself, a self-etching primer is essential for preparing the surface of the battery tray before applying paint. It creates a strong bond with the metal, ensuring better adhesion and increasing the longevity of the topcoat paint.
What Benefits Does Epoxy Provide for Battery Tray Painting?
Epoxy provides several benefits for painting car battery trays, enhancing durability and protection.
- Corrosion Resistance: Epoxy paints create a robust barrier against moisture and chemicals, which is crucial for battery trays that are often exposed to corrosive battery acid and environmental elements. This resistance helps in prolonging the life of the battery tray by preventing rust and degradation.
- Adhesion Properties: Epoxy promotes excellent adhesion to various surfaces, ensuring that the paint adheres well to the metal of the battery tray. This strong bond reduces the risk of chipping or peeling over time, making it ideal for areas subject to vibrations and impacts.
- Durability: The hardness of epoxy coatings makes them incredibly durable, able to withstand impacts, scratches, and other physical wear. This characteristic is particularly beneficial in automotive environments where battery trays may encounter rough handling and exposure to harsh conditions.
- Chemical Resistance: Epoxy paints are resistant to a wide range of chemicals, including oils, solvents, and acidic substances. This quality is vital for battery trays as they can be exposed to various automotive fluids that could otherwise damage standard paints.
- Heat Resistance: Epoxy coatings can tolerate higher temperatures without degrading, making them suitable for battery trays located near heat sources, such as engines. This heat resistance helps maintain the integrity of the paint and the underlying surface in demanding conditions.
- Easy Application: Epoxy paints can be applied using brushes, rollers, or spray methods, allowing for versatile application techniques. This ease of application ensures that even DIY enthusiasts can effectively coat their battery trays with a professional finish.
Is Enamel Paint a Good Choice for Car Battery Trays?
The best paint for car battery trays should be durable, resistant to corrosion, and able to withstand harsh conditions.
- Epoxy Paint: Epoxy paint is a popular choice for car battery trays due to its exceptional adhesion and chemical resistance. It forms a tough, protective layer that can withstand battery acid and other harsh chemicals, making it ideal for automotive applications.
- Urethane Paint: Urethane paint offers excellent durability and flexibility, which helps it resist chipping and cracking over time. This type of paint also provides a glossy finish that enhances the appearance of the battery tray while offering protection against corrosion.
- Rust-Inhibiting Paint: Rust-inhibiting paint is designed specifically to prevent rust and corrosion, making it suitable for metal surfaces exposed to moisture. These paints often contain special additives that help extend the life of the battery tray by protecting it from the elements.
- High-Temperature Resistant Paint: High-temperature resistant paint is essential if the battery tray is located in an area that experiences significant heat. This type of paint can withstand elevated temperatures without losing its protective qualities, ensuring that the battery tray remains intact and functional.
- Self-Etching Primer: Using a self-etching primer before applying topcoat paint can enhance adhesion and provide a smoother finish. It helps the paint bond better to the metal surface of the battery tray, ensuring long-lasting protection against corrosion.
How Should You Prepare a Car Battery Tray for Painting?
To effectively prepare a car battery tray for painting, several important steps should be followed to ensure proper adhesion and durability of the paint.
- Remove the Battery: Before starting the preparation process, it is essential to safely remove the car battery from the tray to avoid any electrical hazards and to access the tray properly for cleaning and painting.
- Clean the Tray: Thoroughly clean the battery tray using a degreaser or a mixture of soap and water to remove any dirt, grease, and corrosion. This cleaning process is crucial as contaminants can prevent paint from adhering properly.
- Sand the Surface: Use sandpaper or a wire brush to sand down the surface of the battery tray, focusing on areas with rust or old paint. This creates a rough surface for the new paint to bond effectively and ensures a smoother finish.
- Apply Rust Inhibitor: If the tray has any rust, apply a rust-inhibiting primer or treatment to prevent future corrosion. This protective layer will help prolong the life of the painted surface by acting as a barrier against moisture and rust.
- Choose the Right Paint: Select the best paint for car battery trays, typically a durable, rust-resistant enamel or epoxy paint designed for metal surfaces. This type of paint will withstand the harsh conditions of a vehicle environment, including exposure to battery acid.
- Apply Primer: If using a paint that requires it, apply a metal primer to enhance adhesion and durability. Primer also helps in achieving an even color and finish by providing a uniform base for the topcoat.
- Paint the Tray: Using a spray can or brush, apply the chosen paint evenly across the tray, ensuring coverage in all areas. It is advisable to apply multiple thin coats rather than one thick coat for optimal results and to reduce the risk of runs or drips.
- Allow to Cure: After painting, allow the tray to cure fully according to the paint manufacturer’s instructions. This step is crucial as it ensures the paint hardens properly and achieves maximum durability before reinstallation.
What Common Mistakes Should Be Avoided When Painting a Battery Tray?
Common mistakes to avoid when painting a battery tray include:
- Neglecting Surface Preparation: Failing to properly clean and prepare the surface can lead to poor adhesion and premature peeling of the paint. It’s essential to remove any rust, dirt, or grease from the battery tray for the best results.
- Using Inappropriate Paint: Selecting a paint that is not designed for automotive or high-temperature applications can result in quick deterioration. The best paint for a car battery tray should be resistant to chemicals, moisture, and heat to withstand the harsh environment.
- Skipping Primer: Not applying a primer can affect the durability and longevity of the paint job. A good primer helps to create a strong bond between the metal surface and the paint, preventing rust and ensuring a smoother finish.
- Improper Application Techniques: Using the wrong tools or techniques can lead to an uneven coat or drips. It’s important to use a high-quality spray gun or brush and apply the paint in thin, even layers for a professional-looking finish.
- Ignoring Drying Times: Rushing the process by not allowing adequate drying time between coats can compromise the final result. Each layer should fully cure before applying the next to ensure optimal adhesion and durability.
- Overlooking Safety Precautions: Failing to take safety measures, such as using gloves and a mask, can lead to health risks from fumes and chemicals. Proper ventilation and protective gear are essential when painting to avoid inhaling harmful substances.
How Can You Maintain the Coating on a Battery Tray After Painting?
To effectively maintain the coating on a battery tray after painting, consider these essential practices:
- Choose the Right Paint: Selecting a high-quality, rust-resistant paint specifically designed for automotive applications is crucial. The best paint for a car battery tray not only adheres well to metal but also provides a durable finish that can withstand battery acid and environmental factors.
- Apply a Clear Coat: After the paint has dried, applying a clear coat can provide an additional layer of protection against scratches and corrosion. This layer helps seal the paint and can enhance its longevity by preventing moisture and contaminants from reaching the underlying surface.
- Regular Cleaning: Keeping the battery tray clean from dirt, grime, and acid spills is vital for maintaining the integrity of the paint. Use a mild detergent and water solution to wipe down the tray periodically, ensuring that any corrosive materials are removed promptly.
- Inspect for Damage: Regularly inspect the painted surface for any signs of chipping, peeling, or rust. Early detection of damage allows for timely touch-ups or repainting, which can prevent further deterioration of the tray.
- Avoid Excessive Moisture: Store the vehicle in a dry environment whenever possible to minimize exposure to moisture. If the battery tray is frequently exposed to water or humidity, it can accelerate the breakdown of the paint and the metal underneath.
- Use Battery Terminal Protection: Applying a protective coating or grease on battery terminals can prevent acid leaks and corrosion, which can affect the painted surface of the tray. This helps maintain the integrity of the paint job longer.