To load test a battery, first, ensure it’s fully charged. Then, using a load tester, apply a load equal to half of the battery’s Cold Cranking Amps (CCA) rating for 15 seconds. For instance, if the CCA is 700, apply a 350-amp load. After 15 seconds, check the battery’s voltage. If it’s above 9.6 volts, the battery is in good condition. If it’s below, consider replacing the battery.
As someone who’s spent countless hours tinkering with cars and batteries, I can’t stress enough the importance of a well-functioning battery. It’s the heart of your vehicle, and without it, well, you’re not going anywhere. Over the years, I’ve seen batteries in all states – from brand new and full of life, to old and struggling to hold a charge. And let me tell you, there’s nothing quite like the feeling of turning the key and hearing… nothing. That’s why I’m a big advocate for regular battery load tests.
Now, you might be wondering, “What’s a load test?” Well, I’m glad you asked! A load test is a simple yet effective way to check the health of your battery. It’s like a stress test for your heart but for your car’s battery. It tells you whether your battery can handle the load (hence the name) when it’s working its hardest.
In my experience, a load test can save you a lot of headaches down the road. It’s a quick and easy way to catch potential battery issues before they leave you stranded. So, buckle up, because we’re about to dive into the nitty-gritty of how to load test a battery. Trust me, it’s easier than you think, and your car will thank you for it!
What You Need to Know About Car Batteries?
Before we dive into the world of load testing, let’s take a moment to appreciate the humble car battery. It’s an unsung hero, quietly powering your vehicle’s electrical system and asking for very little in return.
Basic Information About Car Batteries
Car batteries, or automotive batteries as they’re formally known, are rechargeable batteries that supply electric energy to your vehicle. They’re a type of lead-acid battery, designed to deliver a large burst of energy over a short period of time. This energy is used to start the engine, and once that’s done, the battery’s job is essentially over.
Car batteries are rated in Cold Cranking Amps (CCA), which is a measure of how much power the battery can deliver at 0 degrees Fahrenheit for 30 seconds while maintaining a voltage of at least 7.2 volts. The higher the CCA, the more powerful the battery.
The Role of a Battery in a Car’s Electrical System
Now, you might be thinking, “I get it, batteries are important. But what exactly do they do?” Well, I’m glad you asked!
The battery is the cornerstone of your car’s electrical system. It provides the juice needed to power all the electrical components in your car – from the engine control unit and fuel injectors to the radio and headlights. When you turn the ignition key, you’re asking the battery to wake up all these components and get them ready for action.
But that’s not all. The battery also stabilizes the voltage to keep your engine running. So, you see, without a healthy battery, your car is like a coffee addict without their morning brew – sluggish and unresponsive.
Signs of a Failing Battery
Just like us, batteries have their good days and bad days. But unlike us, they can’t tell you when they’re feeling under the weather. That’s why it’s important to know the signs of a failing battery.
Here are a few red flags to watch out for:
- Slow engine crank: When you try to start the vehicle, the cranking of the engine is sluggish and takes longer than normal to start.
- Check engine light: The check engine light sometimes appears when your battery power is weak.
- Low battery fluid level: Car batteries typically have a part of the casing that’s translucent so you can always keep an eye on your battery’s fluid level.
- Swollen battery case: If your battery casing looks bloated, it could be a sign that your battery has been exposed to excessive amounts of heat, causing it to swell.
Remember, a failing battery is not a death sentence. With a bit of TLC and regular load testing, you can keep your battery in tip-top shape and extend its lifespan. After all, prevention is better than cure, right?
Preparing for a Battery Load Test
Before we dive into the nitty-gritty of preparing for a battery load test, let’s take a moment to appreciate the importance of a clean and fully charged battery. You see, a clean battery not only ensures optimal connection but also prevents corrosive build-up that can hinder performance. On the other hand, a fully charged battery is essential for an accurate load test. It’s like showing up to a marathon fully rested and hydrated – you’re setting yourself up for success.
Tools Needed for a Load Test
Now, let’s talk about the tools you’ll need for a load test. It’s like going on a camping trip – you wouldn’t leave without your tent and sleeping bag, right? Similarly, you wouldn’t start a load test without the right tools. Here’s what you’ll need:
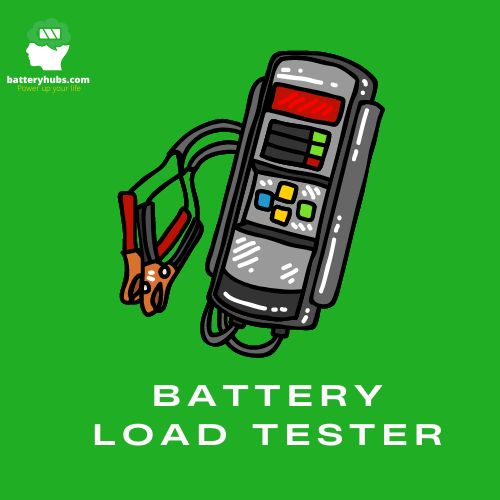
Battery load tester
This is the main tool you’ll need. It applies a load to the battery while measuring the battery’s ability to maintain voltage.
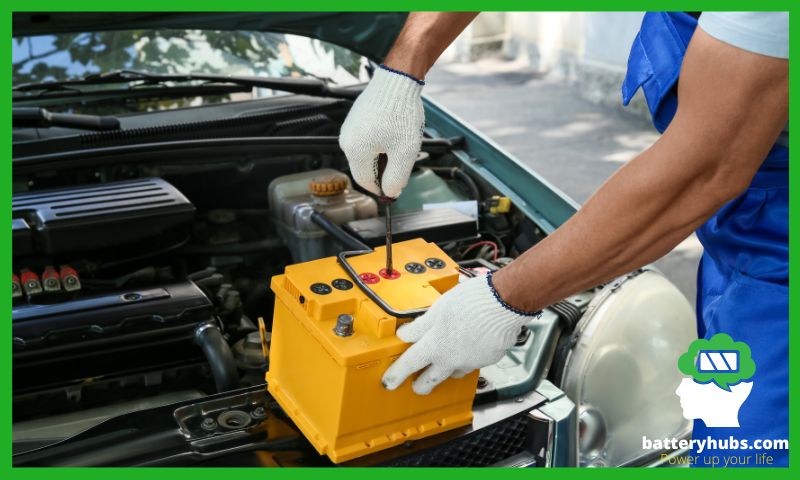
Protective gear
Safety first, folks! Always wear gloves and safety glasses when working with car batteries.

Battery post cleaner
This tool is used to clean the battery terminals, ensuring a good connection for the load test.

Battery charger
If your battery isn’t fully charged, you’ll need a battery charger to juice it up before the test.

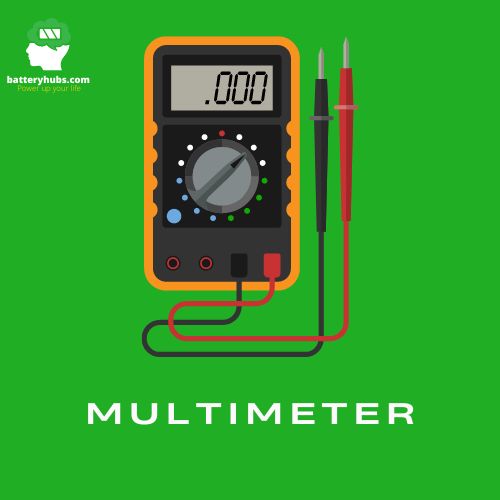
Multimeter
This tool is used to measure the battery voltage before and after the load test.
Remember, folks, preparation is key when it comes to battery load testing. A clean, fully charged battery and the right tools are your tickets to a successful and accurate test. So, roll up your sleeves, put on your safety glasses, and let’s get testing!
Stay tuned for the next section where we’ll dive into the actual process of performing a battery load test. It’s going to be electrifying!
How to Perform a Battery Load Test?
Today, we’re going to dive into the electrifying world of battery load testing. Now, I know what you’re thinking: “Battery load testing? Sounds like a thrilling Saturday night!” Well, buckle up, because it’s about to get even more exciting. We’re going to learn how to perform a battery load test using two different tools: a multimeter and a battery load tester. So, grab your safety goggles, and let’s get started!
Step-by-step guide on how to perform a load test with a multimeter
A multimeter is a versatile tool that can measure voltage, current, and resistance. Here’s how you can use it to perform a battery load test:
- Safety first! Always wear safety glasses and gloves when working with batteries. We’re dealing with electricity here, folks, and it’s not to be trifled with.
- Prepare the battery. Make sure the battery is fully charged. A low charge can skew the results of your test.
- Set the multimeter. Turn your multimeter to the DC voltage setting. If your multimeter has multiple voltage settings, choose the one that is closest to, but higher than, the voltage of your battery.
- Connect the multimeter. Connect the red probe to the positive terminal of the battery and the black probe to the negative terminal.
- Read the voltage. The multimeter will display the voltage of the battery. A healthy 12V battery, for example, should show a reading of about 12.6V.
- Apply a load. Turn on a load, such as the headlights or the heater, for about 15 seconds.
- Read the voltage under load. While the load is on, read the voltage on the multimeter. A healthy 12V battery should not drop below 9.6V under load.
Remember, this is a basic test and may not reveal all potential issues with your battery. For a more comprehensive test, you might want to consider using a battery load tester.
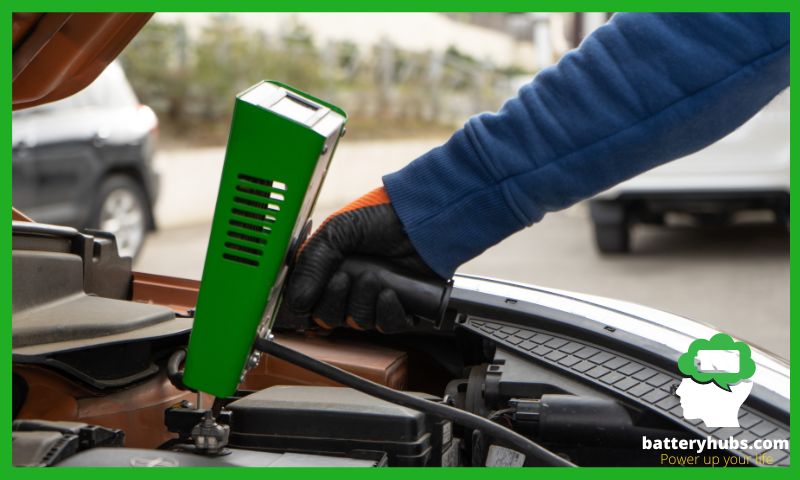
Step-by-step guide on how to perform a load test with a battery load tester
A battery load tester is a device specifically designed to test the condition of a battery. Here’s how to use it:
- Safety first! Again, always wear safety glasses and gloves. Safety is no accident!
- Prepare the battery. As with the multimeter test, ensure the battery is fully charged.
- Connect the load tester. Connect the positive lead of the tester to the positive terminal of the battery, and the negative lead to the negative terminal.
- Apply a load. Press the load switch on the tester. This will apply a load equivalent to the cranking load of a starter motor.
- Read the voltage. While the load is applied, read the voltage on the tester. A healthy 12V battery should not drop below 9.6V under load.
- Release the load. After 15 seconds, release the load switch. The voltage should recover to near its no-load state.
- Check the results. If the voltage drops below the acceptable range during the test, or if it does not recover after the load is released, the battery may be faulty.
Understanding the Results of a Battery Load Test
Alright, folks, we’ve done the hard work of performing the load test, now comes the fun part – interpreting the results! I know, I know, it sounds like a chore, but trust me, it’s not as complicated as it sounds.
When you perform a battery load test, you’re essentially checking how well your battery can hold up under pressure, or ‘load’. Think of it like a stress test for your battery. The results of this test can tell you a lot about the health of your battery and whether it’s time for a new one.
So, what do these results mean? Well, if your battery maintains a voltage above 9.6 volts during the load test, it’s in good shape. It means your battery can handle the load and is functioning well. But if the voltage drops below 9.6 volts, that’s a sign your battery might be on its last legs. It’s struggling to keep up with the load and might not be able to start your car when you need it to.
The Significance of the 9.6 Volts and 12.4 Volts Benchmarks
Now, you might be wondering, why 9.6 volts? What’s so special about this number? Well, 9.6 volts is considered the ‘pass’ mark for a 12-volt battery under load. If your battery can’t maintain this voltage under load, it’s not able to deliver the power your car needs to start and run properly.
On the other hand, 12.4 volts is the benchmark for a fully charged 12-volt battery at rest. If your battery’s resting voltage is below this, it’s not fully charged. And if it’s significantly below this, it might be a sign your battery is failing.
Remember, these are just benchmarks. Every car and battery is different, and other factors like temperature can also affect battery performance. But these numbers give you a good starting point for understanding the health of your battery.
Now, let’s take a look at some expert advice and real-world examples to help illustrate these points.
“A healthy 12-volt battery should maintain a range from 9.6 to 10.5 volts under the load for a good 30 seconds straight. If the battery begins to hold and then steadily drops in voltage, there is a problem. If the voltage instantly drops to 0 volts, that is also a problem. We call this the open cell.”
“The battery should maintain a baseline voltage of 9.6 volts for 15 seconds during the load test. If the voltage drops below 9.6 volts, the battery is “bad” and needs replacement. A voltage drop greater than .5 volts on starting the engine also indicates a problem.”
“If your battery is fully charged, it will measure at 12.4 volts or higher. If the battery is low, the voltage drop would be 11.8 volts or lower.”
What to Do If Your Battery Fails the Load Test?
Well, folks, it’s the moment of truth. You’ve performed the battery load test and… your battery failed. Now what? Do you panic? Do you start shopping for a new car? Not so fast! Let’s talk about your options and some tips for battery maintenance to prevent future failures.
Options for a Battery That Fails the Load Test
First things first, don’t panic. A failed load test doesn’t necessarily mean you need a new battery. Here are your options:
- Recharge the Battery: Sometimes, a battery fails the load test simply because it’s not fully charged. Try recharging the battery and then perform the load test again.
- Check the Battery Connections: Dirty or loose battery connections can cause your battery to fail the load test. Check the connections, clean them if necessary, and ensure they’re tight.
- Have the Battery Tested Professionally: If you’re not sure about the results of your load test, it might be a good idea to have the battery tested by a professional. They have specialized equipment that can provide a more accurate assessment of your battery’s health.
- Replace the Battery: If all else fails, it might be time to replace the battery. If your battery is more than 3-5 years old and is showing signs of failure, a replacement might be the best option.
Tips for Battery Maintenance to Prevent Failure
Now, let’s talk about how to prevent battery failures in the future. Here are some tips for battery maintenance:
- Keep the Battery Clean: Dirt and corrosion can cause your battery to discharge slowly even when you’re not using it. Regularly clean the battery terminals to prevent this.
- Keep the Battery Charged: A battery that is often left discharged or at a low charge can fail prematurely. Try to keep your battery fully charged as much as possible.
- Avoid Short Trips: Short trips can prevent your car’s alternator from fully recharging the battery. If you make a lot of short trips, consider using a battery charger to maintain the battery charge.
- Get Regular Check-ups: Regular battery check-ups can help detect problems before they cause a failure. Consider having your battery tested professionally at least once a year.
Remember, folks, your car’s battery is like the heart of your vehicle. It needs regular care and maintenance to keep it healthy and functioning well. So, take these tips to heart, and your battery will thank you!
Conclusion
And there you have it, folks! We’ve journeyed through the ins and outs of load testing a car battery, from understanding the role of a battery in your car’s electrical system, preparing for a load test, performing the test, and interpreting the results. We’ve also discussed what to do if your battery fails the load test and how to maintain your battery to prevent future failures.
Remember, a well-maintained battery is key to keeping your car running smoothly and reliably. Regular load testing can help you catch potential issues before they become big problems. So, don’t wait for your car to give you trouble. Be proactive, perform regular load tests, and keep your battery in tip-top shape.
I hope this guide has been helpful and has demystified the process of load testing a car battery. Remember, I’m here to help you navigate these technical waters, and I’m just a conversation away. So, don’t hesitate to reach out if you have any questions.
Now that you’re well-versed in load testing a car battery, you might be wondering what other maintenance tasks you can perform to keep your car in peak condition. Well, you’re in luck! We have a wealth of resources available to help you with that.
For instance, if you’re interested in learning more about your car’s electrical system, you might want to check out our guide on how to test an alternator by disconnecting the battery. This is another crucial component of your car’s electrical system, and knowing how to test it can save you from unexpected breakdowns.
If you’re looking to expand your knowledge on battery maintenance, our guide on how to test a battery charger is a must-read. After all, a good charger is just as important as a good battery!
And for our BMW owners out there, we haven’t forgotten about you. We have a special guide on how to charge a BMW battery, tailored specifically for your needs.
Remember, knowledge is power, especially when it comes to maintaining your car. The more you know, the better equipped you’ll be to handle any issues that come your way. So, don’t stop learning, and keep exploring our resources for more helpful guides and tips. Happy reading, and safe driving!
FAQ
What does a battery load test show?
A battery load test measures the battery’s ability to hold voltage under load. It’s a more accurate assessment of a battery’s health than a simple voltage reading. The test puts the battery under the kind of strain it would experience in real-world use, such as starting a car or powering a device. If the battery’s voltage drops significantly during the test, it may be unable to hold a charge under normal use.
How often should you load test a car battery?
The frequency of load testing a car battery depends on its age and usage. However, it’s generally recommended to test it once a year. For batteries in harsh environments or frequent use, testing every six months could be beneficial. Regular testing can help detect potential issues early and maintain optimal performance.
Can a battery pass a load test and still be bad?
Yes, a battery can pass a load test and still be bad. The load test primarily checks the battery’s ability to hold voltage under load. However, other factors like internal resistance, capacity, and overall health of the cells aren’t measured in a load test. Therefore, a battery might pass a load test but fail in real-world usage due to other underlying issues.
What is the difference between a battery test and a load test?
A battery test generally refers to checking the battery’s voltage without any load, which can give an indication of its charge level. On the other hand, a load test measures the battery’s ability to maintain voltage under a simulated load, similar to what it would experience during normal operation. The load test is a more comprehensive assessment of the battery’s health.
How do you perform a load test on a 12-volt battery?
To perform a load test on a 12-volt battery, you’ll need a load tester. Here’s a simplified step-by-step guide:
- Ensure the battery is fully charged.
- Connect the load tester to the battery, positive to positive and negative to negative.
- Apply a load equal to half of the battery’s Cold Cranking Amps (CCA) rating.
- Hold the load for 15 seconds.
- Observe the voltage. If it stays above 9.6 volts, the battery is generally considered good.
Please note that this is a simplified guide, and actual procedures may vary based on the specific load tester and battery. Always follow the manufacturer’s instructions when testing a battery.