To test a battery charger, use a multimeter set to the DC voltage range. Connect the multimeter probes to the charger’s output terminals, then switch on the charger. The voltage reading on the multimeter should align with the charger’s specified output range in its user manual. This method ensures the charger is functioning correctly and safely.
I’m thrilled you’ve joined me today as we dive into the electrifying world of battery chargers. Now, I’ve spent a good chunk of my life tinkering with these handy devices, and let me tell you, there’s nothing quite like the satisfaction of knowing your charger is working just as it should. It’s like music to my ears when I see that perfect voltage reading on my trusty multimeter.
But I digress. Today, we’re going to unravel the mystery of how to test a battery charger. It’s a skill that’s saved me more times than I can count, and I’m excited to pass that knowledge on to you. So, grab your multimeter, put on your safety goggles, and let’s get started! Trust me, by the end of this, you’ll be testing battery chargers like a pro.
What You Need to Test a Battery Charger?
Testing a battery charger isn’t rocket science, but it does require some basic tools and a little bit of know-how. Here’s what you’ll need:
A. Multimeter
A multimeter is an essential tool for testing a battery charger. This handy device measures electrical properties like voltage, current, and resistance. It’s used to check the output voltage of your battery charger to ensure it’s working correctly. You can find a decent multimeter at your local hardware store or online for around $10-$20.
B. Battery Charger
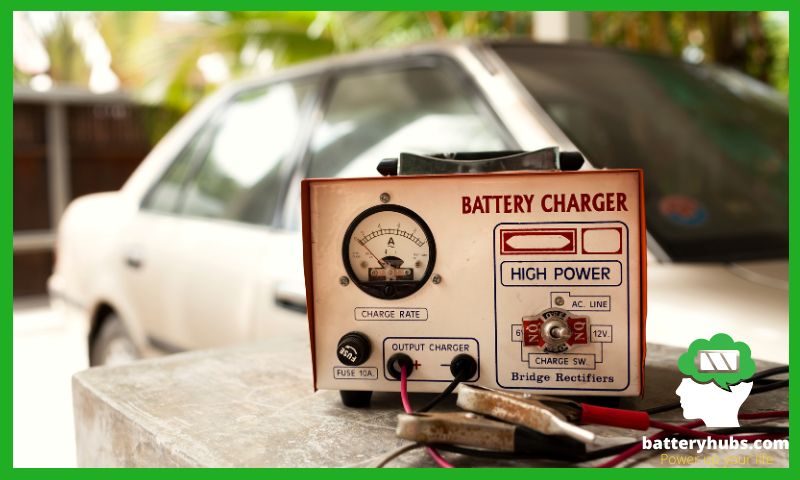
Well, of course, you’ll need the battery charger you want to test. This could be a small appliance charger or a larger one for a car or boat. The testing process is similar for most types of chargers.
C. Safety Equipment
Safety first, folks! Always wear protective gear when working with electrical devices. This includes safety glasses and insulated gloves. Remember, safety is no accident!
D. A Well-Ventilated Space
When testing a battery charger, it’s best to do it in a well-ventilated area. Batteries can sometimes emit harmful gases, especially if they’re damaged or overcharged.
E. A Little Bit of Time
Testing a battery charger isn’t a five-minute job. You’ll need to set aside some time to do it properly. But don’t worry, it’s not going to take all day. You should be able to get it done in under an hour.
So, now that we’ve got our tools and safety gear, let’s get to testing!
How to Test a Battery Charger: Step-by-Step Guide
Before we dive into the steps, let me remind you that safety should always be your priority. Always wear protective gear and follow the manufacturer’s instructions when handling battery chargers and multimeters.
Step 1: Safety Precautions
First things first, safety. Always ensure you’re in a well-ventilated area when working with batteries. Wear protective gear, such as gloves and safety glasses, to protect yourself from any potential battery acid splashes.
Step 2: Preparing the Battery Charger for Testing
To prepare your battery charger for testing, you’ll need to plug it into a wall outlet. Make sure there’s electricity running to it. If your battery charger has a separate On/Off switch, flip it to the “On” position.
Step 3: Using a Multimeter to Test the Battery Charger
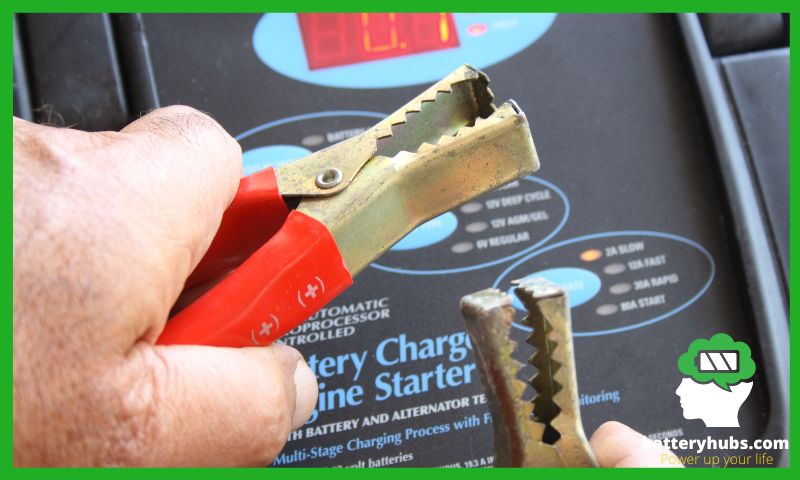
Now, it’s time to bring out your multimeter. Attach the test probes of your multimeter to their corresponding ports. Set the multimeter to “DC.” Touch the black test probe to the negative contact point on the charger.
Hold the red test probe against the charger’s positive contact point. The number displayed on the multimeter’s display screen indicates how many volts of DC power the charger is putting out.
Your battery charger needs to be supplying at least an equal voltage (preferably higher) to the batteries you’re charging in order to restore them to their full capacity in a timely fashion.
Step 4: Interpreting the Results
The final step is interpreting the results. If your battery charger tests well below the recommended output, it may be time to invest in a new one. If the reading is higher than the battery’s static voltage, it means that the charger is working properly and charging the battery correctly.
Remember, these steps are a general guide. Always refer to the manufacturer’s instructions for your specific battery charger and multimeter. And if you’re ever in doubt, don’t hesitate to consult with a professional. Safety first, always!
Now, let’s get to testing!
Common Issues with Battery Chargers and How to Fix Them
Battery chargers are generally reliable, but like any device, they can develop problems over time. Here are some common issues you might encounter and their solutions:
- Charger Won’t Turn On: This could be due to a problem with the power source or the charger itself. Check the outlet and the power cord for any issues. If the charger still won’t turn on, it might be a problem with the internal components, such as the circuit breaker or fuse.
- Charger Not Charging the Battery: If the charger is on but the battery isn’t charging, check the battery connections. Make sure the battery terminals are clean and the charger is properly connected. If the problem persists, the battery itself might be the issue.
- Overheating Charger: Chargers can overheat if they’re used for extended periods or in high-temperature environments. If your charger is overheating, turn it off and let it cool down. If it continues to overheat during normal use, it might be a sign of a more serious issue, like a faulty circuit breaker.
- Charger Making Noise: Some noise is normal, but loud or unusual noises could indicate a problem. It could be a sign of internal damage or a failing fan.
- Charger Shows Error Codes: Many modern chargers have built-in diagnostic tools that display error codes when there’s a problem. Refer to your charger’s manual to understand what these codes mean and how to fix the issue.
Remember, if you’re not comfortable troubleshooting or fixing these issues yourself, it’s best to consult a professional or contact the charger’s manufacturer for assistance. Safety should always be your top priority when dealing with electrical devices.
In the next section, we’ll discuss some tips and tricks to maintain your battery charger and prolong its lifespan. Stay tuned!
Tips for Maintaining Your Battery Charger
Here are some tips for maintaining your battery charger:
- Keep it Clean: Ensure that the charger is kept clean and free from dust and debris. This can prevent overheating and potential damage to the internal components.
- Store Properly: When not in use, store your charger in a cool, dry place. Extreme temperatures and humidity can damage the charger.
- Regular Inspection: Regularly inspect your charger for any signs of damage or wear. This includes checking the cables and connectors for any signs of fraying or damage.
- Follow Manufacturer’s Instructions: Always follow the manufacturer’s instructions for use and maintenance. This can help prevent damage and prolong the life of the charger.
- Avoid Overcharging: Avoid leaving the charger connected to the battery for extended periods of time. Overcharging can damage both the battery and the charger.
- Use the Right Charger: Always use the charger that is designed for your specific battery type. Using the wrong charger can lead to damage.
- Disconnect Properly: Always disconnect the charger from the power source before disconnecting it from the battery. This can prevent potential electrical shocks.
Remember, proper care and maintenance can significantly extend the life of your battery charger.
Conclusion
In conclusion, testing a battery charger is a straightforward process that anyone can do with the right tools and a little bit of knowledge. It’s an essential skill that can save you time, money, and potential frustration. Remember, safety should always be your priority when dealing with electrical equipment. Regular maintenance and care of your charger can also go a long way in ensuring its longevity. So, don’t wait for your charger to fail before you check its health. Regular testing can help you spot potential issues early and keep your charger in top shape.
Moreover, understanding how to test a battery charger is just one aspect of maintaining your electronic devices. There are other common issues you might encounter, such as a stripped side post battery or a sleeping lithium-ion battery. You might also need to know how to get a battery unstuck or how to fix a loose battery terminal. And let’s not forget about the importance of knowing how to test an alternator by disconnecting the battery.
By equipping yourself with this knowledge, you’ll be well-prepared to handle any battery-related issue that comes your way. Remember, the key to maintaining your electronic devices is regular inspection, proper care, and timely intervention.
FAQ
How do you know if your battery charger is working?
You can determine if your battery charger is working by observing the battery’s behavior when connected to the charger. If the battery is charging, the charger’s indicator light should be on, and the battery’s voltage should gradually increase. If the charger is not working, the battery’s voltage will not increase, and the charger’s indicator light may not turn on.
Can a battery charger go bad?
Yes, a battery charger can go bad over time due to various reasons such as internal component failure, faulty wiring, or damage from power surges. Regular inspection and maintenance can help prolong the lifespan of a battery charger.
How do you test a 12v battery charger with a multimeter?
To test a 12v battery charger with a multimeter, first, set the multimeter to measure DC voltage. Then, connect the multimeter’s probes to the charger’s output terminals. The multimeter should read around 12 volts if the charger is functioning correctly.
What should a battery charger read when charging?
When charging, a battery charger should read a voltage slightly higher than the battery’s rated voltage. For example, a 12V battery charger should read around 13.8 to 14.4 volts. This higher voltage is necessary to push current into the battery.
Can you fix a battery charger?
Yes, it’s possible to fix a battery charger depending on the issue. Common problems like blown fuses or damaged cables can be easily replaced. However, more complex issues may require professional repair or replacement of the charger. Always ensure safety when attempting to repair electrical devices.